How to lay bathroom floor tiles – for a professional finish
Discover how to lay bathroom floor tiles and create a stylish and easy-care finish


Get in the know about how to lay bathroom floor tiles and it’s a task you can complete yourself as part of a bathroom remodel.
Knowing how to tile a floor starts with the easy basics: laying whole tiles in a simple square or rectangular space. The tricky part comes when you have to tackle areas around sanitaryware and doorways. However, these are all skills even a DIYer can learn.
If you’re not experienced at the task, it’s best to achieve bathroom floor tile ideas using ceramic tile as it is easier to work with than porcelain and doesn’t come with the high price tag of natural stone.
Tile is an enduringly popular pick among bathroom flooring ideas, selected for its practicality as well as the enormous range of looks it can create using different materials, colors, formats, and designs.
Our guide has the steps to follow to lay bathroom floor tile along with advice from the experts on achieving a professional finish.
How to lay bathroom floor tiles
When laying a bathroom floor you will need a few specialist tools. For cutting the tiles you will need a metal ruler, tile scourer, tile nipper and fine sandpaper. For the grout you will need a grout float and grout finishing tool.
For the adhesive you will need a bucket, drill with a mixing paddle attachment and a tile adhesive spreader. To lay the tiles you will also need a pencil, tape measure 5mm floor tile spacer, long spirit level, a sponge and timber batten and fixings. Here's the full list.
You will need:
- Metal ruler
- Tile scourer
- Tile nipper
- Fine sandpaper
- Grout float
- Grout finishing tool
- A bucket
- Drill with mixing paddle attachment
- Tile adhesive spreader
- Pencil
- Tape measure
- 5mm floor tile spacer
- Long spirit level
- A sponge
- Timber batten and fixings
1. Prepare the floor
Before laying any tiles, it is important to prepare the floor. If you are tiling a level concrete floor you can start laying your tiles straight away. However, for most other floor types, you will need to build a subfloor. If you are laying shower floor tiles, it's vitally important to ensure the subfloor is sound and that special attention is paid to grouting and sealing to ensure water doesn't penetrate to the ceiling below.
2. Work out the starting point
Start by measuring the width of the room and marking the center point with a pencil. Take this marker as a starting point and lay tiles toward the side wall, inserting spacers between each tile as you go.
Once aligned mark the position of the last full tile on the floor in pencil. Measure the distance from this line to the center point you marked earlier. Take this distance and from further down the room, starting at the center line make another mark.
If you are working with a plywood subfloor, connect the point with a timber batten screwed to the floor. With a concrete floor you can simply connect them with a pencil line.
Repeat the above for the width of the room. You should be left with two fitting lines. Inside the corner where the lines or timber battens meet is where you start tiling.
3. Plan how you want to align tiles
You might already have an idea of how you want to lay out your floor tiles in your head. However, now is the time to test it before being committed to the design. Take the time to lay them out and decide if you are happy with the look. This is easiest to do with small bathroom flooring.
4. Lay whole tiles first
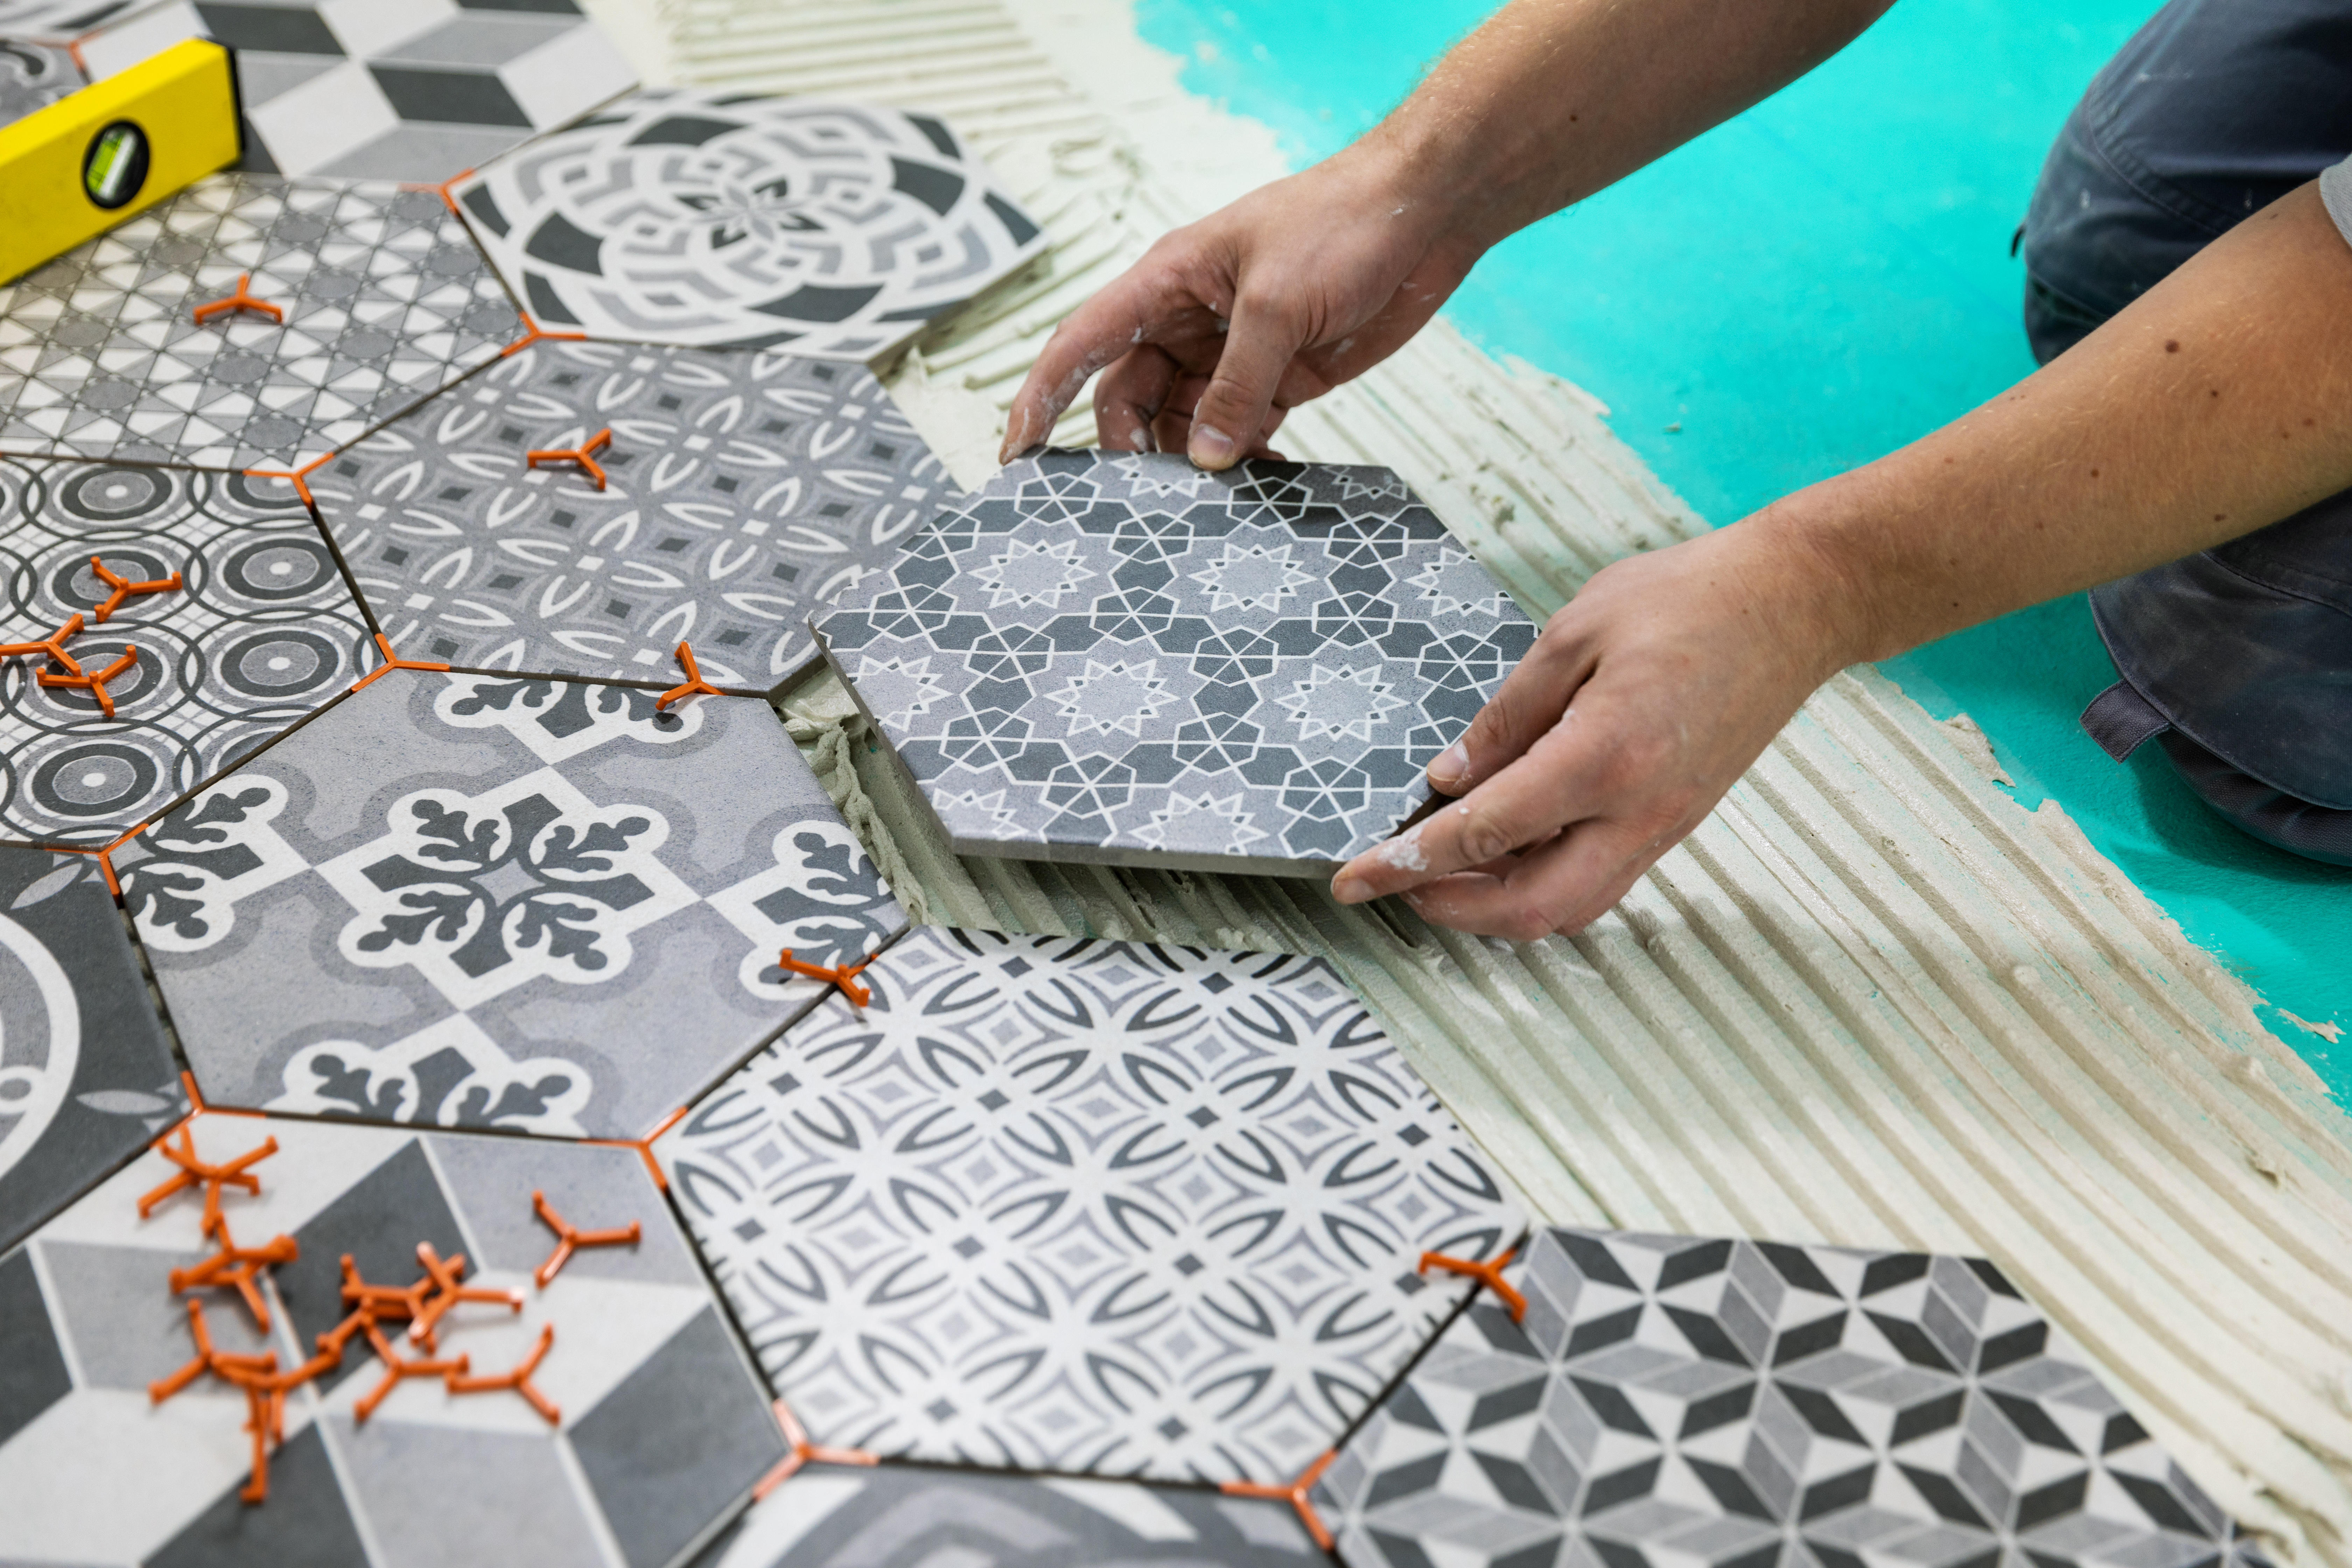
At your starting point, spread the prepared adhesive using a notched spreader to cover about 3ft square of the floor. Press the tile into position using a small twisting motion to secure. Position the second tile with space between. Insert a spacer in between the tiles to maintain the gap.
Check at regular intervals that the tiles are level using a spirit level. Wipe any excess adhesive off the tiles using a damp cloth, and scoop out any excess from the grout lines. Once the adhesive is completely dry, remove the timber battens if using.
5. Cut remaining tiles to size
Some tiles will need to be cut to cover the remainder of the floor. Measure the space between each tile and the wall and account for a 5mm spacer. Walls aren’t always straight, so it is best to measure each gap rather than use one as a guide.
Draw a cutting line on the tile, and score it a couple of times using a metal ruler and tile scriber. Place a pencil under the line, and press down firmly on the tile to split it.
You will also need to follow this method when tiling around obstacles such as a toilet. For accuracy create a stencil in paper to use when creating the cutting tile. Use a tile scriber and tile nippers to cut away the unwanted bit of tile, and smooth the edge with fine sandpaper.
Lay the cut tiles in the same manner as the full tiles.
6. Grout the floor tiles
When the adhesive is completely dry mix up the grout and fill in the gaps between the tiles using a grout float. Work the grout float diagonally to fill the lines.
Using a slightly damp sponge wipe off any excess grout before it dries. When the grout begins to harden, go over it with a grout finishing tool for a smooth finish. After the grout has dried, wipe down the floor and spray with a grout protector.
To finish, fill the gap between the floor and wall with a silicone sealant, using masking tape to protect the tiles.
Where do you start when laying bathroom floor tiles?
The best place to start when tiling a bathroom floor is the center point.
Tiling a floor isn’t always as simple as starting at the corner and working out. You need to work out where to start as shown above in the step by step, so that you use as many full tiles as possible.
‘Your chosen layout, size of your area and tile shape will define where you should start tiling on a wall,’ explains Hannah Guilbert, Product Marketing Manager at Original Style. ‘We recommend consulting a professional tiler before carrying out any installations.’
What's the best material for bathroom floor tiles?
Non-slip bathroom flooring ideas are the best if you ware laying bathroom floor tiles.
‘When choosing floor tiles, make sure that they are non-slip but not too textured. You want to ensure they have enough grip, but if they are too textured limescale can easily build up,’ suggests Yousef Mansuri, Head of Design at C.P. Hart.
‘Whichever material you choose, particularly if it’s stone or wood, check that it is suitable for humid areas – water damage is more likely to occur with natural materials.’
Another thing to consider is if the tiles are compatible with underfloor heating. Ceramic and porcelain tiles are the perfect companions for an underfloor heating system because they transfer heat effectively.
What types of tile are easiest to install?
If this is your first venture into a DIY project, we would recommend using ceramic or porcelain tiles. They are the easiest to install because they can be cut using dry manual tile cutters, creating minimal mess. The majority of ceramic and porcelain tiles will also not require any sealant.
What sub floor is needed for tiles?
A sub floor is needed for tiles if you are not tiling onto a solid concrete floor and it will need to be stable and waterproof. This can be done easily by installing a cement-based tile backer board.
‘They are simply glued and screwed to the existing floorboards and provide a strong, stable base for tiling,’ explains Ben Youssefi, Director at Porcelain Superstore. ‘They are easy to cut and work using a score and snap method. And are dimensionally stable so will not swell or warp with any changes in temperature.’
Sign up to the Homes & Gardens newsletter
Design expertise in your inbox – from inspiring decorating ideas and beautiful celebrity homes to practical gardening advice and shopping round-ups.

Rebecca has been working as a homes and interiors journalist for over four years. She first discovered her love of interiors while interning at Harper's Bazaar and Town & Country during my Masters in Magazine Journalism at City, University of London. After graduating she started out as a feature writer for Women's Weekly magazines, before shifting over to online journalism and joining the Ideal Home digital team covering news and features. She is passionate about shopping for well-crafted home decor and sourcing second-hand antique furniture where possible.
-
 5 things people with clean upholstery always do – simple, quick and oh-so-effective
Ensure your furnishing looks clean year-round with these expert tips
By Seraphina Di Mizzurati Published
-
 7 native perennials to plant in April – for glorious flowering displays to attract bees, butterflies, and hummingbirds
Discover some of the best perennials to plant in April to make your garden a hotspot for wildlife
By Drew Swainston Published