How to reupholster a chair in 5 foolproof steps
Whether you're a dab-hand at DIY or a beginner, our expert guide has got you (and your chairs) covered
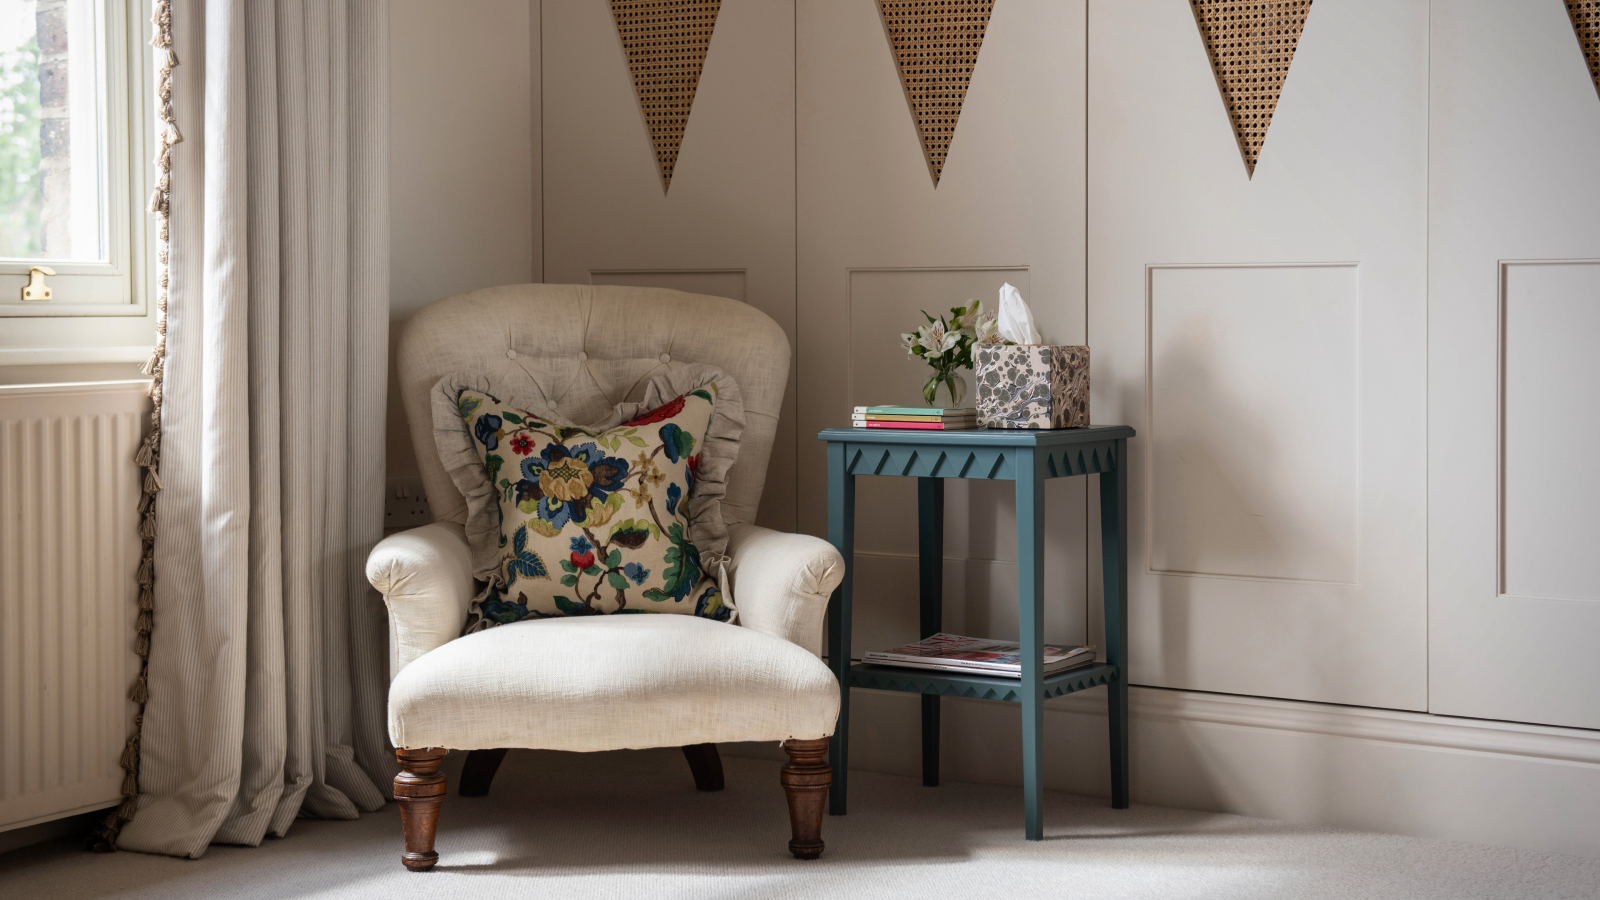

If you're looking to revamp or refresh your home, one of the easiest and affordable options you can try is reupholstering your furniture to switch up the décor and breathe new life into your space.
You might find, also, that your sofas or accent chairs look sad, worn and weathered and in need of some TLC beyond what cleaning can achieve. In either case, knowing where to start when it comes to reupholstering can be bewildering.
So, I spoke to DIY experts and interior designers for their top tips on starting a reupholstering DIY project, and to find out how to do it like the pros do.
Why you might reupholster a chair

'Reupholstering a chair is not only a great way to update the look of a room, but it’s also a sustainable approach to keeping quality furniture pieces for longer,' says Vincent Larson, lead interior designer for CopperSmith, a custom designer of sustainable products. 'Many people choose to reupholster because they have a sentimental attachment to the chair, or it’s just too well-built to throw out.'
This might be the case if you opt to source sustainable furniture by thrifting, as you can find a good quality piece that you love, and refresh and customize it with upholstery ideas to fit your home.
'For example, an antique or heirloom chair often has a solid frame but might need new fabric or foam,' adds Larson. 'Reupholstering can bring it back to life while maintaining its original charm. Plus, reupholstering allows you to completely customize the look – choosing the fabric, color, and design to fit perfectly with your current decor.'
How long will reupholstering a chair take?

How long a reupholstering project will take depends largely on two factors – how advanced you are at DIY, and what kind of chair you are reupholstering.
'The time it takes to reupholster a chair will vary depending on the complexity of the design and your level of experience,' says Logan Taylor, interior designer and cleaning expert at the Dazzle Cleaning Company. 'But, on average, it can take anywhere from 2-6 hours to complete this DIY project.'
If you're more adept at DIY, ' you can easily complete this project within an afternoon with some practice and patience,' says Jonathan Faccone, interior designer and founder of Halo Homebuyers.
To be on the safe side, it's best to set aside time over a weekend so your DIY project doesn't become overwhelming. It will also mean you can dip in and out of it. As a DIY project that will elevate your home, it's worth taking your time, particularly if you struggle to finish your projects.
What you will need to reupholster a chair

Once you've identified a chair you would like to reupholster, here's what you will need, according to experts:
- Fabric: Two to four yards, depending on your chair. Jennifer Krosche-Moreno, editor in chief of Boho Blue Magazine, and DIY expert @BluStoneCoastalCottage, says, 'I go to Joann's as they have a nice selection. Some Walmart stores also have a fabric section and they have some nice choices.'
- Batting/ foam: Such as the Upholstery Batting available at Amazon, recommended by Krosche-Moreno. If you need to replace the foam cushioning, it's available at Amazon.
- Staple gun and staples: Such as the Arrow JT21CM Light Duty Staple Gun Kit available at Amazon.
- Fabric scissors/rotary cutter: I recommend the Fiskars Original Orange-Handled Scissors available at Amazon.
- Measuring tape: Available at Walmart.
- Screwdriver: 'To remove the cushion from the chair,' says Krosche-Moreno. 'Check your screws to see what type.'
- Upholstery tacks/nail heads (optional): 'For those finishing touches that give your chair a decorative edge, tacks or nail heads can be added around the edges,' says Larson.
How to reupholster a chair in 5 simple steps

Once you're ready to reupholster, here's our expert-approved step-by-step guide:
Step 1: Remove the cushion from the chair with a screwdriver
'First you will want to remove the cushion from the chair with a screwdriver,' says Krosche-Moreno. 'There will be four screws on the underside of the cushion that hold the cushion on. Once you remove the screws put them in a safe place.'
You can use a cup, bowl, or Ziploc bag, available at Walmart.
Step 2: Remove the old fabric
'Next, remove the current upholstery, especially if it is heavy material or the cushioning needs to be replaced,' says Krosche-Moreno. 'If the chair has a thinner material and good cushioning you can upholster over the current fabric.'
Larson warns that this step requires patience, as it can be quite fiddly. 'Carefully remove the old fabric by prying out the staples with pliers or a staple remover,' he says. 'It’s a good idea to keep the fabric in one piece so you can use it as a template for cutting the new fabric.'
Step 3: Refresh or replace the cushioning
As one of the main reasons you might be reupholstering a chair is that it's uncomfortable, replacing the cushioning is often necessary. Upholstered and reupholstered chairs add a gorgeous touch to any bedroom corner or cozy living room, but you want them to be functional too.
'If you want to add more cushion or replace the cushion you will need to cut the foam to the size of the cushion leaving an inch or two extra on each side, depending on how thick the seat is,' says Krosche-Moreno. 'You want to make sure your foam, batting and fabric can comfortably wrap around the chair with room to staple in place underneath,' and Larson recommends matching the shape to the seat of the chair.
Once you have cut your foam and batting to size, turn your cushion over and lay it on top of the layered foam and batting, in the center. With batting first, foam on top, and the cushion on top of that.
'Lay batting over the foam, making sure it covers the edges for a smooth look,' says Larson. 'This helps keep the fabric from bunching or looking uneven.' Wrap the batting around both the cushion and the foam and make sure you can comfortably attach it on each side, without having too much excess, which will look bulky.
'Do not cover the screw holes with the batting or fabric,' warns Krosche-Moreno. 'It will make it more difficult to reattach the cushion. Start with one side and place a staple in the center of the first side to hold it in place. Next you will want to staple the entire side up to the corner. Then go to the opposite side, pull tightly and staple in the middle, then the rest of the side. Then repeat on the other two sides.'
Make sure you pull each corner tightly, folding it in like wrapping a gift. Place one staple in the middle of the corner, and then use your scissors to snip off the excess material before adding additional staples to secure it in place, repeating on all corners.
If you are not adding new batting or foam to your chair, you can, of course skip this step, but replacing the fabric uses the exact same procedure.
Step 4: Measure fabric and staple in place
Make sure to measure your fabric first, using the old fabric as a guide, and leave a little extra for folding underneath the cushion. Learn how to read a tape measure for project success.
'Depending on the thickness of the batting, you may need to leave a little more room on all sides to wrap the fabric around comfortably,' advises Krosche-Moreno.
Then, starting in the middle of one side, pull the fabric taut and staple it to the underside of the cushion.
'Then do the opposite side, making sure to keep the fabric smooth,' says Larson. 'Repeat for the remaining sides. For the corners, I think it’s best to fold them neatly, like wrapping a present, and staple them down securely.' Trim any excess, and double-check that none of the fabric is covering your screw holes. If it is, use your scissors to create new holes.
Step 5: Reattach the newly reupholstered cushion to your chair
Flip the cushion upside down, with the underside facing up, and flip your chair on top of it, to line up with the holes in the cushion.
'Reattach tightly with screws,' says Krosche-Moreno, which are essential DIY tools ever home improver should have in their toolbox. 'For more complex upholster pieces, the procedure is pretty much the same.'
And, if you want to add a decorative touch, 'hammer in upholstery tacks or nail heads around the edge,' says Larson. Shop upholstery tacks by style on Amazon.
And voilà! You have a gorgeous new, totally unique chair. It's a brilliant home makeover idea to transform your space.
FAQs
When should old fabric definitely be removed?
While you can reupholster over old fabric, always remove it if it smells, is stained, soiled or moldy. Look out for indicators similar to the early signs of mold on your mattress, including visible marks and damp smelling stains. It's best to also remove any bulky fabric that will affect the look of any layered over the top.
Is it cheaper to reupholster or buy new?
While we always recommend ways to be sustainable at home, sometimes it does just make more sense to buy new
Consider what you are planning to reupholster and ask yourself: is it in good condition? Will it last? Do I like it? Is it worth reupholstering?
If any of the answers are a no, buy new, but shop sustainably.
'The key to upholstery is to make sure you are pulling the fabric tightly and folding in the corners so you don't have an bunching of the fabric,' says Krosche-Moreno. 'You want to be as tight as possible.'
If you're feeling inspired, try these DIY old money upgrades to give your bedroom a luxe look.
Sign up to the Homes & Gardens newsletter
Design expertise in your inbox – from inspiring decorating ideas and beautiful celebrity homes to practical gardening advice and shopping round-ups.

Ottilie joined Homes & Gardens last year, after finishing a Master's in Magazine Journalism at City, University of London. With previous contributions in Livingetc and Motorsport Magazine, she produces content for the Solved section on the website, focusing on clever tips and tricks to keep your home beautiful, organized and clean. She also has a Master's degree in English Literature and History of Art from the University of Edinburgh, where she developed a love for inspiring interiors and architecture.
-
 Gwyneth Paltrow uses LED lights to bring a gallery-like feeling to her kitchen cabinets – you can achieve the same, unique look for $24
Gwyneth's glass-front cabinets become more chic and accessible with their hidden lights, which create a subtle glow in the space
By Hannah Ziegler
-
 The instinct-based Toddler Decluttering Method will reduce clutter by half in seconds – and it's not for children
It's a simple but effective method to cull clutter quickly in your home
By Ciéra Cree
-
 7 expert-approved painting hacks to minimize clean up – to make an already exhausting task easier
Avoid a backbreaking clean-up after your next painting project with advice from the professionals
By Chiana Dickson
-
 5 beautiful and impactful home improvement projects you can DIY this weekend for under $200 – you don't have to spend big to make a statement
From painting your fireplace to redecorating your door, little changes can transform and refresh your space
By Ottilie Blackhall
-
 6 ways to prevent mold and damp in bedrooms – expert solutions to maintain a safe sleep environment
Don't sleep on these six tips, experts urge
By Seraphina Di Mizzurati
-
 How to paint over stained wood – 6 simple steps expert painters swear by for even, lasting finishes
Skipping even one step will result in chipping paint, experts warn
By Natasha Brinsmead
-
 Can you put wallpaper on textured walls? Experts reveal it is indeed possible with this vital step
Prep, prep and prep some more for wallpapering success
By Sophie Warren-Smith
-
 8 helpful ways to re-purpose old pillows – from making handy garden kneelers and draft excluders, to cozy pet beds
Sustainability experts say these bulky items don't have to go to waste
By Sophie Warren-Smith
-
 7 practical things you can do with leftover paint around your home including protecting outdoor furniture, tinting cement and creating touch-up kits
Pro tips to make the most of those extra supplies
By Andy van Terheyden
-
 Construction pros reveal the 6 mistakes to avoid when hanging drywall for perfect walls and ceilings
They see these all the time
By Natasha Brinsmead