Experts explain how to install a basement extractor fan to remove damp and musty smells for good
Learn how to install a basement extractor fan for a fresher, healthier space


Basements can be notorious for poor airflow, often leading to dampness and an unmistakable musty smell. So if you’ve started noticing condensation on your basement windows, stubborn humidity, or even patches of mold, it’s time to think about installing a basement extractor fan.
Luckily, top HVAC experts have provided a step-by-step guide to the installation process, as well as advice on the right tools for the job, and all the tips you need to keep fresh air circulating freely throughout your space.
But before you dive into this DIY project, it’s essential to know where to place the fan and what features to look for in a unit to ensure moisture is effectively removed and keep your basement ideas dry and comfortable for year-round use.
How to install a basement extractor fan
Understanding how to ventilate a basement is essential knowledge if you want to prevent issues like mold and mildew from plaguing your home. Installing an extractor fan is one of the most effective ways to control humidity and improve air circulation. Here's how:
The Signs You Need a Basement Extractor Fan

Joshua Paz, Marketing Manager at Olive Air & Heating LLC begins, 'Basements need to have a lot of airflow because they tend to get damp and moldy, which can damage the structure and cause musty odors.' So if you’re wondering how to get rid of musty basement smells, installing an extractor fan might be the solution you need.
But bad odors aren't the only telltale sign that you might need to install a fan. Other common signs include persistent dampness, visible mold growth on walls or floors, and condensation on windows. 'If the air feels thick or humid, and you notice any mildew or water stains, these are clear indicators that your space needs proper ventilation to stay dry and healthy,' says Joshua. An extractor fan might be just what you need if you want to get rid of basement mold and breathe cleaner, fresher air.
The Best Placement for an Extractor Fan
If you want your basement extractor fan to perform properly, you first need to choose the right spot for it. Allen Chenault, owner and founder of AC’s Heating & Air LLC says, 'For the best results, install a large fan high on an exterior wall in the center of your basement'. This central position will ensure that air can circulate freely and reach all corners of the room.
Be sure to avoid placing the fan in tucked-away spots or behind bulky furniture, as this can obstruct airflow. Instead, opt for locations near windows or vents, allowing the fan to pull in fresh air while pushing out stale, humid air your basement no longer needs.
What tools do you need to install an extractor fan?

To install an extractor fan in your basement, you'll need to get your hands on a few essential tools and materials:
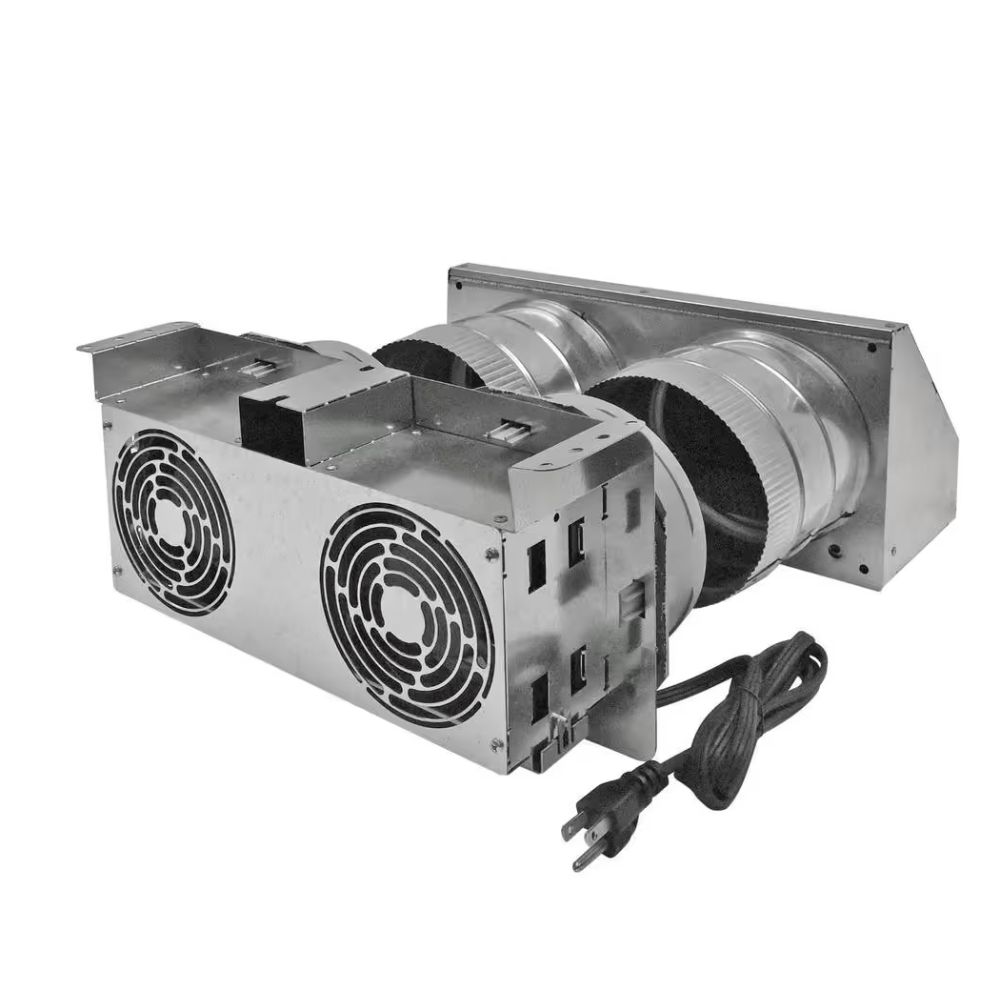
- An extractor fan: Colin Matei, president of Clean Air Heating & Cooling, recommends choosing a fan rated at least 1 CFM (cubic feet per minute) per square foot of your basement. This ensures the fan is powerful enough to ventilate the entire space.

This 2-speed reversible fan exchanges up to 180 CFM, controls humidity, reduces odors, and offers magnetic draft stops for efficiency.

This ventilator fan provides 240 CFM airflow, reducing basement humidity and odors with ease and has WiFi-enabled controls for remote monitoring and automation.

This fan provides 120 CFM airflow to reduce humidity and odors, featuring a 10-speed controller and a durable, liquid-resistant design for long-lasting performance.
- Mounting template: Most fans will come with a mounting template to help mark the correct size and placement for the fan. Be sure to use this template to ensure the hole is cut accurately. Otherwise, you will need an accurate measuring tape, a spirit level and a pencil to mark your wall.
- Hole saw or jigsaw: These tools are what you will use to cut the hole where the fan will be installed. A Bosch Top-Handle Jigsaw from Amazon is a fantastic option, as it’s powerful and precise, with adjustable speeds to ensure clean cuts through various materials.
- A high-quality drill: This tool is essential for making the necessary holes in your wall to secure your fan. For this, the DEWALT 20V MAX Cordless Drill/Driver from Amazon is a reliable and powerful choice. It offers variable speeds and comes with a variety of drill bits suitable for wood, drywall, or masonry.
- Wood screws and wall plugs: These will secure the fan to the wall.
- Sealant: You will need to apply weatherproof sealant around the edges of the fan to prevent air or moisture leakage. Gorilla Clear 100% Silicone Sealant from Amazon is an excellent choice, as it’s waterproof, mold-resistant, and can handle extreme temperatures.
- Insulation for ductwork (if applicable): If your extractor fan includes ductwork, it will also need insulating to prevent condensation from forming inside the ducts. Thermal insulation wrap specifically designed for HVAC systems can be purchased from Amazon.
The tools listed here are ideal for installations on wood or drywall surfaces. If your basement walls are made of concrete, brick, or other masonry, you may need specialized equipment such as a hammer drill and masonry bits, or you may want to call in a professional to ensure the job is done correctly.
You may also find it helpful to invest in a dehumidifier to extract excess moisture from the air before and just after installation. The GE Energy Star Portable Dehumidifier from Amazon was rated best dehumidifier overall by the Homes & Gardens team, as it can remove up to 22 pints of water per day from the air in your basement.
How to Install a Basement Extractor Fan

Once you have gathered your tools and selected the perfect spot on your wall, you can start the process of installing your extractor fan.
- Start by choosing the perfect spot for your fan. It’s best to place it high on an exterior wall, ideally near a window or vent. This way, the fan can pull in fresh air while expelling the stale, humid air your basement no longer needs.
- Next, mark and prepare the area. Using the mounting template provided by the manufacturer, carefully mark where you’ll cut the hole. Before cutting, check for any wiring or plumbing behind the wall to avoid complications. You can use this BOSCH GMS 120 Wall Scanner from Amazon to double check you aren't about to drill or cut through electrical wiring.
- Now it’s time to cut the opening. Using a hole saw or jigsaw, follow the template to create the hole. Be sure the size matches both the fan and any ductwork required. For drywall or wood, this step should be relatively easy – just take your time and proceed carefully. As mentioned above, if your wall is made from concrete or brick, you may require professional tools or help for this part.
- Once the hole is ready, fit the fan snugly into place and secure it with screws and wall plugs. For ducted fans, ensure the ductwork is properly connected, sealed, and insulated to prevent air leaks and maximize the fan's efficiency.
- After installation, apply a weatherproof sealant around the edges of the fan to stop any moisture or air from leaking through. This step is crucial for waterproofing your basement, keeping your space dry, and ensuring the fan operates effectively.
- Next, connect the fan to power. For simple plug-in models, simply connect the fan to the nearest outlet. However, if your fan requires hardwiring, make sure to turn off the power at the breaker before starting any electrical work. If you're not experienced with wiring, it's recommended to consult a professional electrician to ensure everything is safely installed.
- Once the fan is connected, turn it on and test the airflow. Make sure it’s operating quietly and efficiently, and check that there are no air leaks around the installation site.
- To keep your fan in top shape, regular maintenance is key. Check for dust buildup and any unusual noise over time.
FAQs
Allen Chenault, owner of AC’s Heating & Air LLC, warns, 'The biggest mistake DIYers make is using fans that are too small or placing them in corners where they won’t circulate air effectively.' To avoid this, ensure the fan has enough capacity to handle your basement’s size. He also advises positioning the fan in an open area to allow for proper airflow, steering clear of cramped or poorly ventilated spaces.
What are some common mistakes to avoid when installing an extractor fan?
How often should I replace an extractor fan?
'Fans typically need to be replaced every 3 to 5 years,' explains Colin Matei, president of Clean Air Heating & Cooling. Common signs that your fan may need replacing include increased noise, decreased airflow, rust, or visible physical damage. Regular maintenance will help you catch these issues before they become major problems.
An extractor fan can significantly reduce moisture and improve indoor air quality, but it won’t fix underlying structural issues. If your basement is leaking, or if cracks in the foundation are allowing water in, adding an extractor fan won’t solve the root cause. You will need to resolve those issues first by fixing leaky basement walls or issues with your floors, then use a fan as part of a larger solution to manage humidity and mold.
Sign up to the Homes & Gardens newsletter
Design expertise in your inbox – from inspiring decorating ideas and beautiful celebrity homes to practical gardening advice and shopping round-ups.

Gabriella is a freelance contributor for Homes & Gardens. She is a DIY enthusiast and a lover of all things interior design, often found antiquing or browsing the aisles of her local hardware store. She has a particular passion for historic buildings and is in the process of renovating a Victorian coachhouse in the countryside.
For much of the past decade, Gabriella has worked as a freelance writer, crafting copy for national publications and renowned homeware brands. Most recently, she worked for Homebuilding & Renovating Magazine and is the former Head of Solved at Homes & Gardens, focusing on case studies for the magazine and website, as well as writing features about issues surrounding historic and listed building projects.
-
 Thoughtful modernism – how one Dallas home makes bold contemporary design feel warm, welcoming, and comfortable
With its mix of textural finishes and carefully curated furnishings, this modernist home is a refreshing retreat
By Karen Darlow Published
-
 'Wick away the ick' – 6 things people with clean laundry rooms always do to make this hardworking space shine
These tips on how to clean your laundry room will banish grime
By Seraphina Di Mizzurati Published
-
 6 things you should never throw in the trash – and what to do for safe disposal instead
From batteries to space heaters, experts reveal what not to throw
By Andy van Terheyden Published
-
 7 spring home maintenance mistakes to never make – overlooking these now can lead to pest problems and structural damage
Home improvement pros share common mistakes and what to do instead
By Eve Smallman Published
-
 10 common but little-known HOA fines to watch out for – and how to avoid them
From sprinklers to garage doors and external pipes, your HOA contract may leave you open to a fine
By Eve Smallman Published
-
 I’m a homes editor and these are the 4 vital storage items I’m 'adding to cart' this spring – and why you should too
I've learned a few hard lessons in recent weeks and these storage solutions will help
By Punteha van Terheyden Published
-
 7 things you should repair instead of replace in your home – and how to complete the job well yourself in a few simple steps
Easy steps for fixing common household items
By Eve Smallman Published
-
 Why does my carpet feel damp? Property experts reveal the 3 causes and how to fix them properly to avoid mold
Condensation doesn't just gather on your windows
By Dan Fauzi Published
-
 The 5 things you should never recycle at home – 'most people don’t realize' how damaging it can be, experts warn
One wrong move can make the whole batch redundant, experts warn
By Ciéra Cree Published
-
 6 things people with clean sunrooms always do – expert tips to make the most of your sunroom this spring
From dusting the tracks to rotating fabrics, these are the simple steps to a sparkling sunroom
By Andy van Terheyden Published