

The good news is that you can wallpaper over textured walls, the not-great-news is that you will have to endure some extra prep work beforehand to make the walls as wallpaper-ready as possible.
Our decorating experts say the best place to start is evaluating your walls to see how textured they are – is it barely-there texture or more ingrained? The basic rule of thumb is to wallpaper on walls that are as smooth as possible, and the design you've chosen needs to be taken into consideration too.
We've asked our professional experts for their advice on how to wallpaper correctly and what to look out for with textured walls.
How to wallpaper on textured walls
The most important thing with wallpapering a textured wall is to prep extremely well, and that starts with examining the wall first.
Catherine Jacob, head of design at Hovia explains, 'The type of texture your wall has plays a big role in determining how well wallpaper will adhere and how it will look once applied and there are 4 main types – leftover wallpaper, orange peel (light dimpled surface), popcorn (rough and jagged) and knockdown (textures featuring peaks and troughs).
'Light or medium textures, such as orange peel or knockdown finishes, may work with minimal preparation. Heavily textured or rough surfaces, like heavy stucco, will need more extensive preparation,' advises James Mellan-Matulewicz, creative director and interior designer at Bobbi Beck.
Once you've evaluated the texture level you can start to gather what you'll need for the first stage.
What you'll need
- 8 Pcs sanding block, washable and reusable, on Walmart – we like these as they have different options that start from 60 and go up to 220.
- Lightweight Compound, on Amazon – this make has great reviews and comes in a good sized pot.
- Drywall skimming blade, at Amazon – makes smoothing over the joint compound easier.
- A damp cloth, you can't go wrong with Mr. Siga microfiber cloths at Amazon
- White wallpaper primer, at Amazon – perfect for prepping the wall before wallpapering.
- Unpasted heavyweight lining wallpaper, at Amazon,.
- A good quality wallpaper paste like Rust-Oleum's insser 62008 sure grip adhesive for wallpaper, available at Walmart.
- Wallpapering tools, we like the Amazon Basic's wallpaper kit with soft grip brushes.
- A putty knife such as Walmart's hyper tough 3" flexible design
1. Start by prepping the wall

It's vital wallpaper onto a perfectly smooth wall, but it's even more important with a textured wall that you prep it thoroughly first.
'Clean the surface well before doing anything else,' says Catherine. 'Dust, dirt, and grease can affect how well your wallpaper sticks. Thoroughly clean your wall with a mild detergent then allow it to dry completely before proceeding.'
You don't need anything fancy for this stage, a bowl of warm soapy water (we like Dawn Platinum power wash dish soap from Amazon) will suffice with a microfiber cloth.
2. Use the joint compound

Old properties can have uneven walls so these steps will help with them too.
'Textures can show through your wallpaper, creating lumps and bumps that are visible through your chosen design which is why we always recommend smoothing your walls beforehand,' says Catherine.
Jodi Peterman, CEO and owner at Elizabeth Erin Designs agrees, 'The first thing you’ve got to do is smooth out the walls. That means skim coating them with joint compound.'
Once your wall is dry from the cleaning, you can apply the joint compound using a putty knife and smoothing it over with the skimming tool. Let it dry completely once applied and if it needs a second coat wait until the next day. To speed up drying you can use a fan on a low setting, we like the Lasko 20" classic box fan with weather-resistant motor from Walmart, it has 3 speeds and fantastic reviews.
3. Sand it over

Once the compound is bone dry and you're happy with the coverage. it's time to sand it over.
Catherine says, 'For moderately textured walls, lightly sanding the surface can reduce unevenness. This step is especially important for textures like orange peel.'
Use a fine grit sanding paper or block to gently smooth over any rough edges leftover from applying the compound. It will create a much better surface for the next stage. If you need to get to higher spots consider investing in a pole sander, the Homax drywall sander pole in yellow from Walmart is a great value option. Simply attach the head to standard pole like this steel extension model from Premier at Walmart.
4. Add a primer (and maybe lining paper)

Failing to use a primer can result in peeling and it can stop wallpaper adhering properly.
'Applying a primer designed for textured walls can improve adhesion and create a smoother base for your wallpaper. It also helps prevent the texture from showing through,' says Catherine.
If your walls are still not quite as smooth as you want even after this stage then you can also add a lining paper, this would be the case for a heavily textured wall for example. To make your life easier when applying it, invest in a really good knife for cutting to size, the WORKPRO retractable box cutter utility knife has 4.6/5 on Walmart and comes with 14 SK5 standard blades.
'Using a wallpaper lining paper will help smooth out irregularities like cracks, bumps & uneven textures whilst creating an even base for wallpaper,' suggests James.
5. Choose your design carefully

This step is really important as it's not as simple as putting up any design that you love. Although there are many wonderful wallpaper ideas to chose from, in the case of a textured wall you're choosing to cover, you will need to pick the incoming wallpaper wisely.
'If you’re putting up wallpaper, skip peel-and-stick entirely. It’s not forgiving at all on less-than-perfect surfaces. Go with pre-pasted or paste-the-wall wallpaper, but only after you’ve done the prep work,' says Jodi.
Vanessa Carter, creative director and art advocate at PaintVibe.com says, 'Thicker wallpapers can hide the texture of a wall better than thinner ones. You can also use patterns or darker colors.'
James agrees, 'Select a thicker wallpaper such as vinyl or textured wallpaper, as it can better conceal imperfections in the wall. Avoid thin, delicate papers, as they will highlight the texture underneath.'
Remember to invest in a good solid table for pasting your chosen design, it will make the whole experience easier, Amazon's vinyl top folding table from COSCO is good buy and has great reviews.
The wallpaper designs below would work well on a less-than-smooth wall.

Screen printed on high-quality non woven paper this floral design is ideal for a slightly textured wall. The dark background will distract from any little bumps. It's not peel and stick so you do need to add your own adhesive. It measures 20.5" W x 33" L and covers approximately 56 sq ft.

This stunning wallpaper is designed by York Wallcoverings, recognized as America's oldest and most prolific wallpaper manufacturers. It has a pre-pasted SureStrip that allows for paste-free application and easy removal. The design is ideal for a textured wall as it's busy without having a small ditsy design.

A good solid stripe will help to distract the eye from any little textures that might show through. Add to that vertical stripes are great at drawing the eye up so will give the illusion of height. This non-woven wallpaper is applied using the paste-the-wall method.
What to look out for when undertaking textured walls
As textured walls can throw up some issues, it pays to prepared and be aware of what they may be.
James explains, 'Wallpaper applied to heavily textured or dirty walls may not stick properly, leading to peeling or uneven results. So always ensure you follow the best preparation for the texture of your wall.'
What is worth doing is hanging a small wallpaper sample to the wall first to see how it sticks and looks on the texture. James also advises using a strong adhesive designed for challenging surfaces, so if your wall has been particularly tricky to smooth over it's worth investing in a product like Amazon's wallpaper adhesive 1.32 gallon tack wallpaper paste, it's known for its excellent adhesion.
Carr Lanphier, CEO of Improovy has a great tip regarding natural light in a space and how it can impact wallpapering a textured wall, 'I’ve seen people wallpaper over textured walls and end up unhappy with the result because rooms with tons of natural or direct light will show texture through the wallpaper a lot more! So, that’s something to keep in mind if you’re looking to paper over texture.'
Meet our experts

Catherine is the head of design for Hovia, a B-Corp certified interior design brand dedicated to sustainably designed interior products made to enrich environments.

James is the creative director and interior designer at design brand Bobbi Beck. He has over a decade of experience as a multidisciplinary designer, working across interiors, styling and art direction.

Jodi Peterman is the creative powerhouse behind Elizabeth Erin Designs, a premier full-service residential, commercial, and vacation rental interior design firm.

Vanessa Carter is the creative director and art advocate at PaintVibe.com, and specializes in bringing artistic inspiration, home interior ideas, and decoration tips to life through innovative projects and meaningful designs.

Carr is the CEO of Improovy and believes that as we evolve, the way we manage home renovation projects should too. At the forefront of a home improvement tech revolution, the Improovy team is excited about what the future may bring.
Without doubt, you can wallpaper on textured walls – although there are some places you should never wallpaper, textured or not – you just need to do your research first to discover what type of texture you are dealing with. This will then inform the next stages and the key is to prep, prep, prep!
-
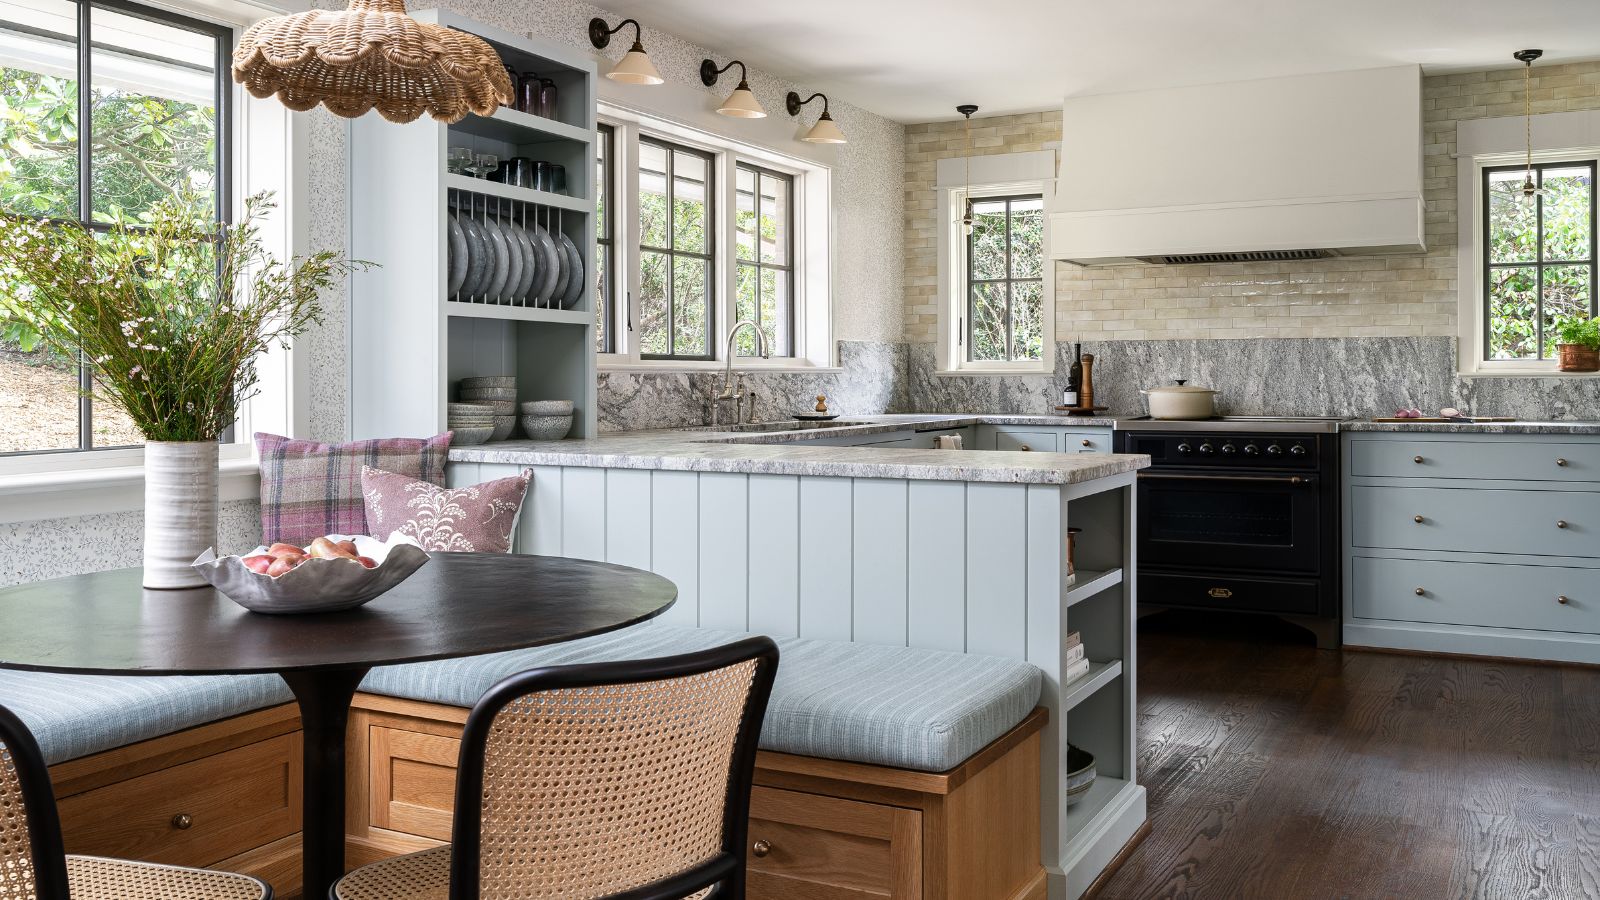 An unexpected layout has totally transformed this family kitchen – it's now filled with warmth, texture, and multifunctional zones
From chaotic to cohesive – this kitchen is a masterclass in choosing the right layout
-
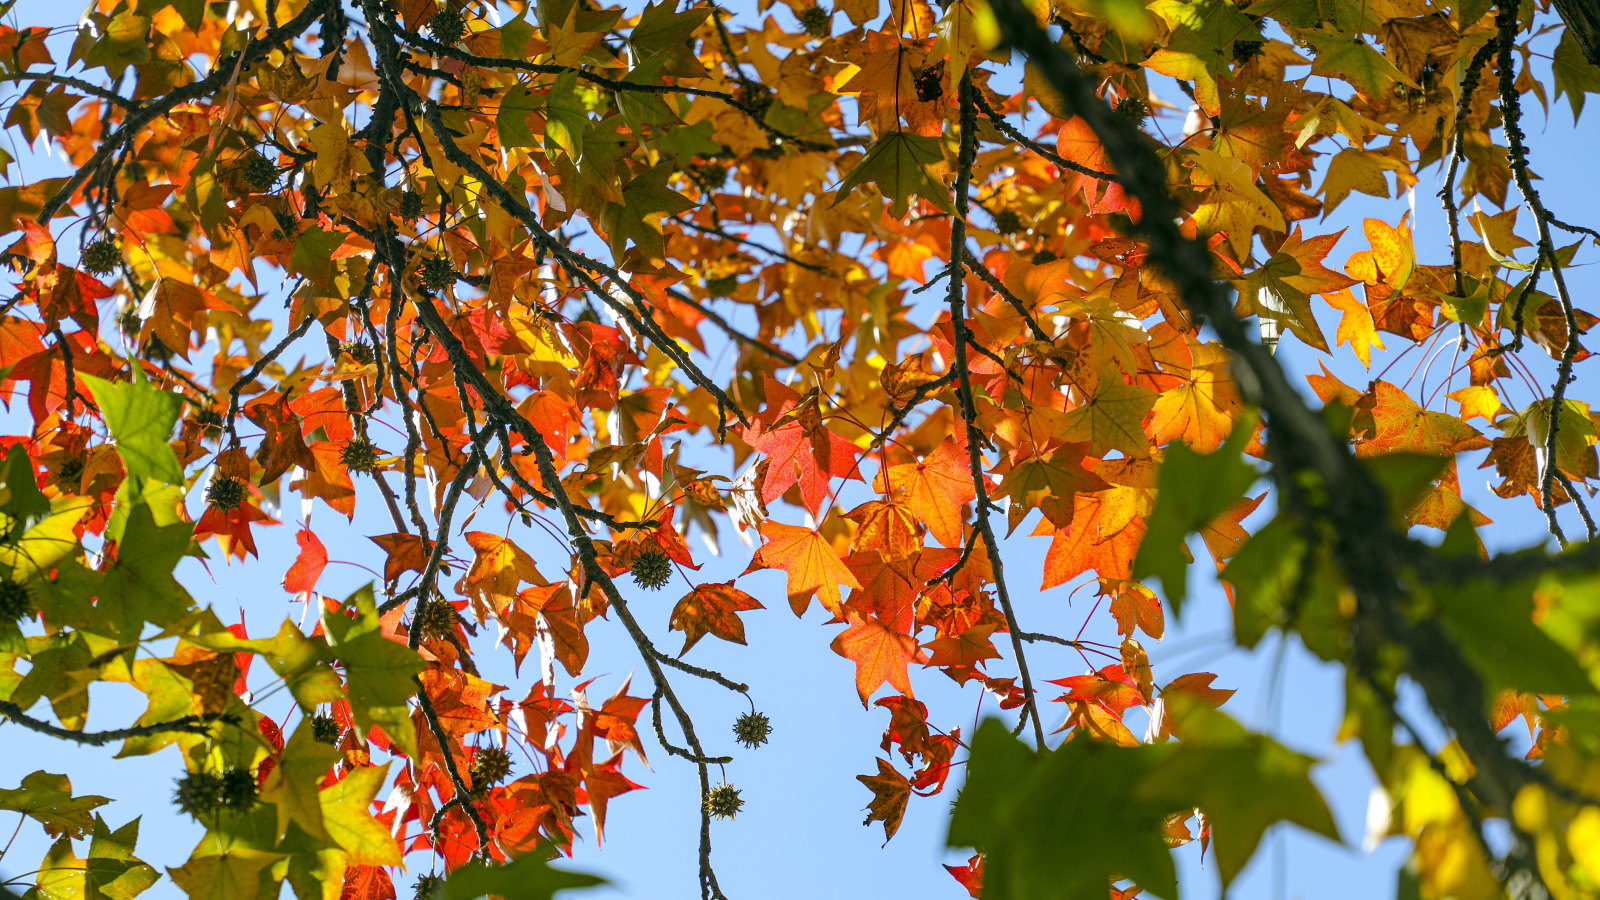 Early spring is the ideal time to prune sweetgums – arboriculture experts reveal pruning tips for safe and stunning trees
Starting to prune early in a tree’s life is highly recommended


-
 7 expert-approved painting hacks to minimize clean up – to make an already exhausting task easier
Avoid a backbreaking clean-up after your next painting project with advice from the professionals
-
 5 beautiful and impactful home improvement projects you can DIY this weekend for under $200 – you don't have to spend big to make a statement
From painting your fireplace to redecorating your door, little changes can transform and refresh your space
-
 How to paint over stained wood – 6 simple steps expert painters swear by for even, lasting finishes
Skipping even one step will result in chipping paint, experts warn
-
 8 helpful ways to re-purpose old pillows – from making handy garden kneelers and draft excluders, to cozy pet beds
Sustainability experts say these bulky items don't have to go to waste
-
 7 practical things you can do with leftover paint around your home including protecting outdoor furniture, tinting cement and creating touch-up kits
Pro tips to make the most of those extra supplies
-
 Construction pros reveal the 6 mistakes to avoid when hanging drywall for perfect walls and ceilings
They see these all the time
-
 Why is my wall paint bubbling? Decorators reveal why it happens and how you can fix it
Bubbles look unsightly and might indicate a more serious problem
-
 Christmas decorating stalled by missing tools and essentials? These 6 festive DIY job must-haves will get your delayed tasks back on track
Get your holiday decorating going again with our Christmas first-aid kit


