How to make gift wrap – 11 easy but elegant bespoke ideas
Make your gifts magical and memorable with these tips and ideas on how to make gift wrap
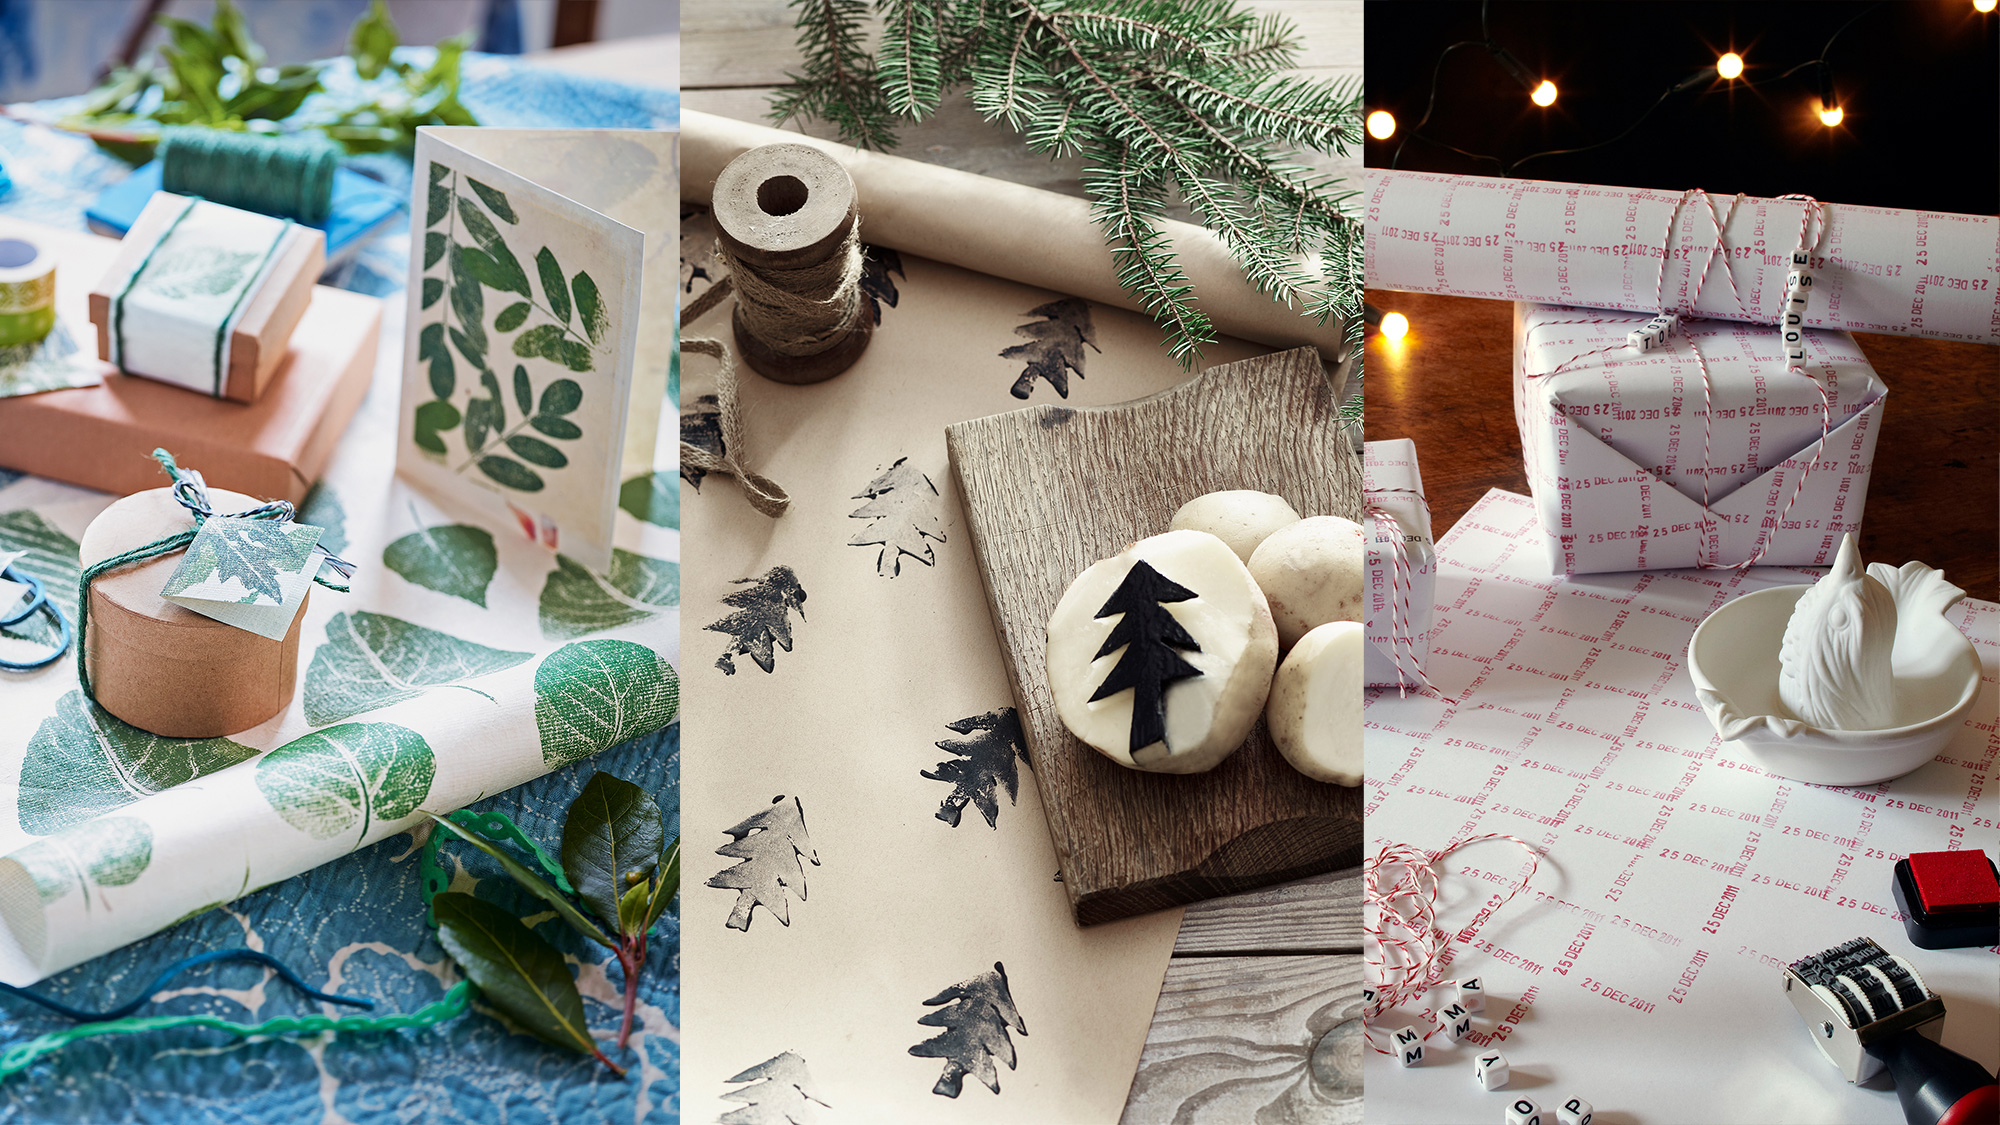

Learning how to make gift wrap is a fun way to make Christmas gifts extra special. When you've put lots of time and thought into finding the perfect present, wrapping it beautifully in a way that adds a personal touch is a lovely way finish it off.
'There is nothing more heartfelt than a piece of hand-printed wrap. It feels good (and saves money) to have made your own. After all, if you give someone a present wrapped in a piece of paper you’ve made, it’s already special before they’ve opened it! You can also make simple, hand-printed cards,' says block printer and fabric designer Molly Mahon.
Not only is making gift wrap fun and great to do with kids, but it can also be a lovely mindful activity to do in the busy run-up to Christmas.
Whether you want Christmas gift-wrapping ideas to tie in with your Christmas decor to bring wow factor to the foot of your tree, or you simply want to get stuck into some Christmas crafting, these DIY gift wrap makes are guaranteed to inspire.
How to make gift wrap
If you're wondering how to make gift wrap and how to wrap gifts, the great thing is that the options really are endless, it is a wonderful way to experiment with creative ideas and different techniques. Below we've gathered an array of our favorite ideas for DIY wrap and tips on how to decorate wrapping paper from festive designs to beautiful botanical creations for all seasons and occasions.
1. Potato print gift wrap
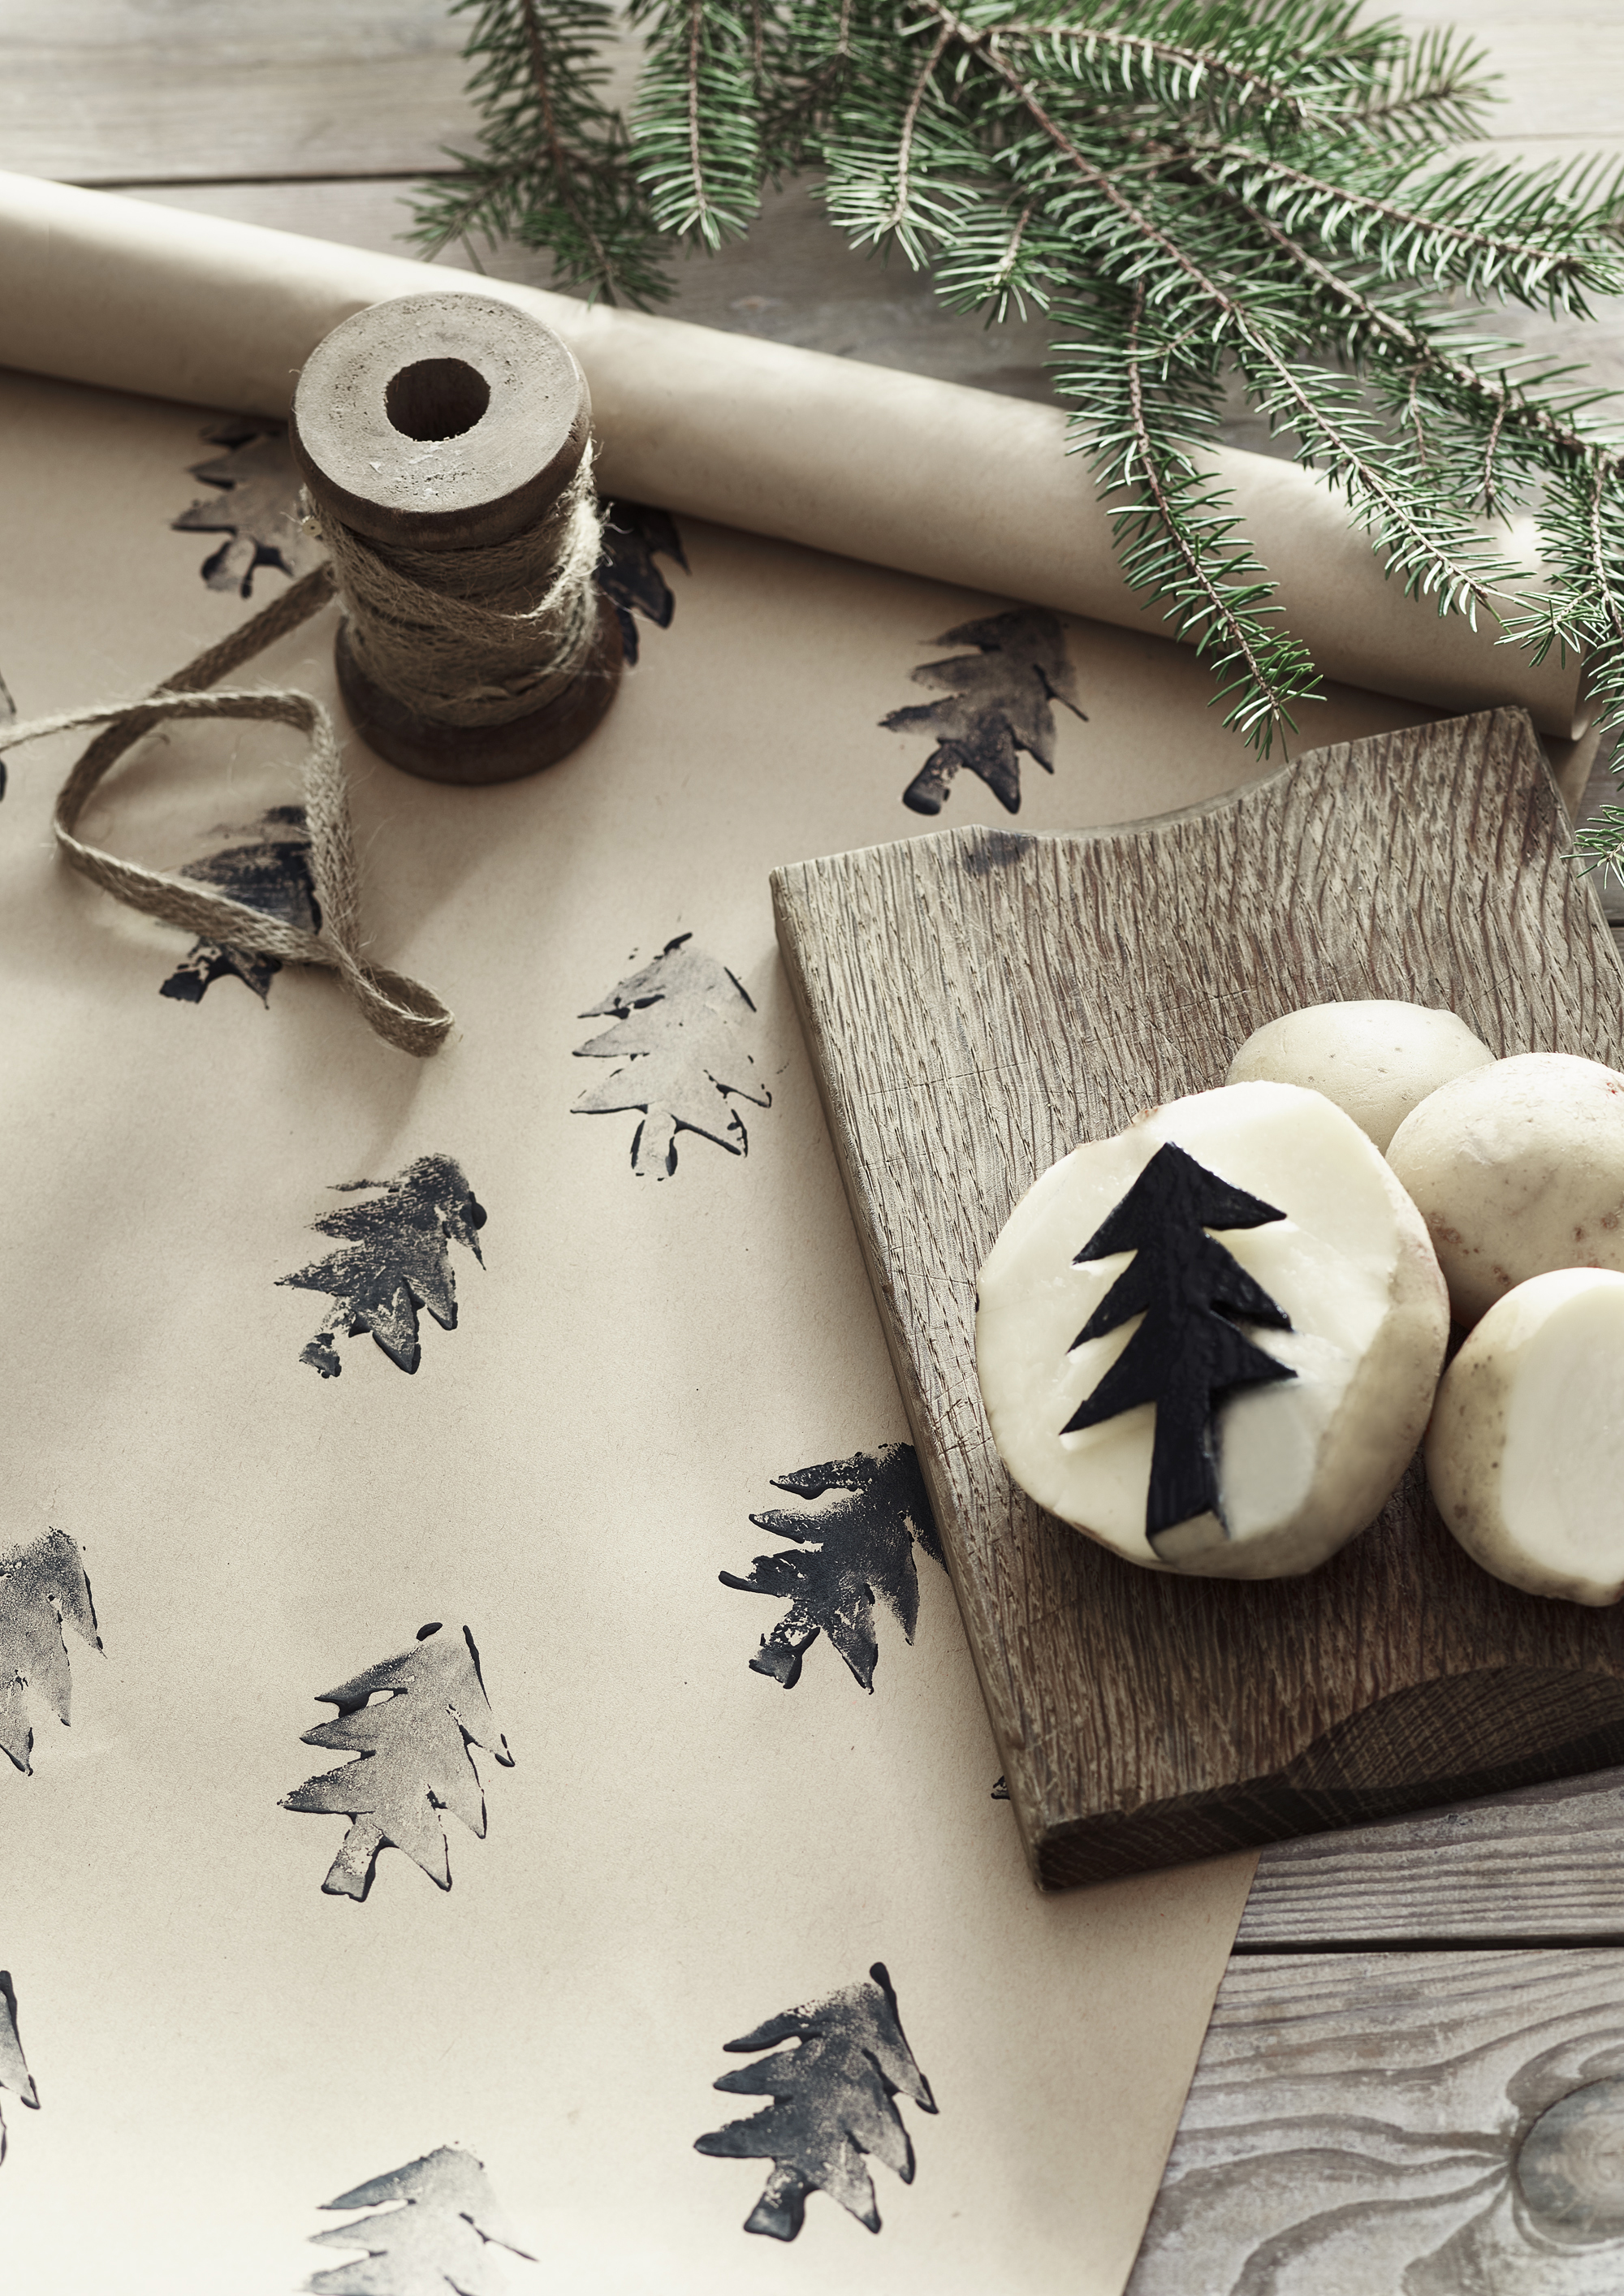
Potato printing is a simple and effective way to create gift wrap with a folksy feel, plus is a fun activity to do with kids.
You will need:
Plain brown craft paper or wallpaper lining paper
Potatoes – such as baking potatoes or King Edwards
Washable paint – used above is Chalk Paint from Annie Sloan.
Printing tray
Craft sponges
Method
1. First, select your potatoes. Choose potatoes that are large enough to create a good sized stamp but aren't too large that they are hard to handle.
2. Cut your potato in half and draw your design onto the flat side, for best results choose something with a simple silhouette such as a star or a Christmas tree. You could use a cookie cutter to gently mark out the design.
3. Carve your design using a sharp knife. This should be done by adults only and not children.
4. Blot the design using kitchen towel and if possible wait for around 30 minutes for the potato to dry out slightly – this will give a more effective print.
5. Lay down a length of your chosen paper on a covered table and weigh it down at each corner to keep it flat.
6. Pour some paint your chosen paint into a shallow printing tray
6. Use a sponge to dab a thin layer of paint onto the potato design and then press it firmly down on the paper to print. Repeat this process until the whole paper is covered.
2. Paint leaves to make paper
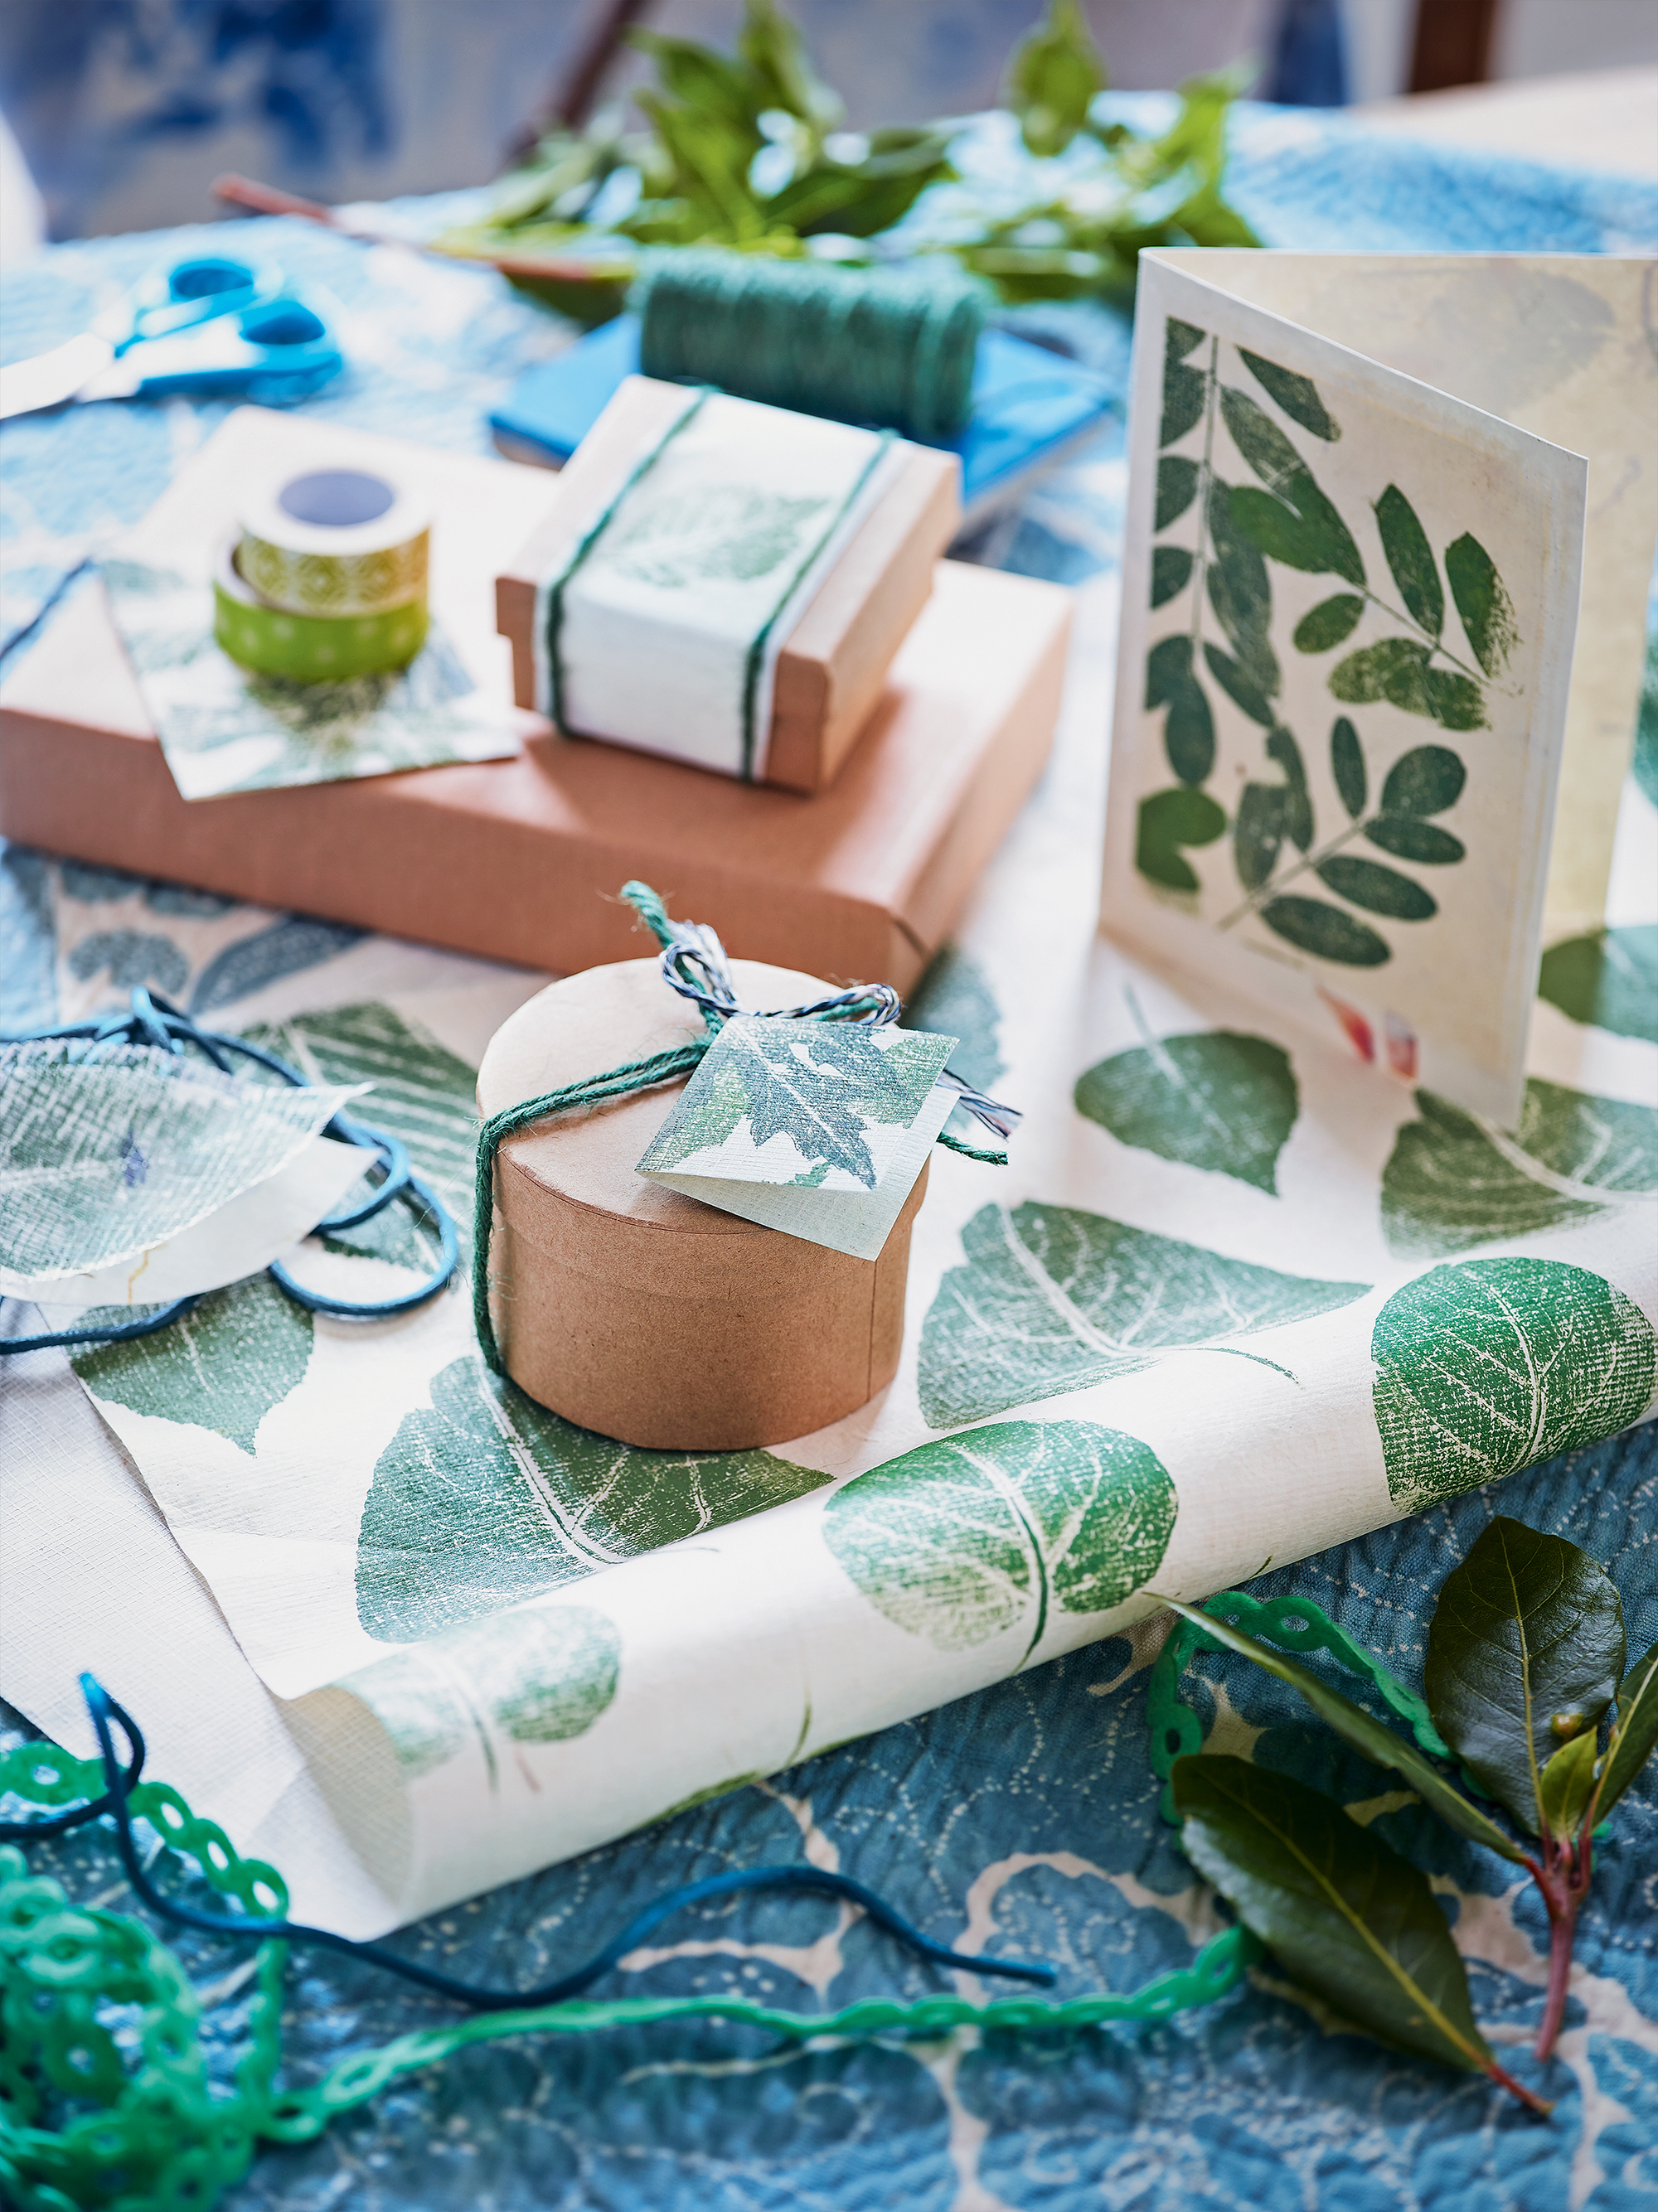
Print paper using leaves collected on a walk to create beautiful paper with botanical charm. The great thing about this technique is it will work for every occasion. The key to success, as with any printing method, is to not overload your leaf or stamp with paint, use just enough to ensure the detail of the veining and texture comes through in the print. Try practising beforehand on scrap paper to work out what coverage is best.
You will need:
Leaves with interesting shapes
Washable paint
Stencil brush
Wallpaper roller
Kitchen towel
Method:
1. Select your leaves - for best results choose flat leaves with sculptural shapes
2. Making sure your leaves are clean and dry (but not dried out and crispy!), lay a leaf face up on a scrap of paper. Working quickly, use a stencil brush to apply the paint, stippling from the center out to the edges.
3. Place the leaf face down on the lining wallpaper (or a folded card, or tag to make greeting cards or gift tags). Put a square of kitchen paper over the top and roll across the leaf using a wallpaper roller. Remove the kitchen paper and leaf then repeat the process to complete your design.
3. Stencil on fabric bags
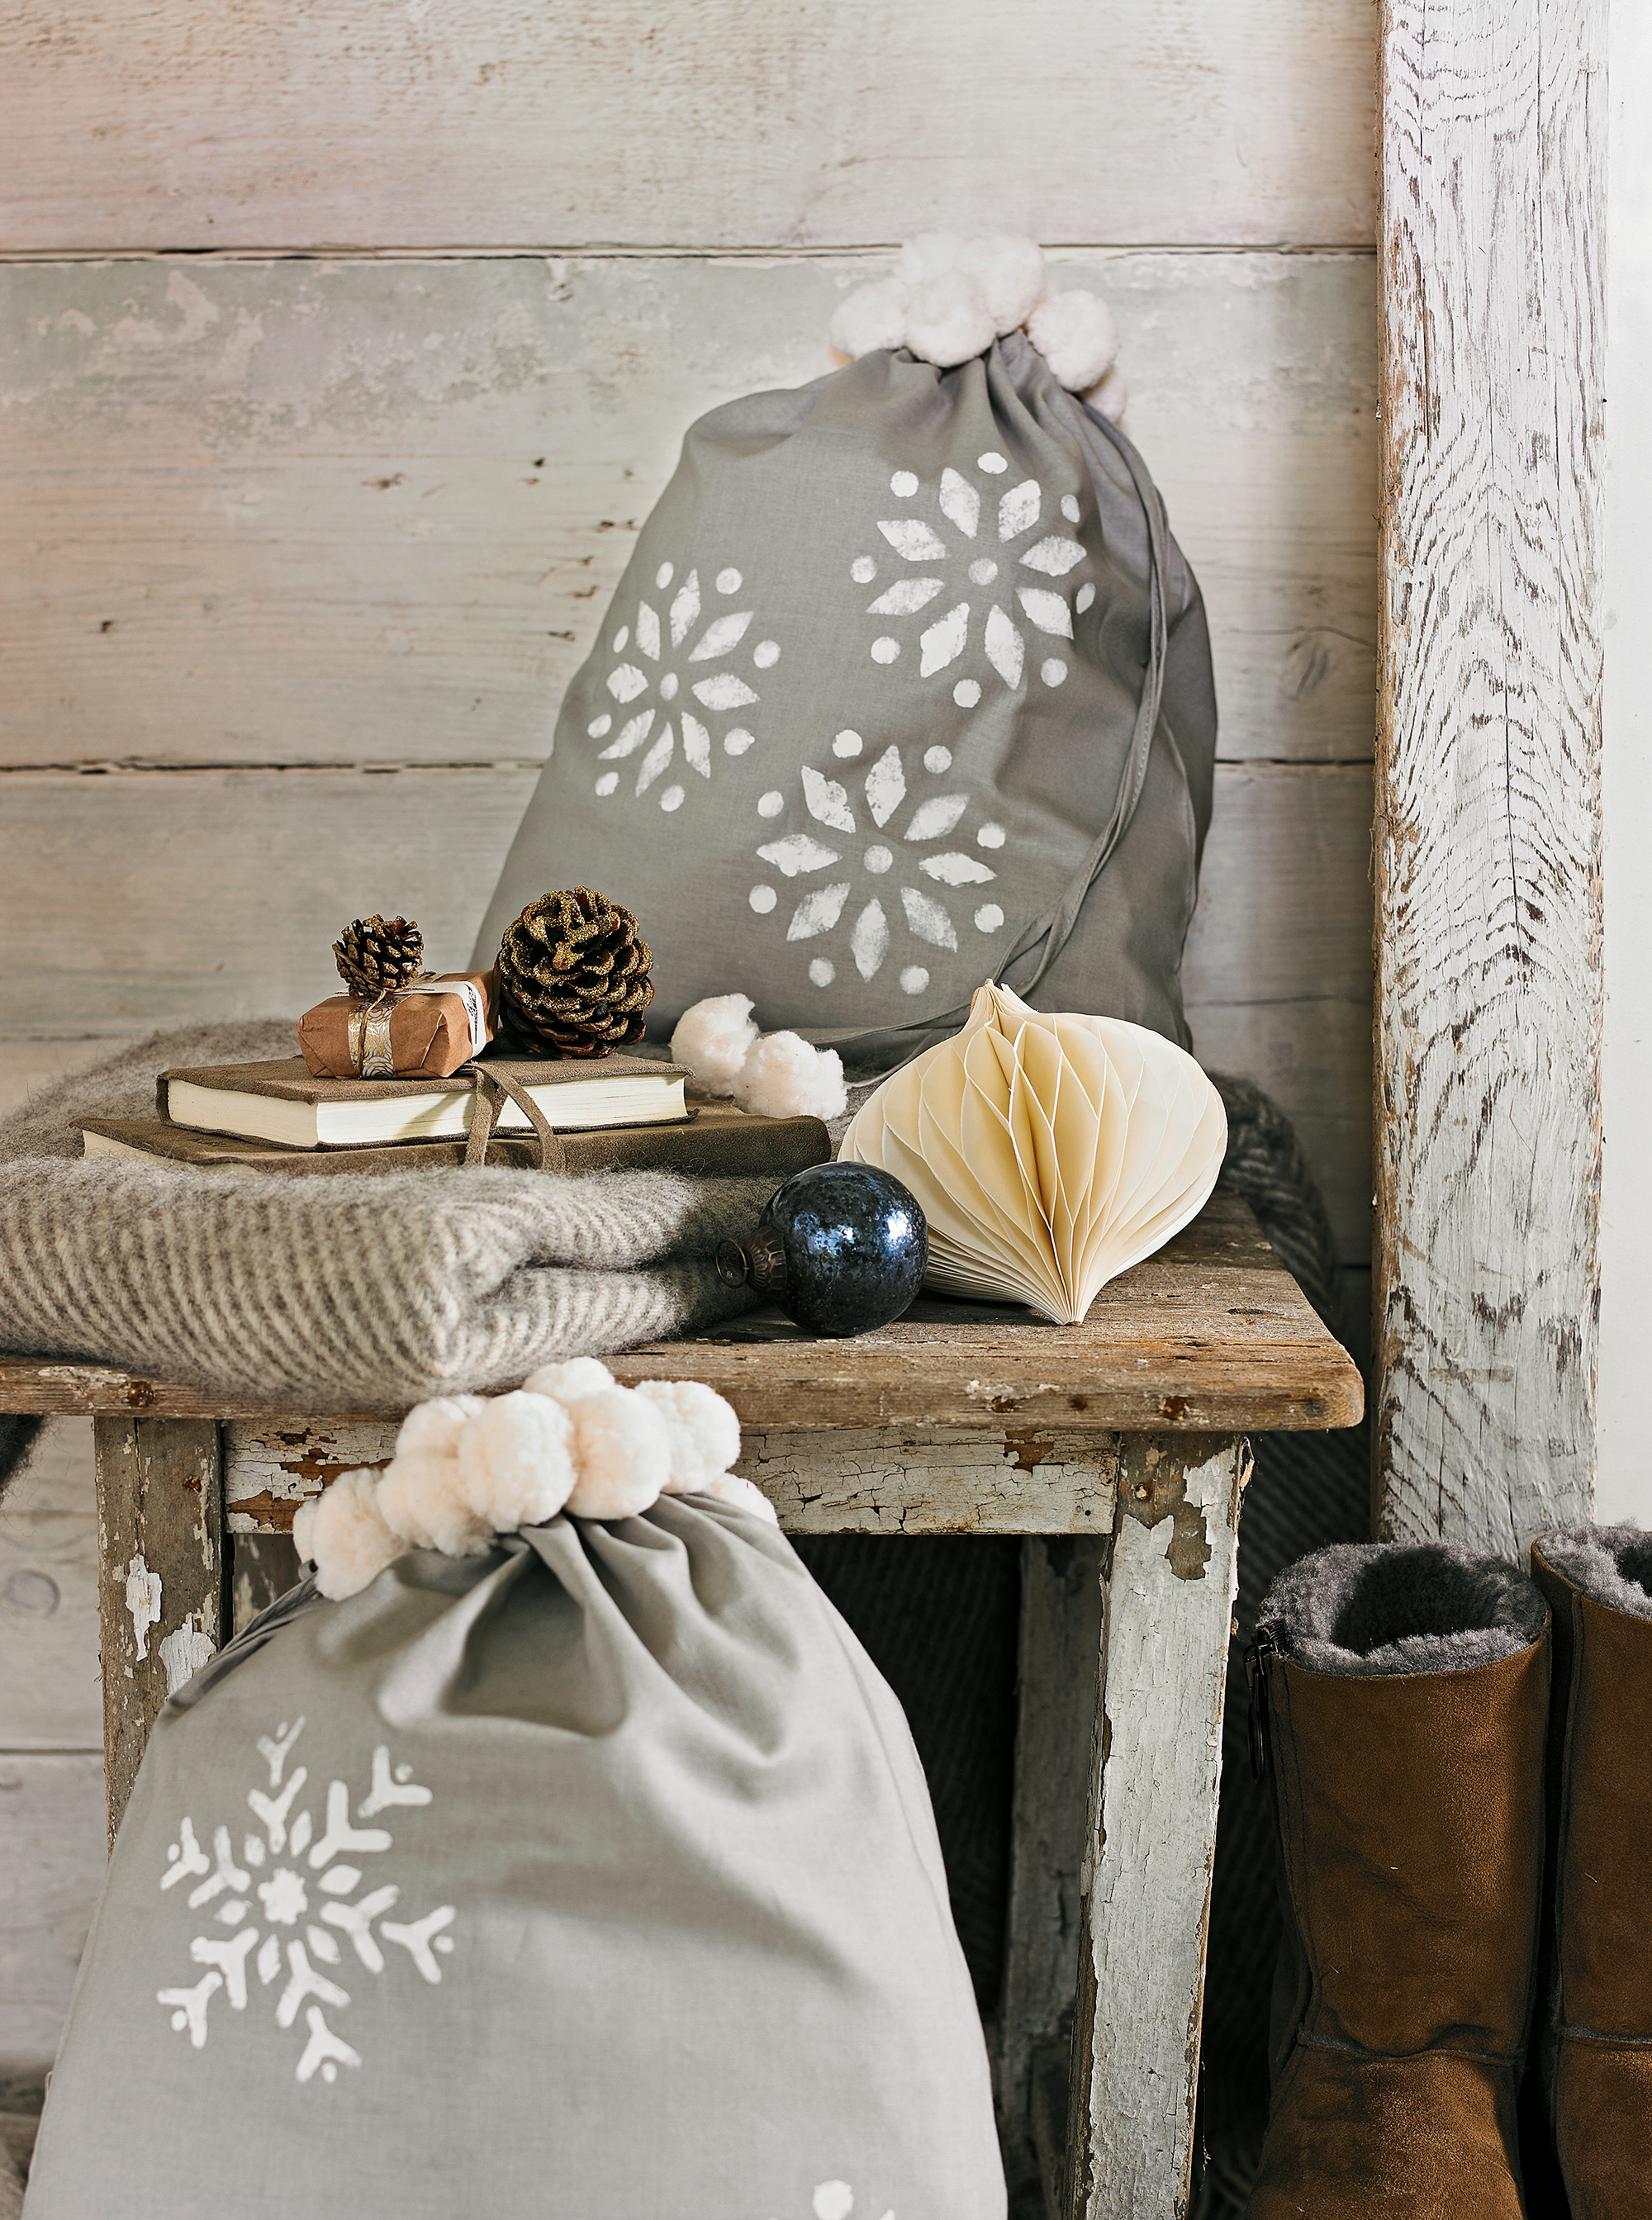
Decorated fabric goodie bags make a lovely alternative to a stocking. They can be reused year after year making them wonderfully sustainable.
You will need
Plain drawstring cotton gift bag(s)
Fabric paint
Stencils
Sponge stippler or stencil brush
Method
1. Lay your fabric bag on a flat surface and place inside a piece of cardboard that is just a little smaller than the bag – this will prevent the paint from seeping through both layers of fabric.
2. Place your stencil onto the fabric bag and secure in place with masking tape if needed
3. Pour a little paint into a shallow tray and load your stippler or stencil brush with a small amount, if you think the brush is overloaded then blot it using kitchen towel or a scrap of paper.
4. Using a dabbing motion rather than a brush motion dab over the stencil with paint until the whole design is covered. Reposition the stencil and repeat the process depending on the design you wish to create.
5. Once you have finished gently remove the cardboard from the inside of the bag and leave the bag to dry.
4. Block print gift wrap
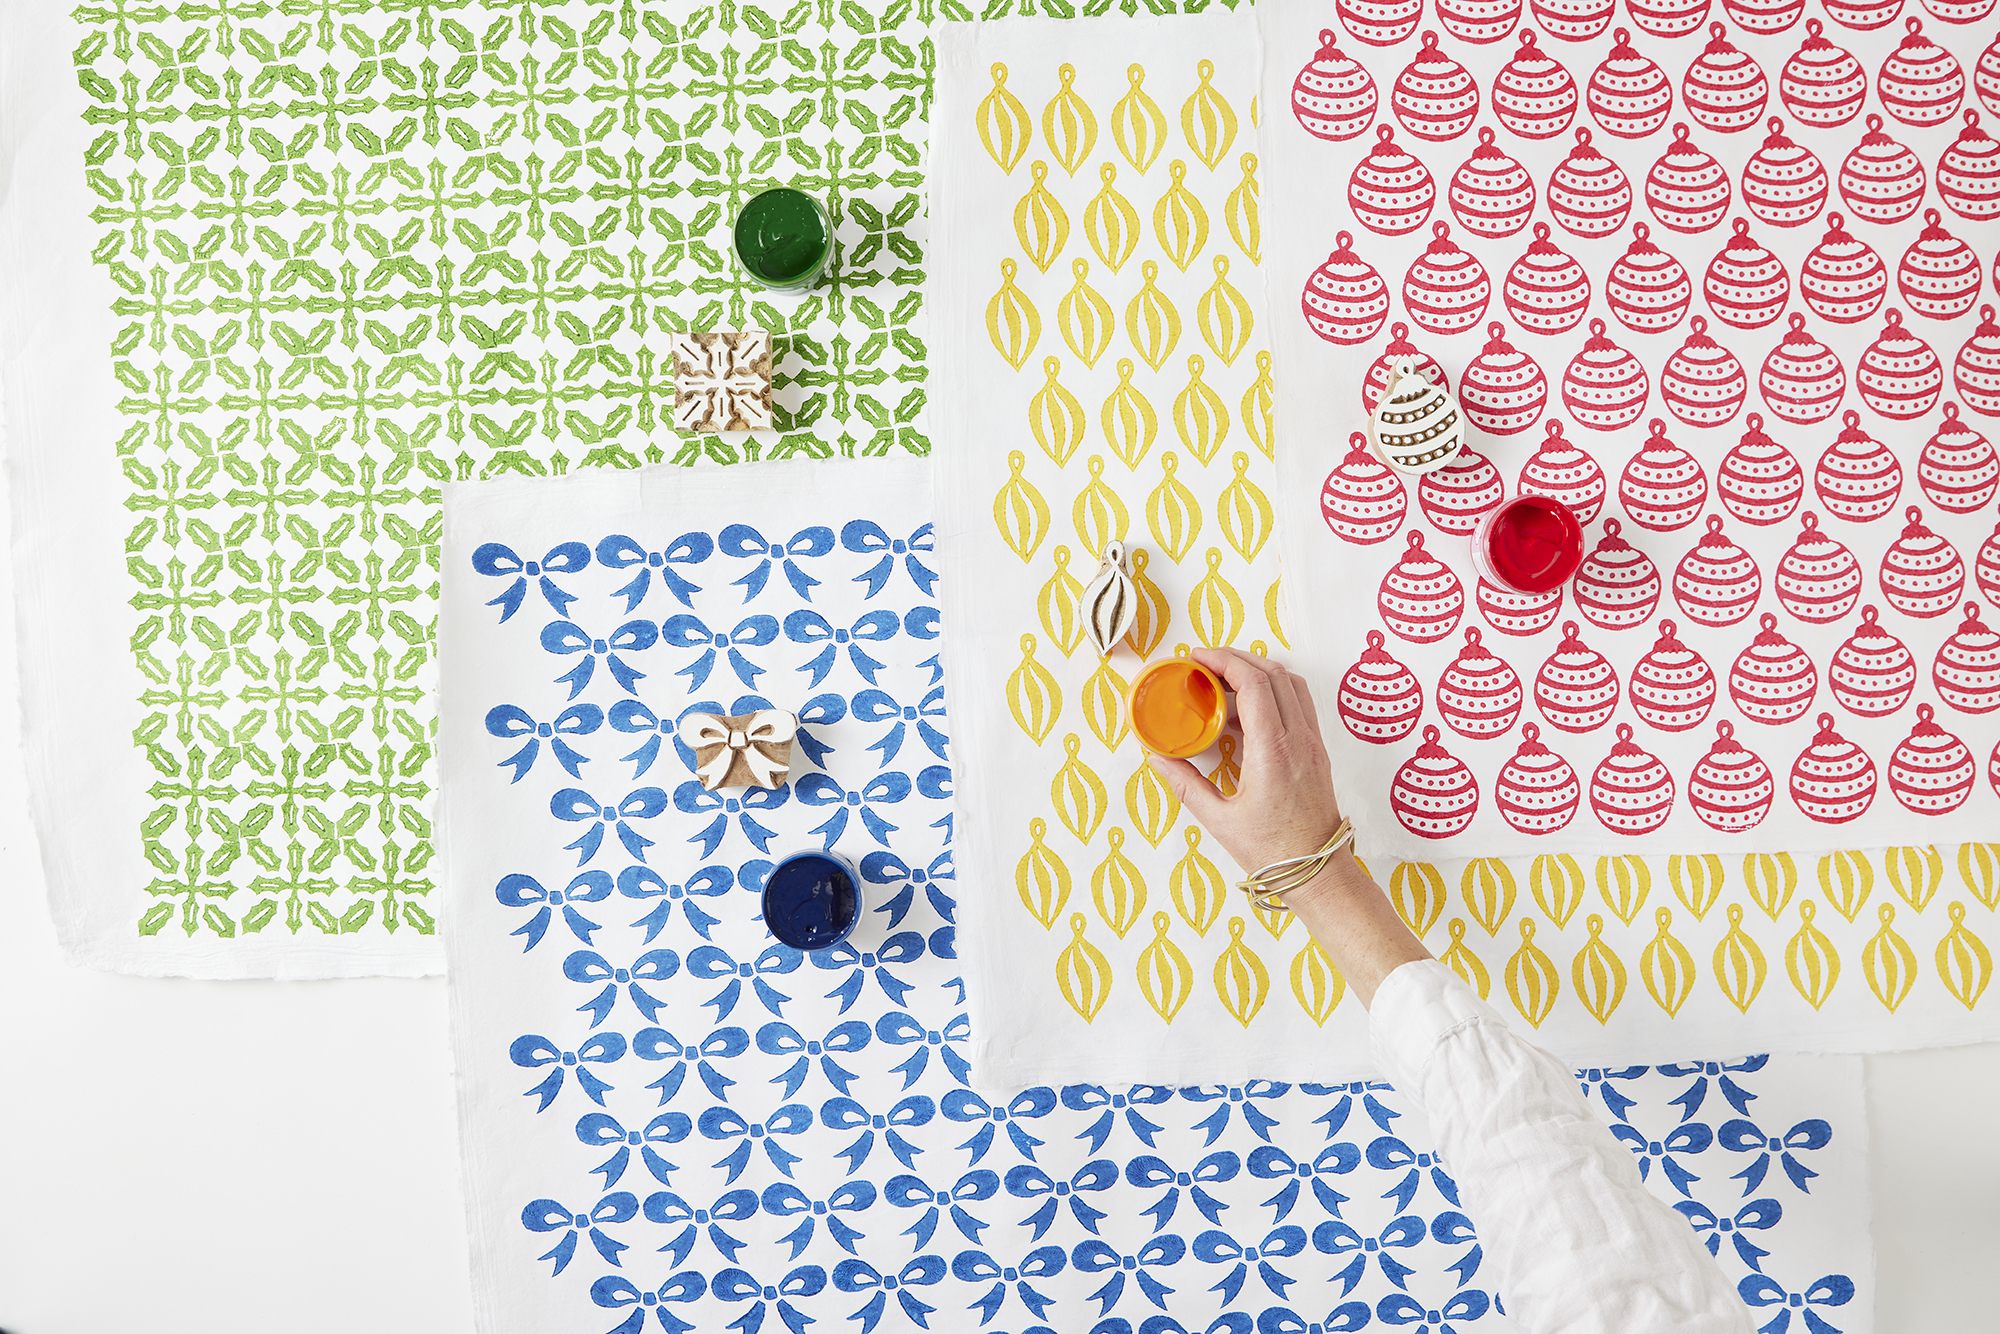
To block print gift wrap follow the same process as potato printing but instead of using a potato use a carved wooden block. There are lots of places to buy pre-carved blocks including from Molly Mahon who has Christmas wrapping block print gift sets that include plain wrapping paper, card sets and gift tags, plus water-based, Soil Association-approved paints, stipplers, and three Christmas-themed block prints.
5. Elevate plain paper
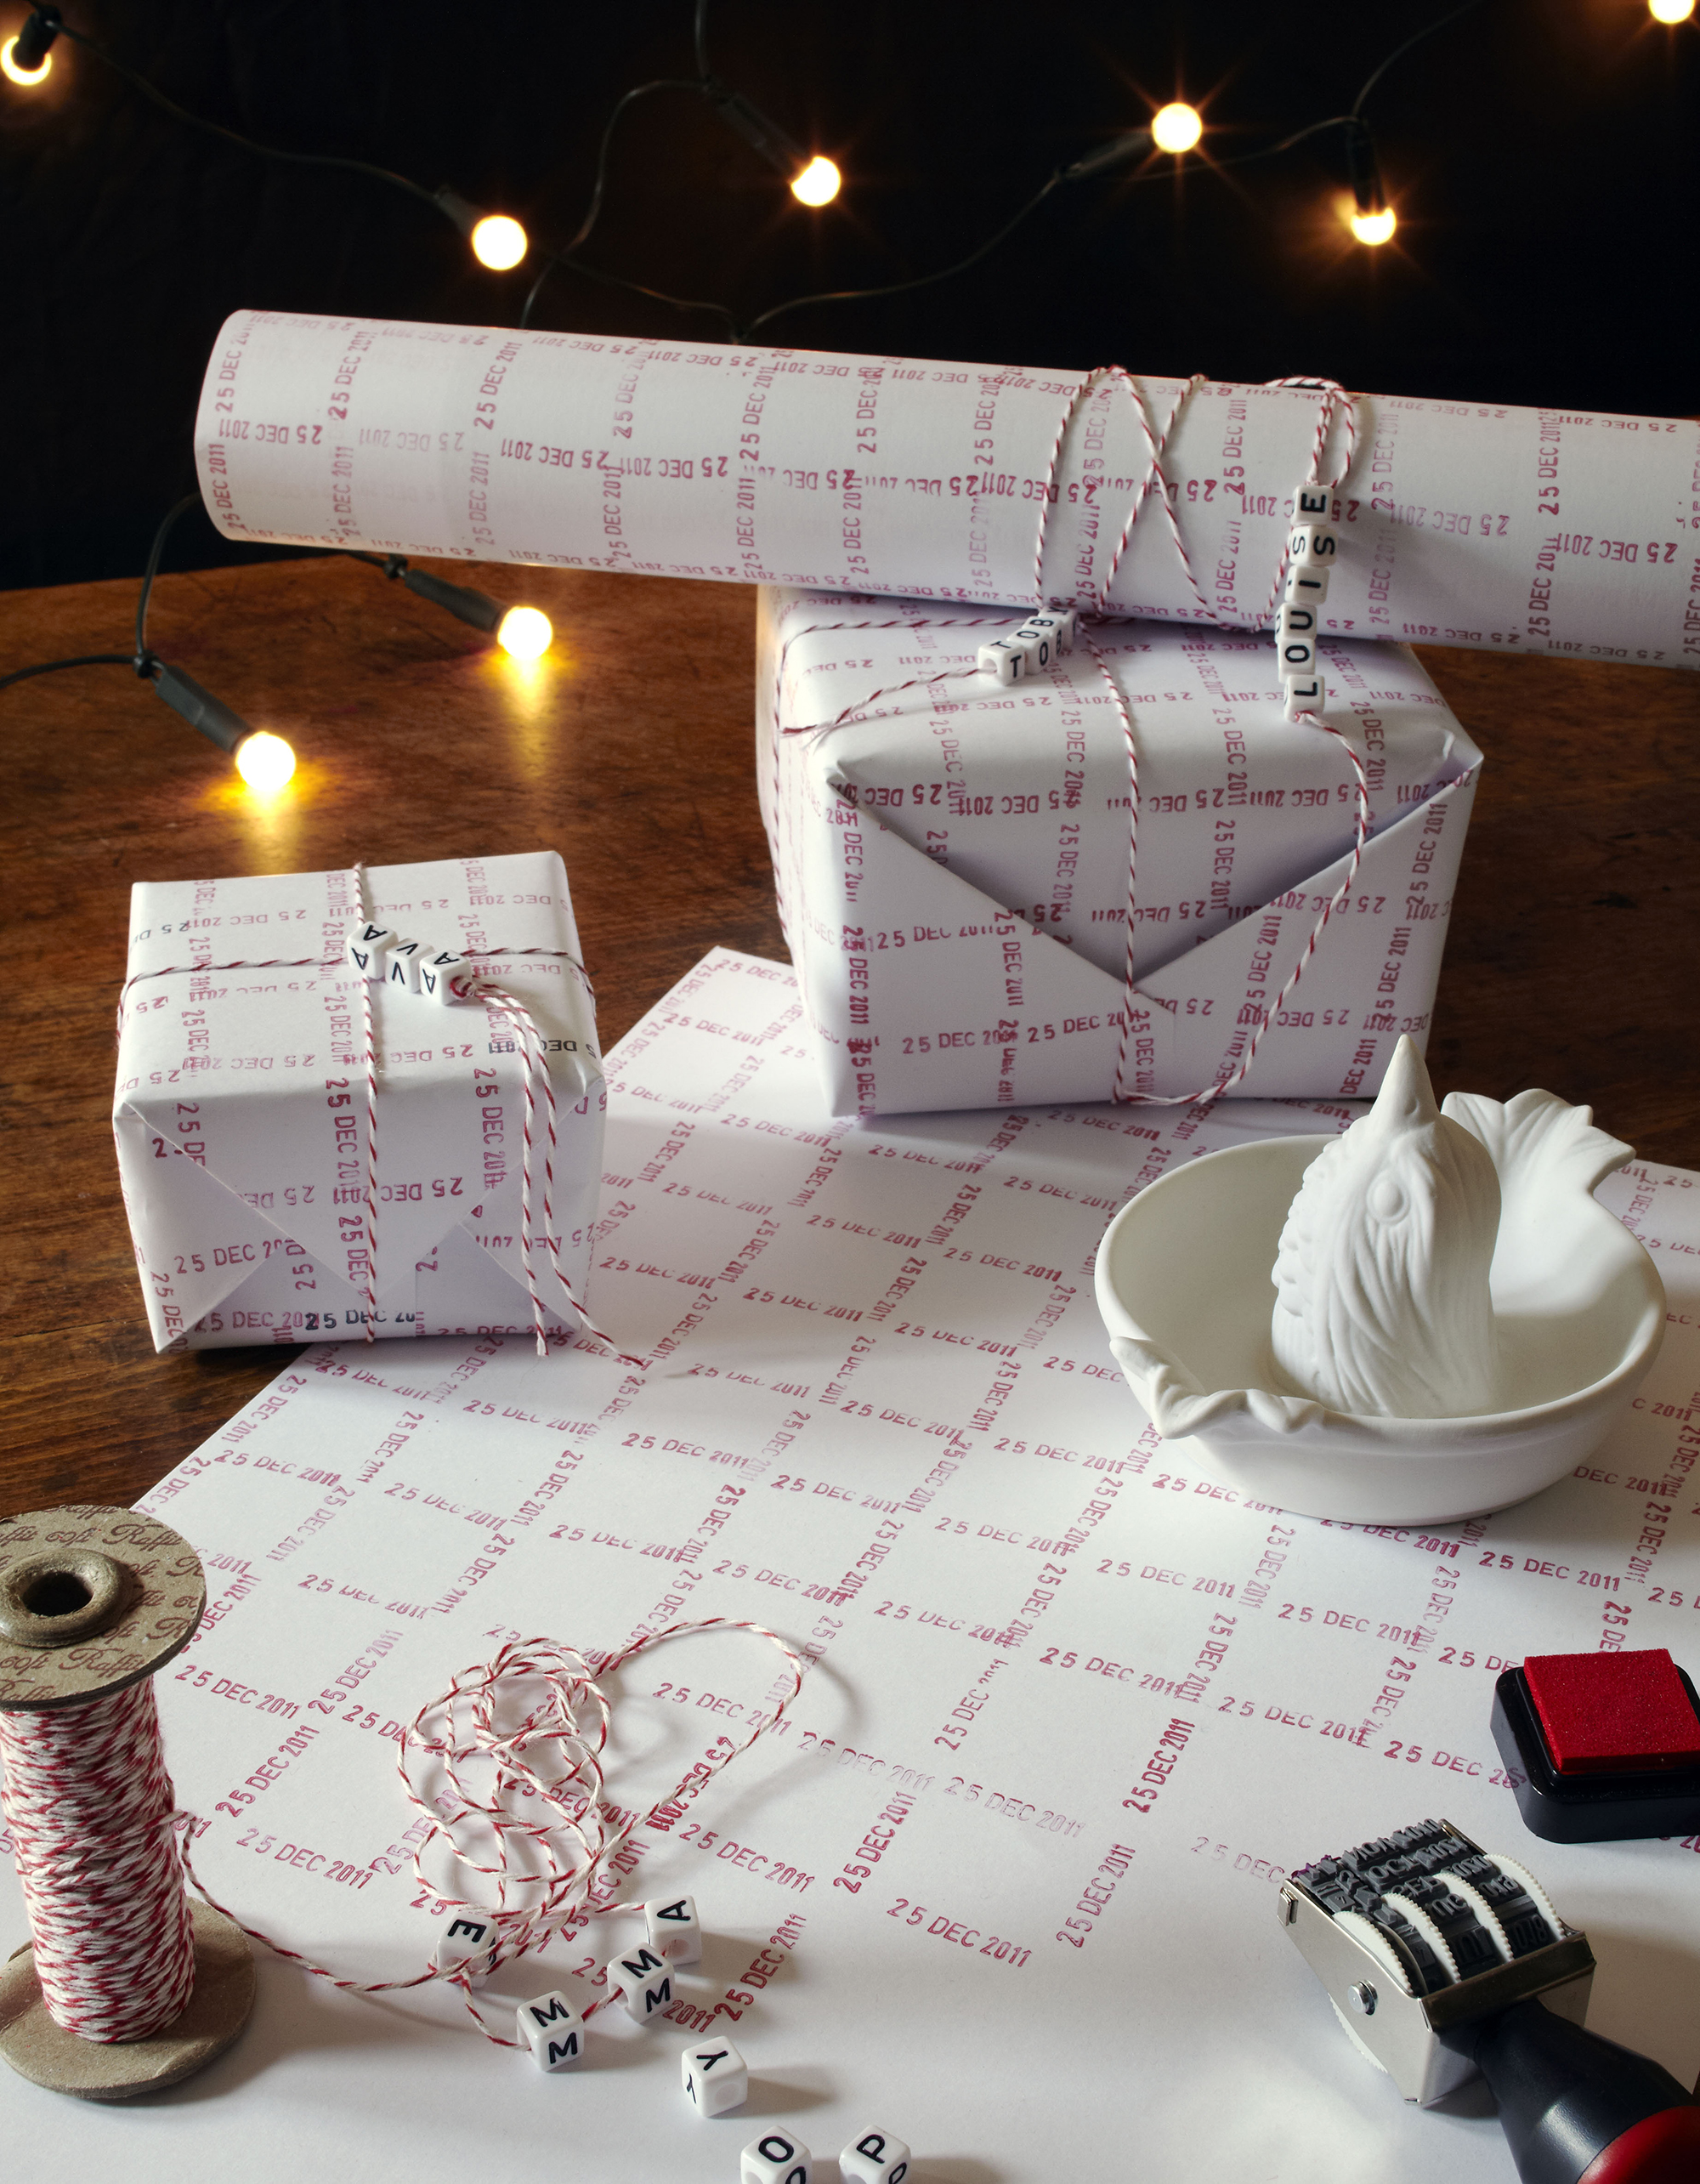
Use a date stamp and ink to create simple but effective 25th December Christmas paper. Get creative and use the stamp in different ways to create an array of patterns, from simple checks to stars. Alternatively, you could alter the date to create personalized birthday gift wrap.
To finish choose ribbons or string in coordinating colors such as this red and white bakers twine from Amazon, you could also string on letter beads to spell out a greeting or the recipient's name as an alternative to a gift tag.
6. Customize wrapped gifts with washi tape
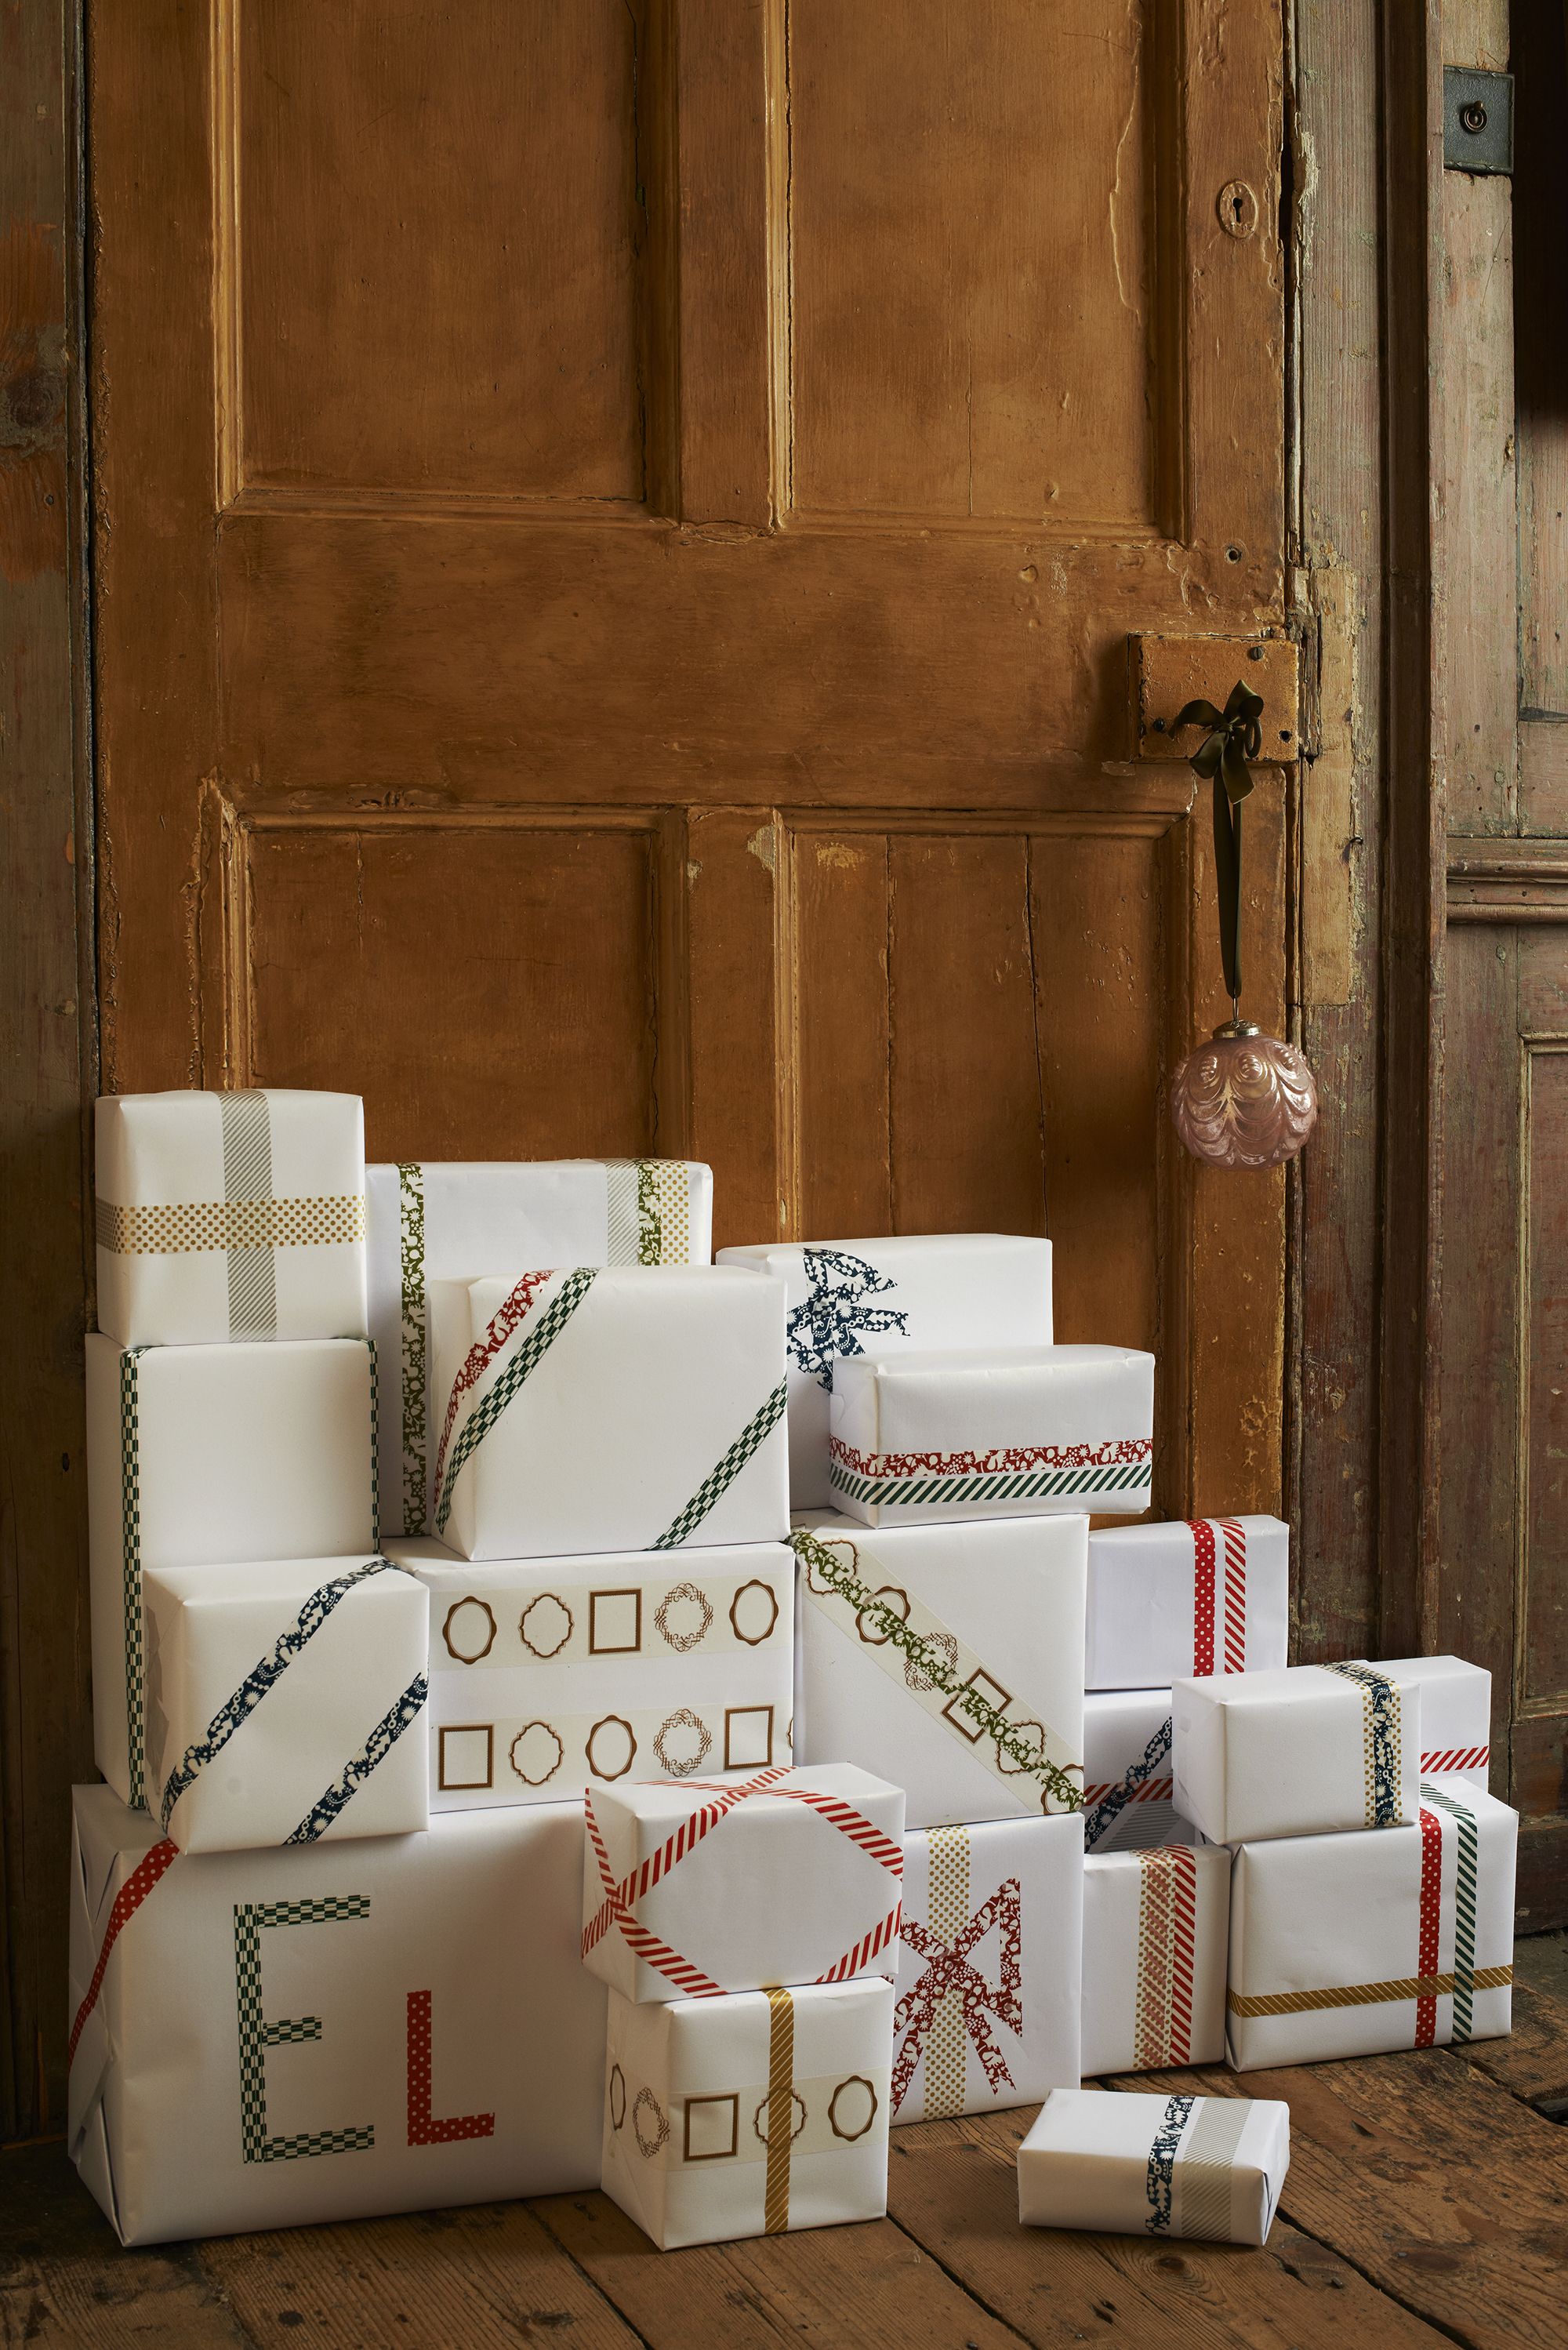
Colored washi tape is a quick, easy and mess-free way to give plain gifts a personal touch. Wrap bands around gifts, create simple designs or even tape on an initial to help friends and family identify their gifts. There a huge array of colors and designs of masking tape available, such as these decorative tapes from Amazon
7. Use reusable fabric wraps
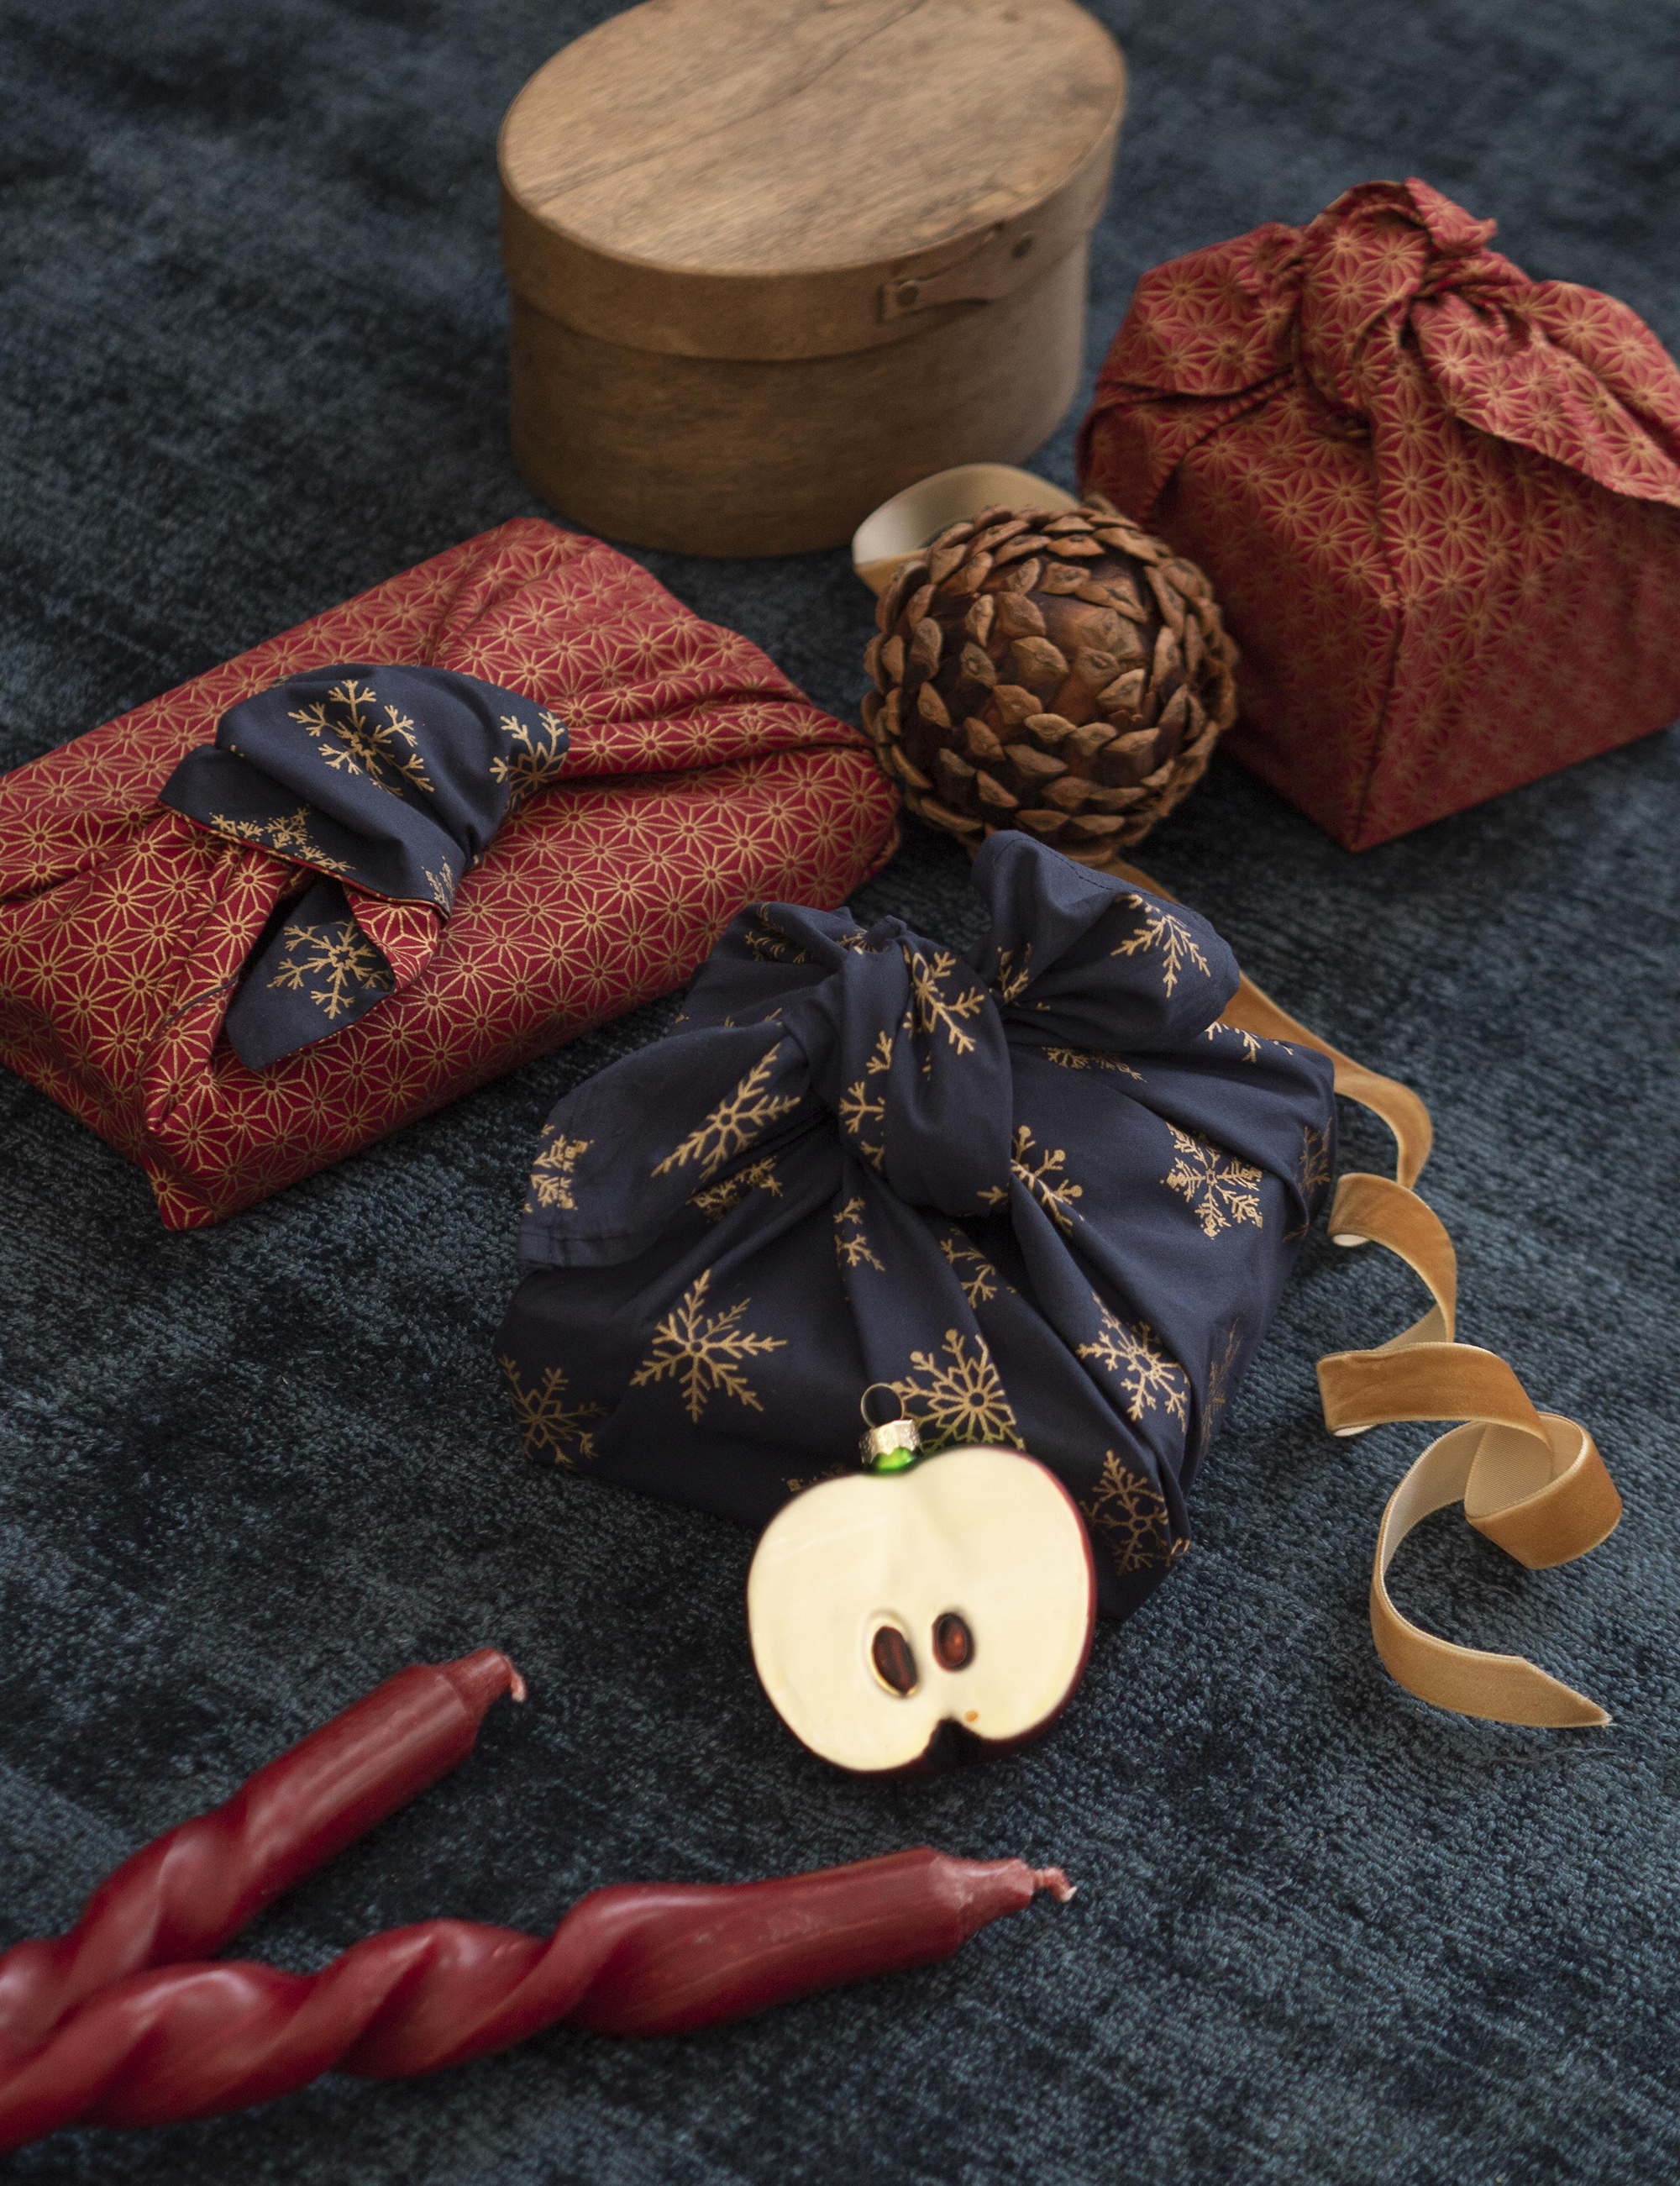
Take a sustainable approach to gift wrapping and use squares of fabric to create furoshiki gift wraps that can be reused year after year, or buy furoshiki wraps from Amazon. If making your own use a fabric that isn't too thick, such as thin cotton, as thick fabrics will be difficult to handle and tie. Reversible designs look particularly effective and there are plenty of folding and wrapping guides available on Youtube.
8. Paint gift boxes
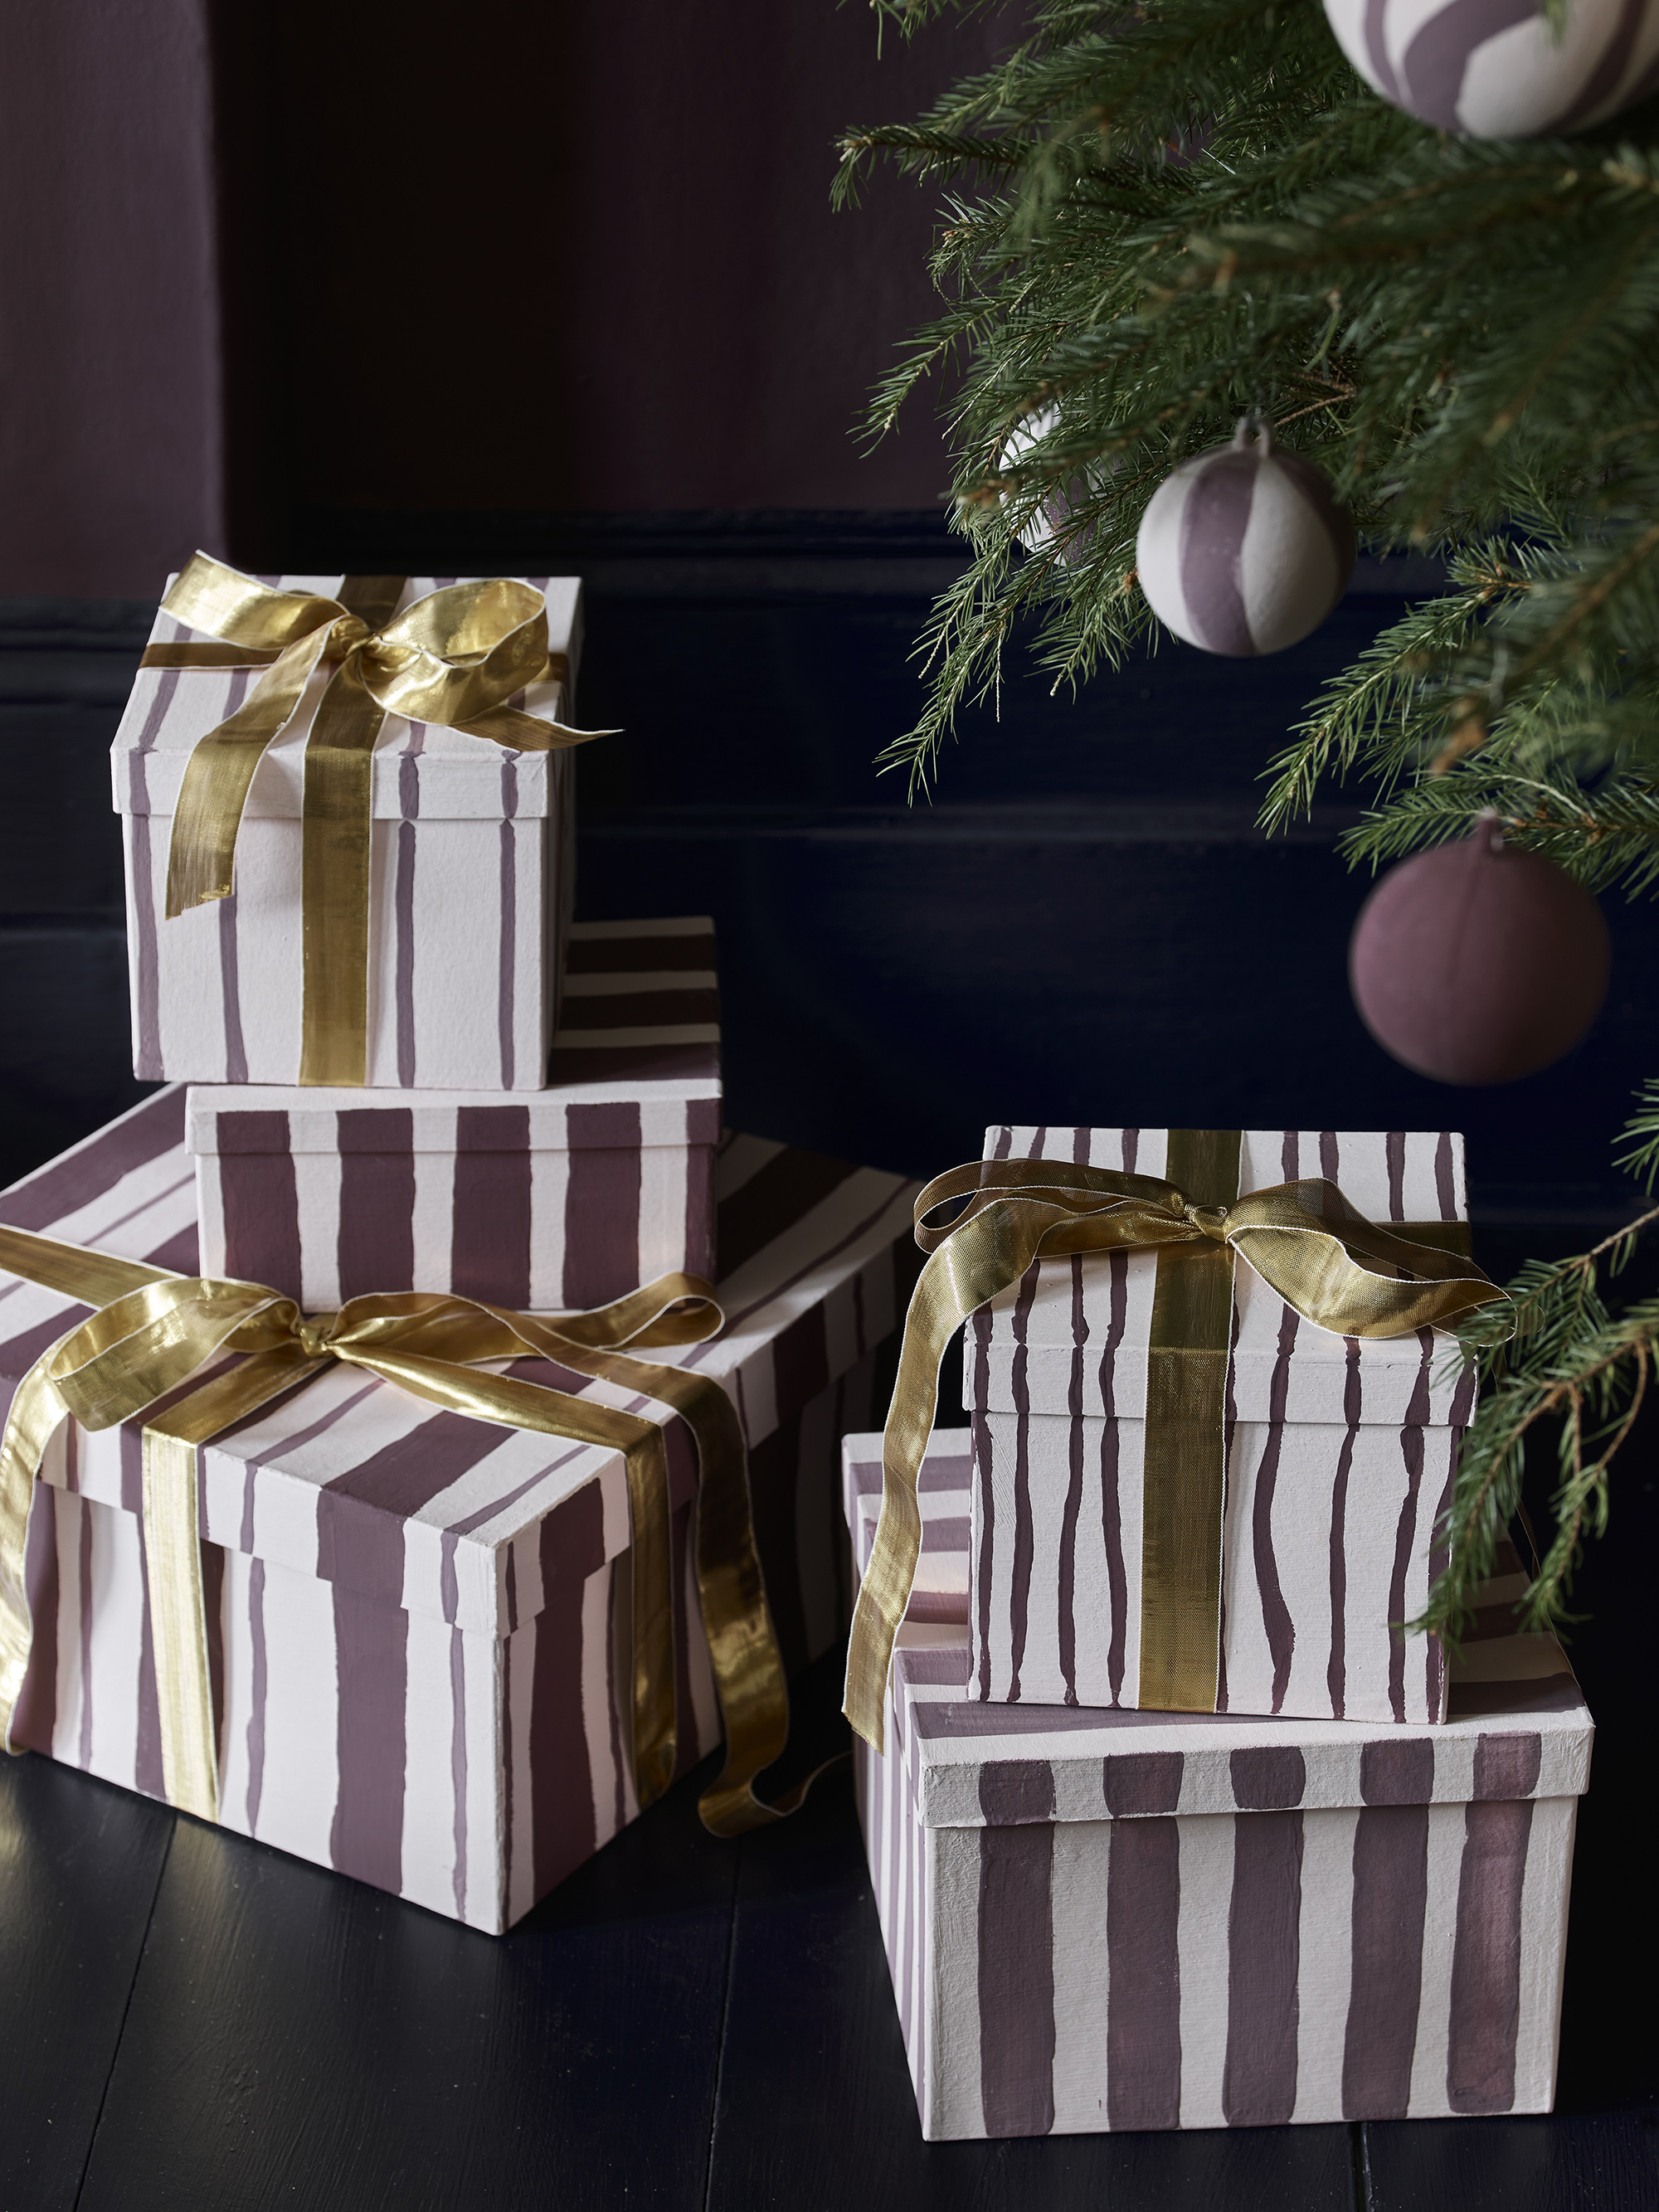
Gift boxes are a practical solution for delicate gifts that make get damaged. Give plain gift boxes a personal touch by painting them with different designs. The beauty of these is that they can be reused as decorative storage boxes. If you are thinking of doing this then be sure to choose gift boxes that are sturdy and uncoated – water-based paint will not be able to adhere to plastic-coated surfaces.
9. Embellish gift wrap with pom poms
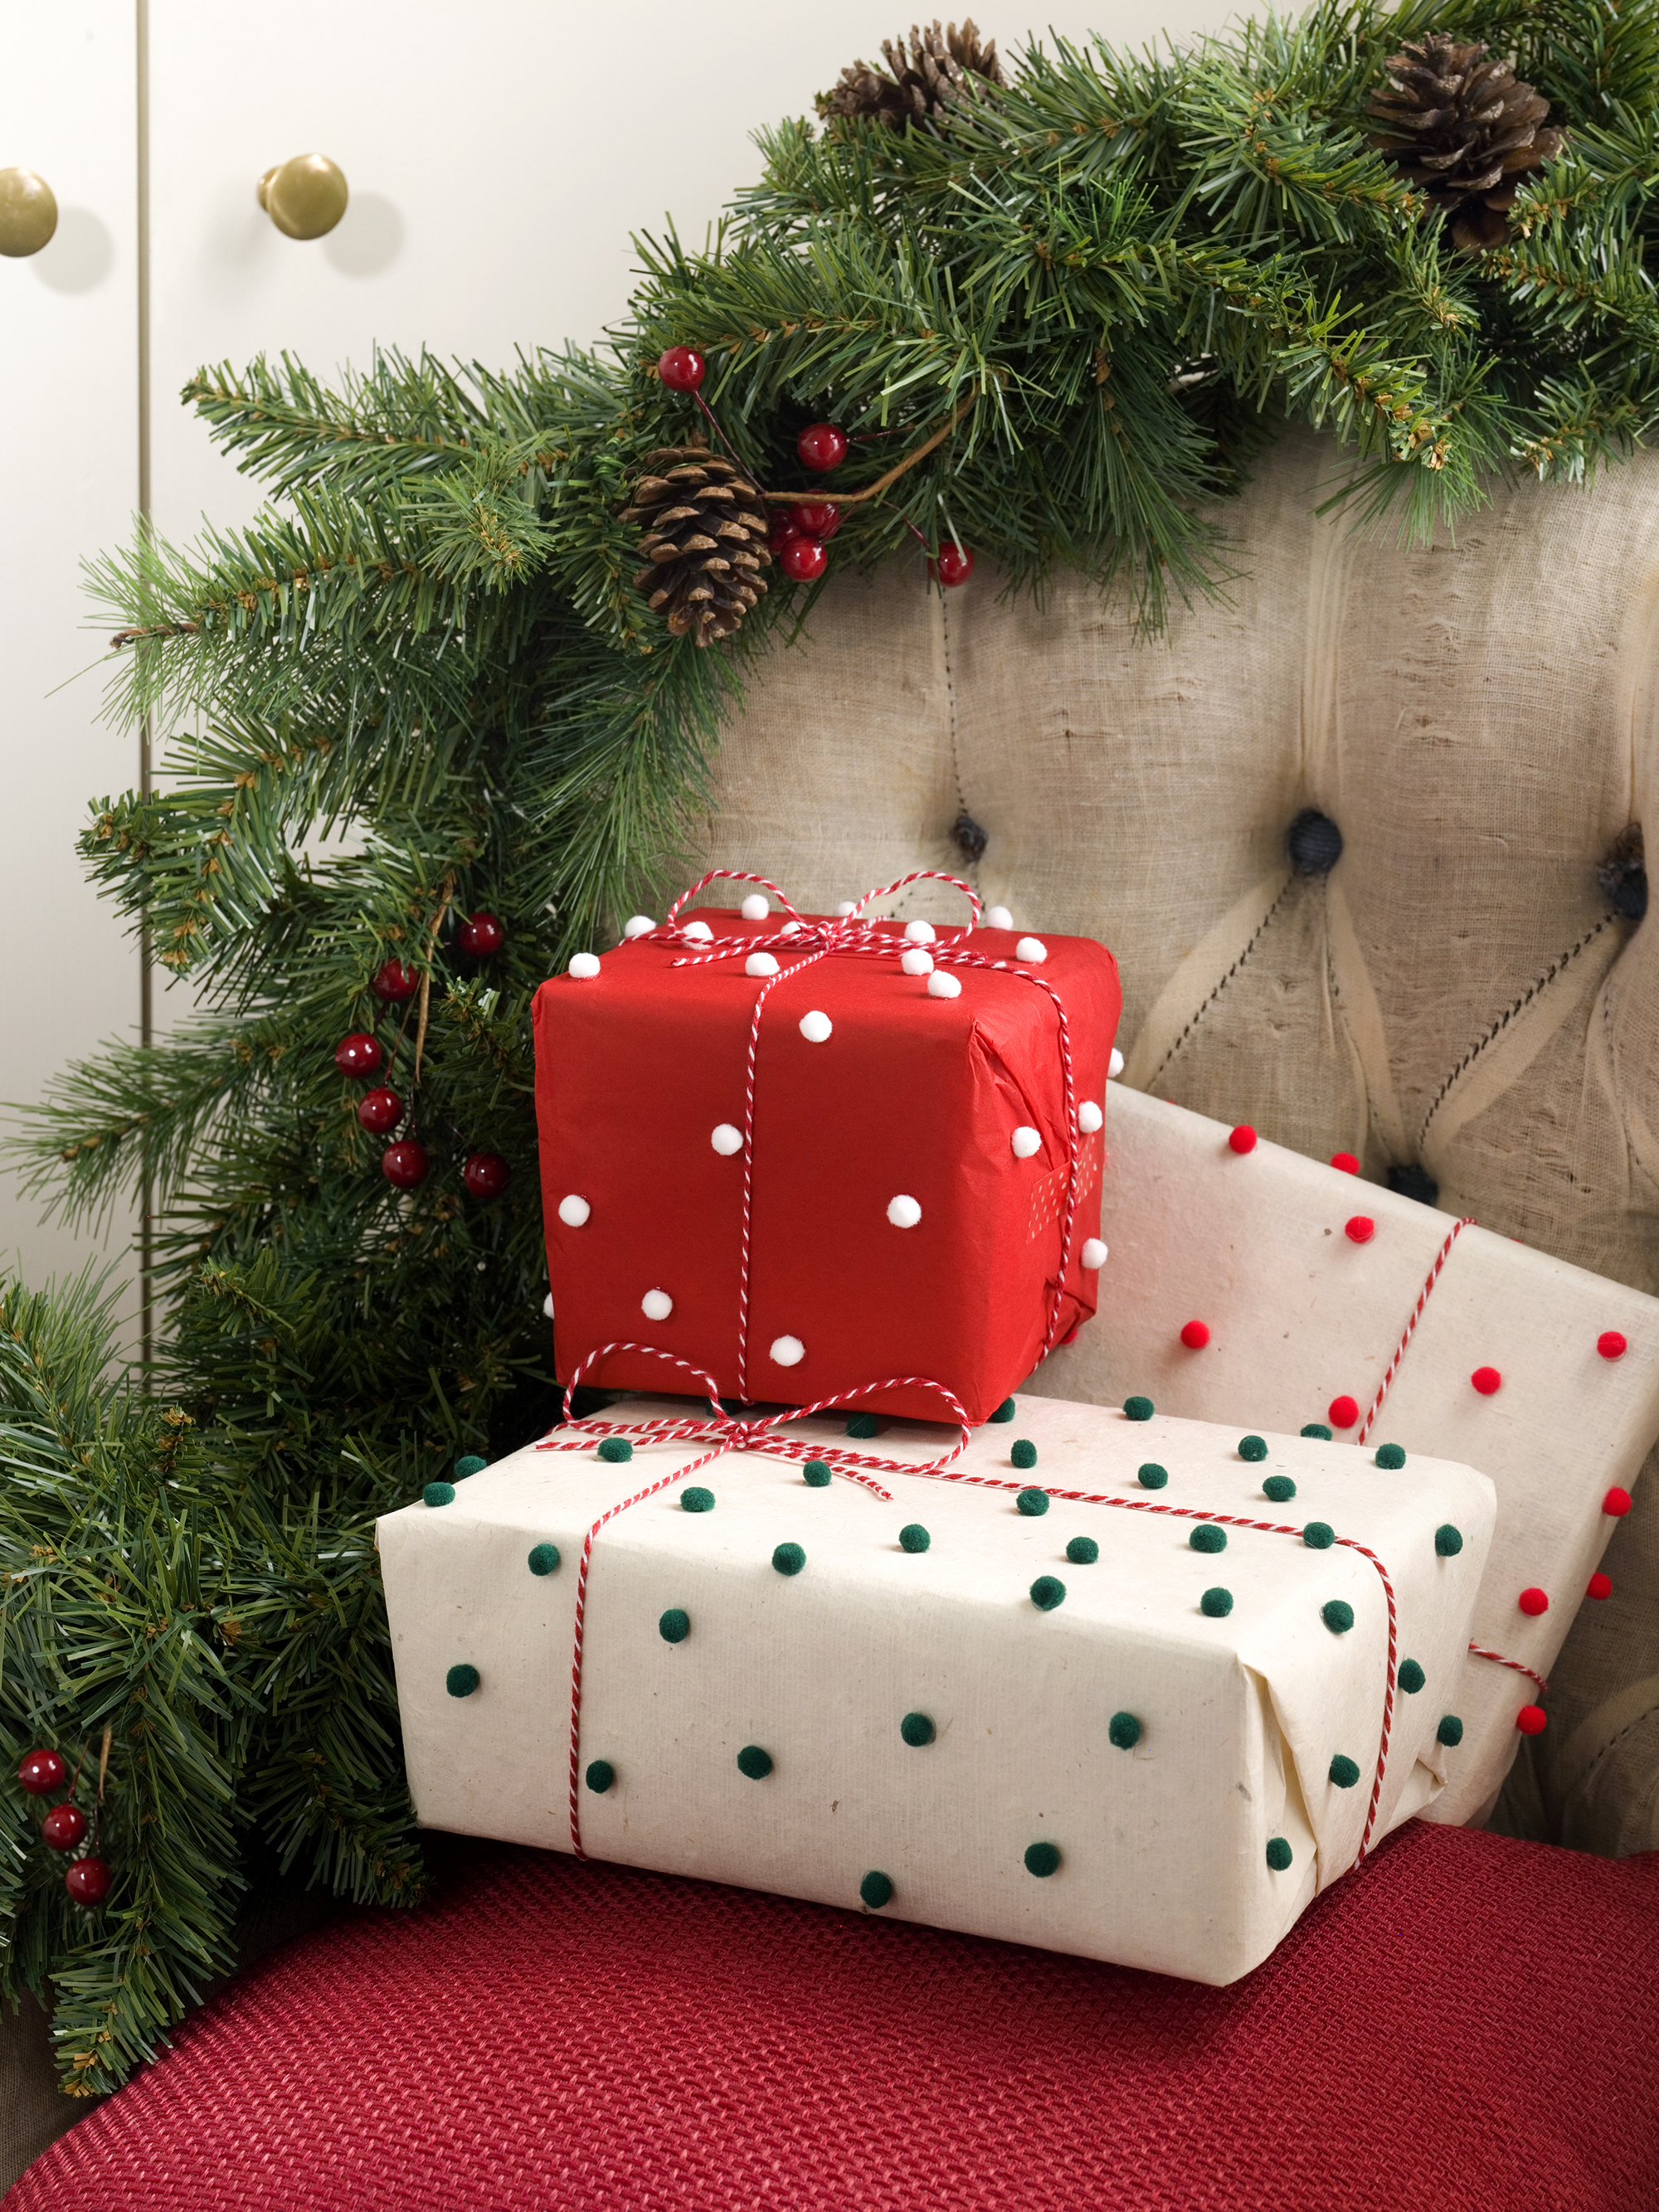
Decorating plain gift paper with mini pom poms is a fun and simple idea which works really well with cards, too. They look great on their own but can also be used to add a flourish to certain designs – for example, you could print paper with reindeer stamps and fix on red pom poms to create Rudolph's nose. Adults could use a glue gun to do this, alternatively try PVA if you're crafting with children. Depending on the shape of the gift and how many pom poms you want to add, it may be best to do this after the gift has been wrapped.
10. Reuse old papers
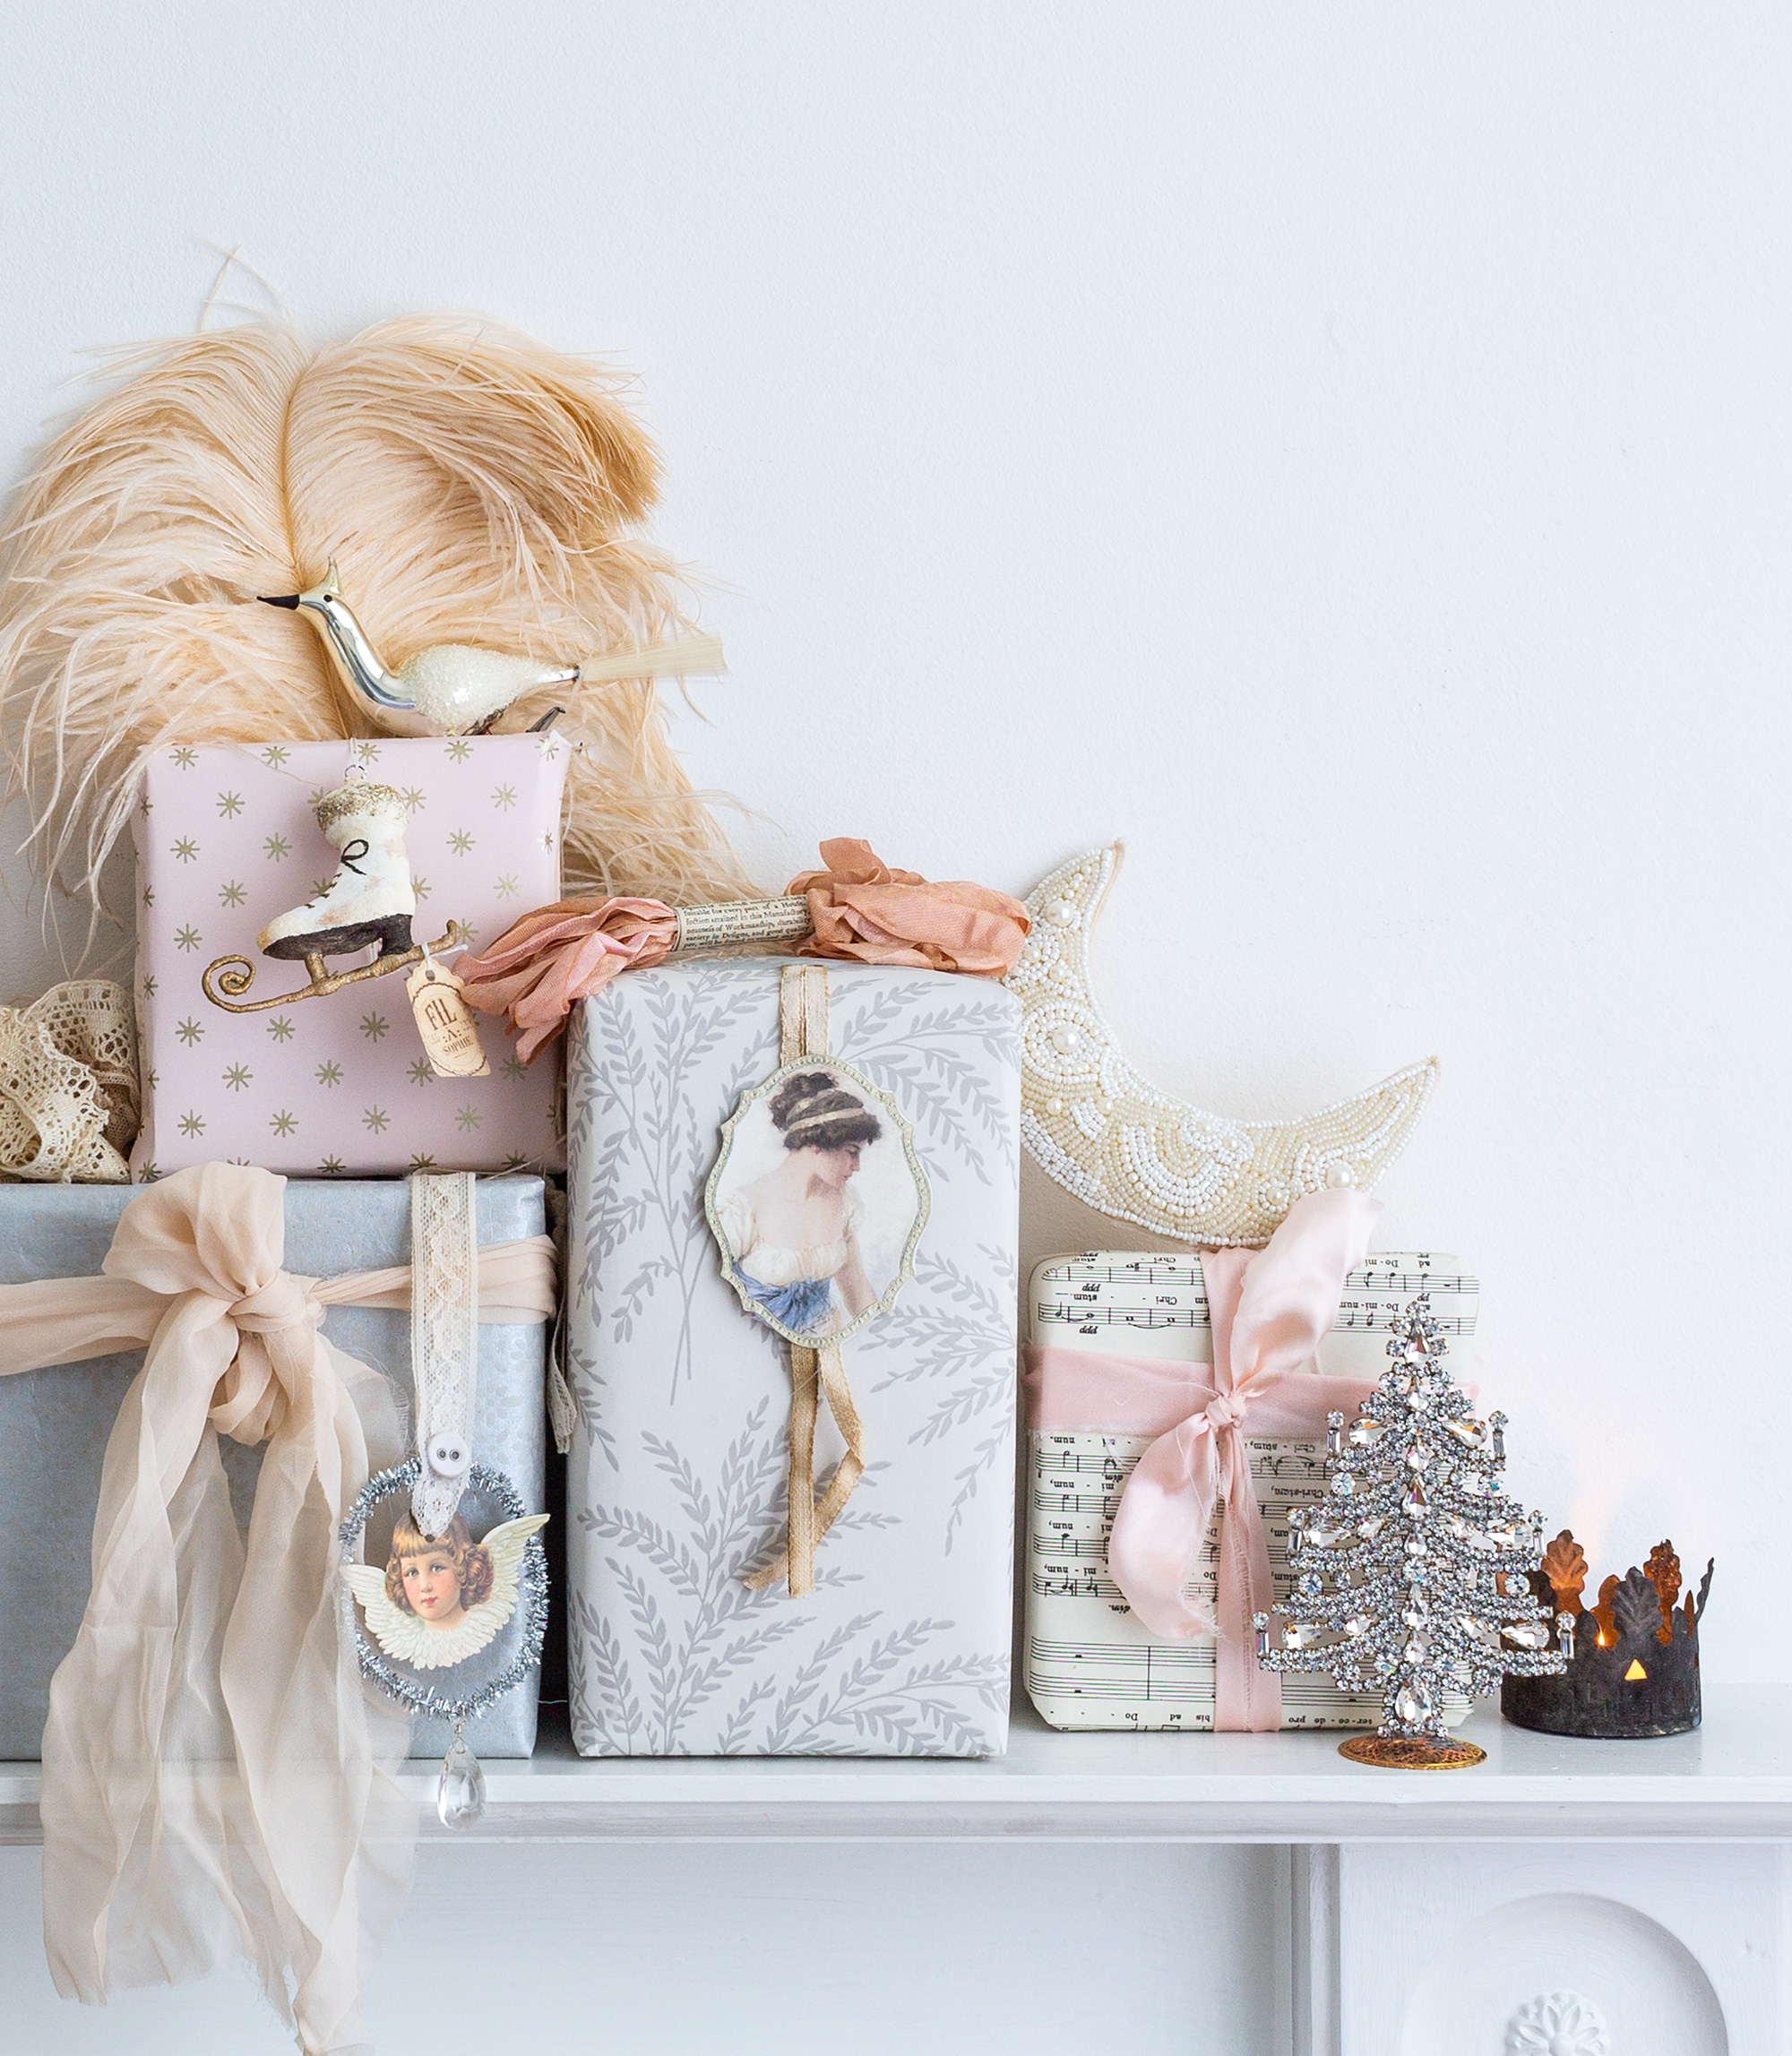
If you don't have time to print or customize gift wrap then try reusing old papers such as sheet music or wallpaper offcuts. Old sheet music can often be picked up in charity shops or at yard sales and will give gifts a vintage feel – continue the eco theme by decorating with fabric ribbon.
11. Spruce up brown paper

Brown paper is a classic way to bring a rustic look to gift wrapping plus it is hugely versatile. For a simple look add a spring of Christmas foliage and bind with a few wraps of string, or decorate the paper using a premade rubber stamp and ink pad – Cambridge Imprint has a lovely selection. Alternatively, opt for plain gift wrap and go all out with a beautiful handmade keepsake tag – this can be done at home using air drying clay or polymer clay such as Fimo.
How do you make your own wrapping paper?
There are many ways to make your own gift wrapping paper – one of the most popular is to print patterns onto brown craft paper or wallpaper lining paper using wooden blocks and paint or with rubber stamps and ink.
There are plenty of pre-made festive blocks and stamps available to buy online for making Chrismtas gift wrap, 'or if you want to make everything yourself, you can carve a printing block from a decent-sized potato using a biscuit cutter, which come in all sorts of festive shapes – it couldn’t be simpler,' suggests block printer and designer Molly Mahon.
What can I use if I don't have gift wrapping paper?
If you don't have any gift wrapping paper then brown craft paper can easily be decorated or customized to make gift wrap, or you could try using old papers like wallpaper off-cuts or old sheet music. Alternatively use gift bags in fabric or paper, or try decorating a gift box.
Sign up to the Homes & Gardens newsletter
Design expertise in your inbox – from inspiring decorating ideas and beautiful celebrity homes to practical gardening advice and shopping round-ups.

Pippa is a contributor to Homes & Gardens. A graduate of Art History and formerly Style Editor at Period Living, she is passionate about architecture, creating decorating content, interior styling and writing about craft and historic homes. She enjoys searching out beautiful images and the latest trends to share with the Homes & Gardens audience. A keen gardener, when she’s not writing, you’ll find her growing flowers on her yard for styling projects.
-
 Thoughtful modernism – how one Dallas home makes bold contemporary design feel warm, welcoming, and comfortable
With its mix of textural finishes and carefully curated furnishings, this modernist home is a refreshing retreat
By Karen Darlow Published
-
 'Wick away the ick' – 6 things people with clean laundry rooms always do to make this hardworking space shine
These tips on how to clean your laundry room will banish grime
By Seraphina Di Mizzurati Published