How to stain kitchen cabinets – an expert guide
Give timber furniture a new lease of life with our handy guide on how to stain kitchen cabinets


Staining kitchen cabinets is one of the easiest and most cost-effective ways to transform wooden cabinetry from tired and drab and in need of some TLC, to good as new.
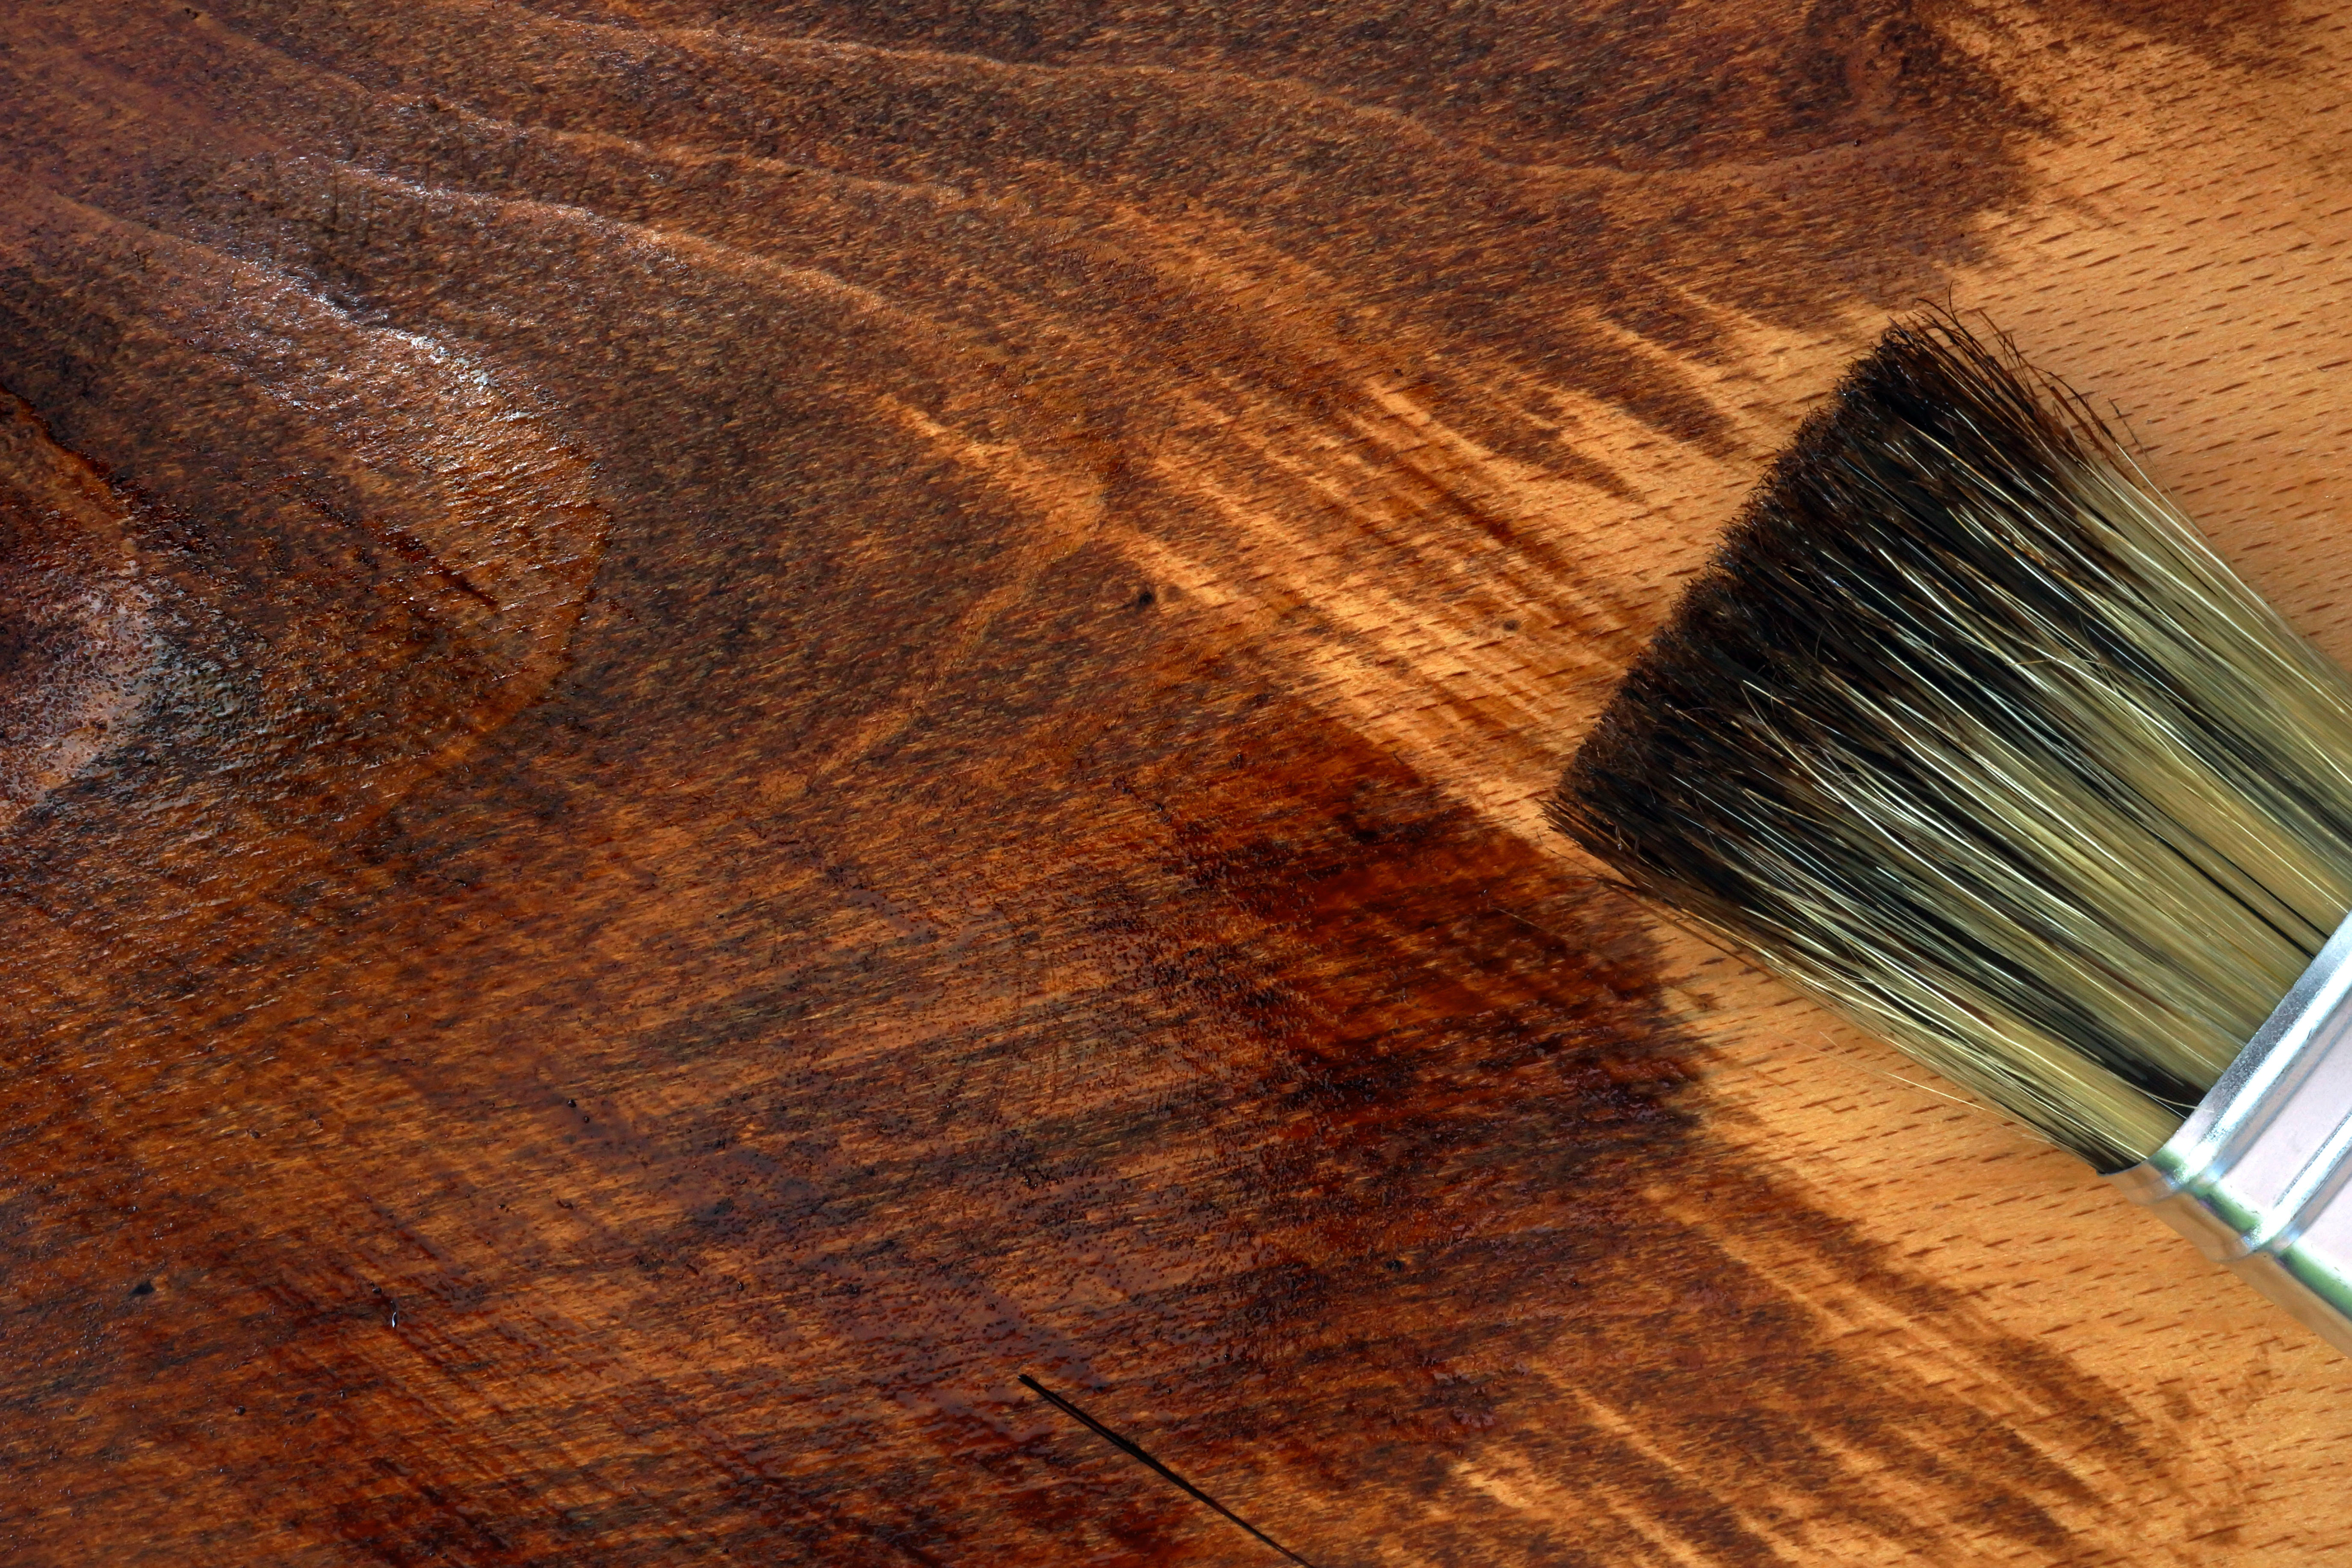
Perfect for traditional designs, wood stain can be used to create various color tones, as the stain soaks into the wood, allowing the natural knots and grains to show through. ‘Staining kitchen cabinets shows off both color and texture,’ says Lucy Searle, Global Editor in Chief of Homes & Gardens. ‘It’s a great way to refresh old or dated furniture and can add warmth and character to the kitchen. It also makes it easier to touch up in the coming years if any marks or blemishes appear.’
The process is pretty simple, similar to how you paint kitchen cabinets, and the key lies in the preparation. Ryan McDonough, interior design expert at My Job Quote says that you can use a wood repair filler in a natural tone to disguise any cracks or nicks in the surface and use a furniture touch-up pen to even out any areas where the old stain has worn away. ‘You can now apply a new coat of stain,’ he says. ‘Always pick wood stain for interior use to avoid harsh chemicals inside the home and follow the application advice on the tin. Finishing with a wax will help provide a protective coat to your cabinets.’
Below we take you through the process of staining kitchen cabinets step-by-step.
How to stain kitchen cabinets
Staining is a great way to refresh the space without having to remove kitchen cabinets and install kitchen cabinets with a different look.
Not only does a wood stain enhance the look of wood kitchen cabinet ideas in the same way that refinishing kitchen cabinets can, but it also protects them so your kitchen will look better for longer.
Michael Rolland, interiors expert and MD at The Paint Shed, shares his step by step guide on how to update kitchen cabinets without replacing them when they’re made from real wood.
You will need:
- TSP (Trisodium Phosphate)
- Microfiber cloths
- Drop cloths
- Protective plastic gloves
- Chemical paint stripper (depending on cabinet condition)
- Paint scraper
- Palm sander (optional)
- Fine-grit sandpaper
- Medium-grit sandpaper
- Wood treatment
- Long-haired, soft bristle paint brush
- Steel wool
- Wood stain
1. Clean and protect
Start the process by removing the cabinet hardware, including the handles and knobs. Put these aside in a bag to ensure you don’t lose any of the screws. Unless you are replacing them, in which case you can donate or sell the originals.
The next step is to thoroughly clean the cabinets. As the kitchen is a place where there is a lot of grease, it is vital that you use something a little stronger than just water to clean the cabinets. TSP (Trisodium Phosphate) is often recommended for jobs like these. It can come as a ready-made spray or as a powder to be mixed with warm water.
It is important that if you are using TSP for cleaning, you are properly protected with gloves and goggles. Once the TSP has properly dried, there will likely be a white residue. Remove this with a clean damp cloth and wait for it to dry.
It is important to note that unless your cabinets are raw wood, the existing finish must be removed. Whether this is paint or a different stain, it should be stripped using a paint and varnish stripper before applying the new stain.
Next, protect your surroundings. Be sure to remove any appliances on the countertop and lay down dust sheets to protect your floor.
If you haven’t got the steadiest hand then use painter’s tape to protect the places where the cabinets meet the countertop and walls.
2. Prep and sand
Once the cabinets are clean and dry, move on to sanding the cabinets with 80 to 120-grit sandpaper. If you have access to a palm sander, this will make the process quicker and easier, but it is not essential.
Sand in the direction of the wood grain until the cabinets' surfaces are smooth and even. If you notice any imperfections in the wood, such as deep scratches or dents, you can use a wood filler to fix them then sand until smooth when dry.
Sand the cabinets again but this time with 150 to 220-grit paper. Use a vacuum cleaner to clear the sanding dust and wipe the excess dust from the cabinets then leave to dry.
3. Treat the wood
Once dry it is recommended that the wood is treated prior to staining. As the kitchen is a high traffic area that is exposed to a lot of moisture and grease, it is important that in the interest of longevity, the wood is treated. Wood treatments can be applied using a brush or a cloth. Check the manufacturer’s recommendations for the number of coats required and drying times.
4. Stain the wood
The stain should be applied in a full flowing coat, ensuring all surfaces and end grains are fully coated. For best results use a good quality, long-haired, soft bristle brush. Avoid over brushing as this will cause brush marks and result in a poor quality finish.
Be sure to work in the direction of the grain and aim for a light, even coating. If you do notice sections looking darker than the rest, you can lighten this by rubbing off the excess stain with a fresh rag or cloth.
Allow the first coat to dry, which takes 2-4 hours, before applying a second coat. It is also recommended that you lightly scuff the cabinet surfaces with steel wool after the first coat before applying the second.
Many stains will have a sealer built into the product, meaning that no topcoat is needed. However, make sure you check the stain before calling it a day.
Can you stain over existing kitchen cabinets?
Yes, you can stain over existing kitchen cabinets, though you will need to remove all traces of the existing finish first to get the best and most professional result.
Is it difficult to stain kitchen cabinets?
It is not hard to stain kitchen cabinets – most DIYers can tackle the job perfectly well. The keys to success are: good and thorough preparation; the right wood stain and brush for application; ensuring a top coat is applied if needed. If you aren't confident of staining wood kitchen cabinets in place, removing doors and drawer fronts to stain them flat can give you better results.
Is staining kitchen cabinets a good idea?
Yes, if you want a really hardwearing finish. Staining kitchen cabinets allows you to easily touch up over time, as any marks or scuffs can quickly and effortlessly be covered up.
What is the best stain for kitchen cabinets?
The best stains for kitchen cabinets are water-based but always ensure that your wood stain matches your wood finish for best results.
Sign up to the Homes & Gardens newsletter
Design expertise in your inbox – from inspiring decorating ideas and beautiful celebrity homes to practical gardening advice and shopping round-ups.

Hayley is an interiors journalist, content provider and copywriter with 26 years experience who has contributed to a wide range of consumer magazines, trade titles, newspapers, blogs and online content. Specialising in kitchens and bathrooms, she has twice won the CEDIA Award for Best Technology feature. Hayley writes for H&G about kitchens, bathrooms, cleaning, DIY and organizing.
-
 Ina Garten's storage pantry is an insightful window into all of the best cookware used by the chef – and it's easy to recreate on your kitchen shelves from $48
The beautiful dishware in The Barefoot Contessa's Hamptons pantry showcases the tools she uses most often to cook – this is exactly how you replicate it
By Sophie Edwards Published
-
 Extend the lifespan of your appliance with 5 simple but crucial washing machine maintenance tips
From cleaning the filters to keeping the door open, experts reveal the washer tips they swear by
By Andy van Terheyden Published
-
 7 dorm room organizing rules for less clutter and more space
Experts offer their top tips for creating a well-organized dorm room, no matter the size, space, or layout.
By Ashley Chalmers Published
-
 How to maximize storage in a small or shared dorm room, according to pro organizers
Find out all the hidden storage zones you might never have noticed
By Ashley Chalmers Published