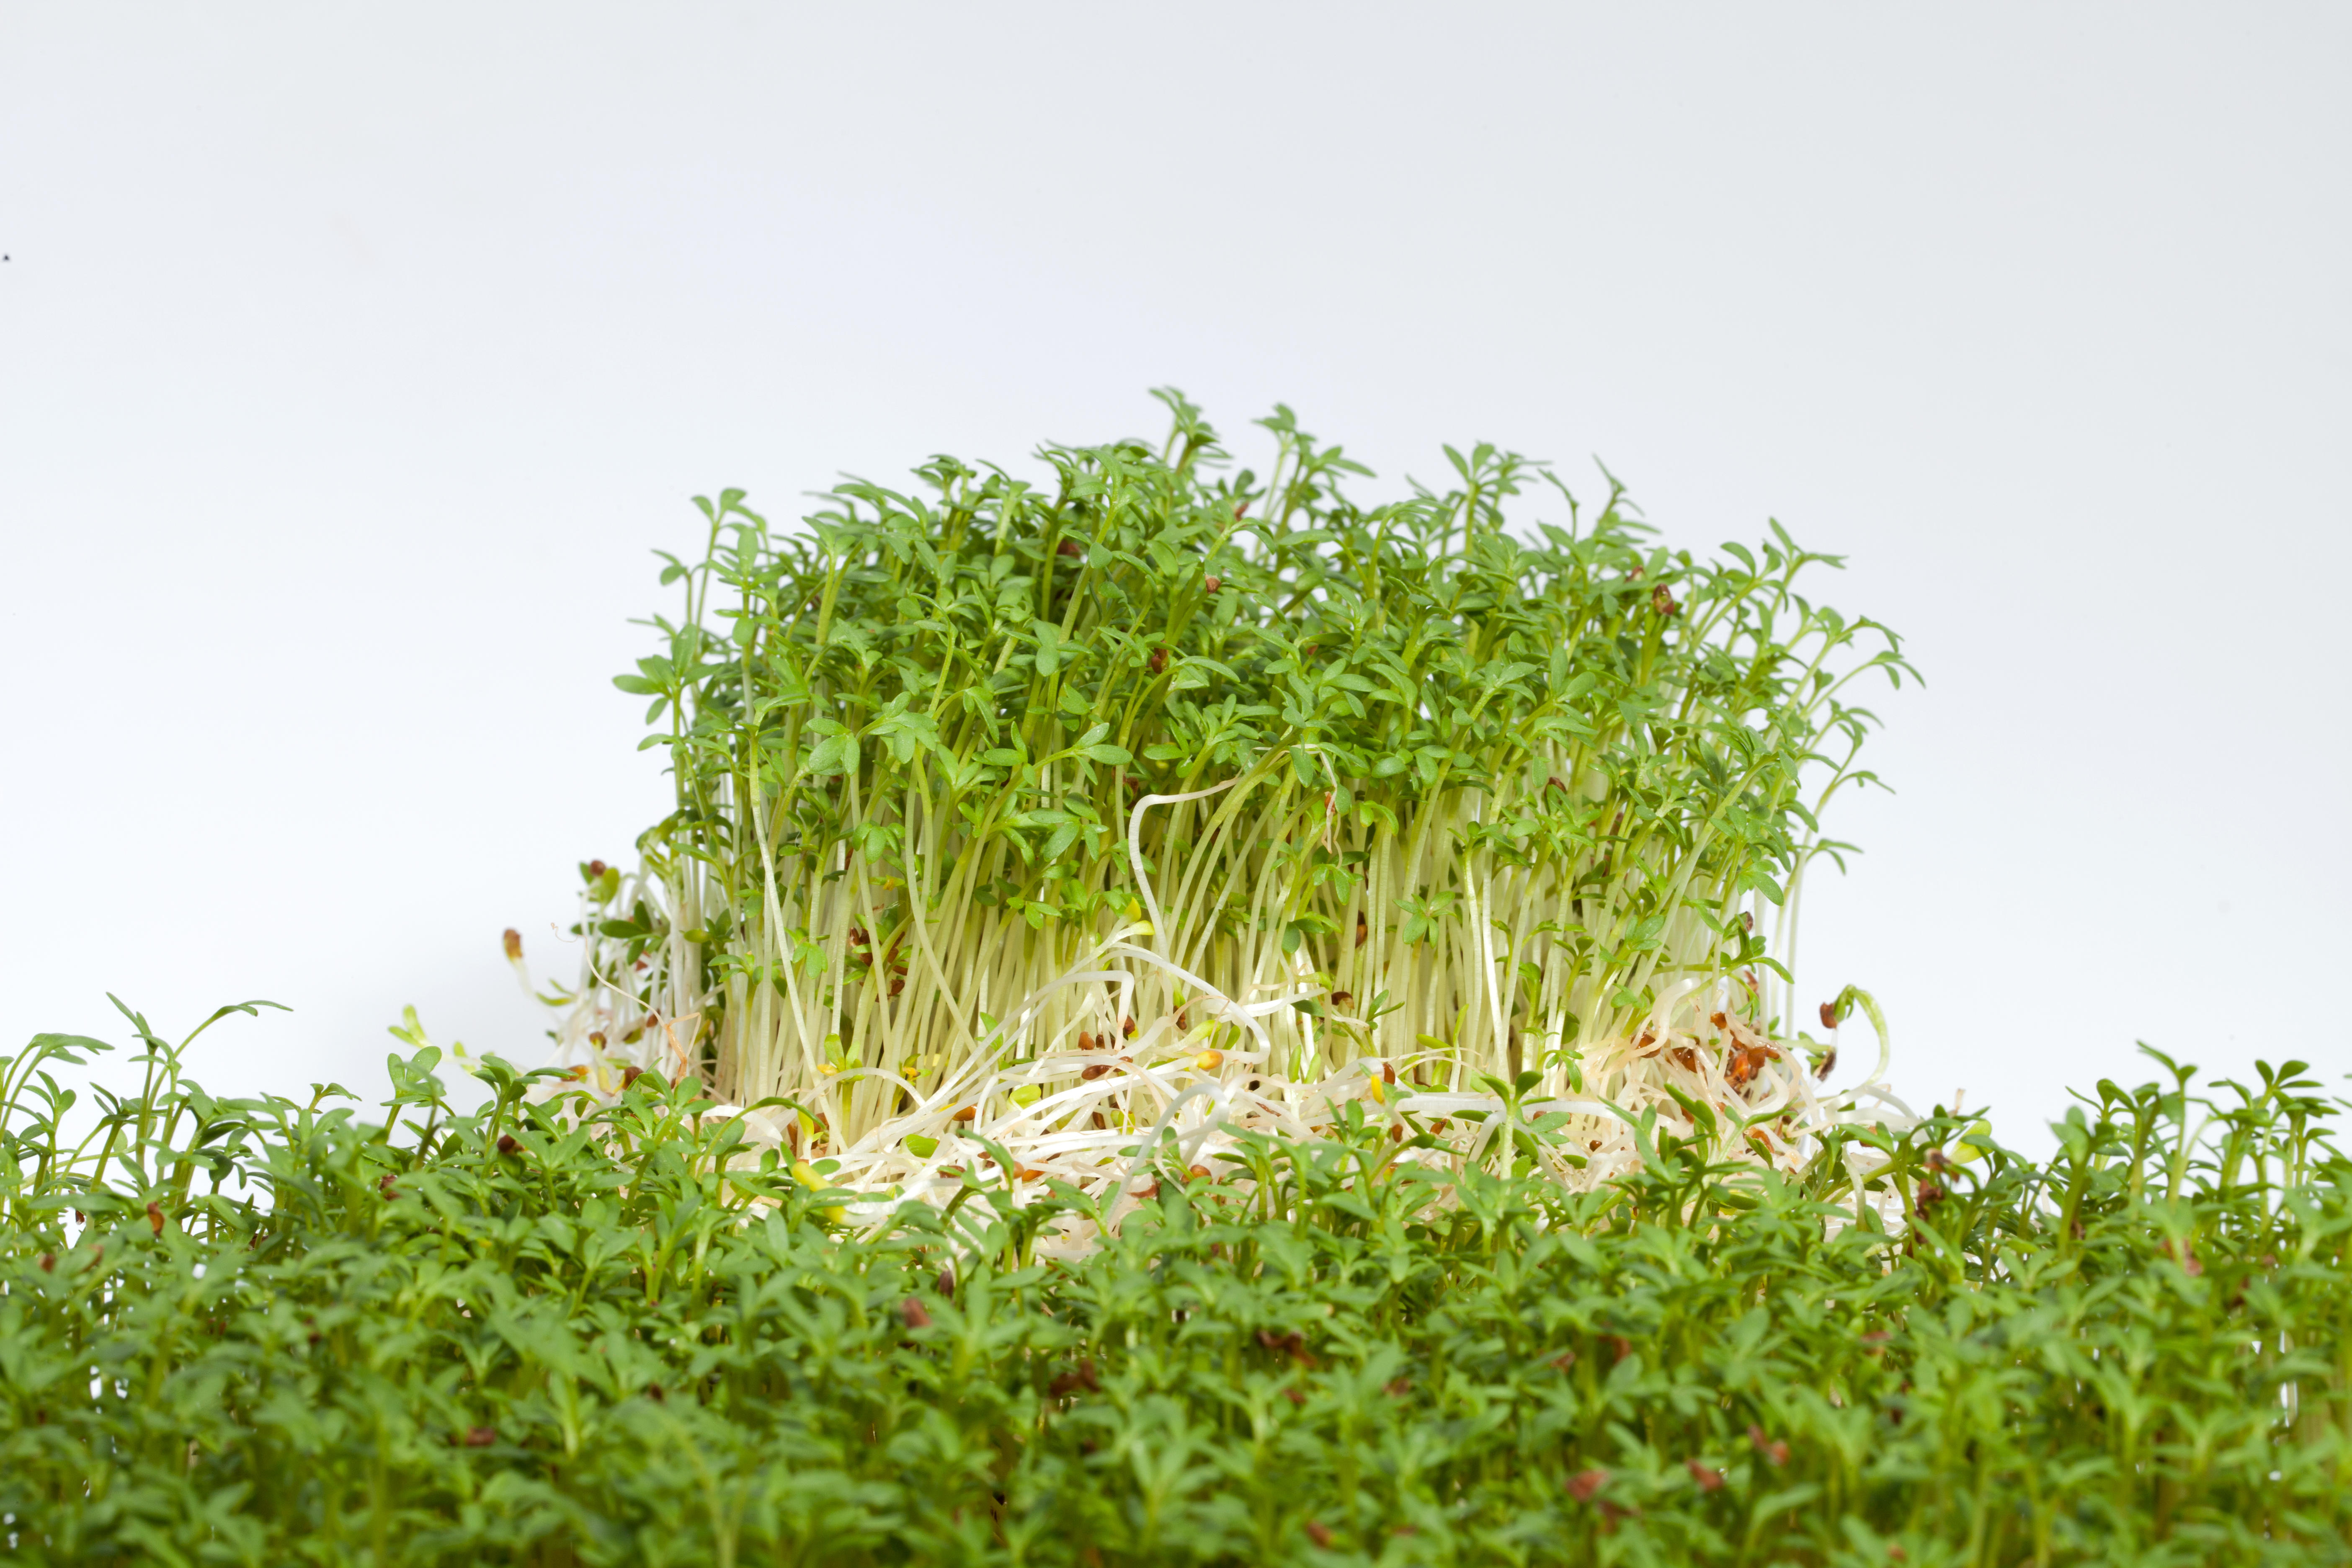
How to grow alfalfa sprouts – for fresh, tasty salads and garnish
Learn how to grow alfalfa sprouts for a speedy and delicious home crop


Once you discover how to grow alfalfa sprouts, you won’t want to stop. Easy to grow, these tiny, tasty plants allow you to enjoy homegrown sprouts in just five days.
Alfalfa (Medicago sativa) is a perennial plant and is used in traditional medicine and supplements. But it can be grown as part of your vegetable garden ideas and eaten fresh in salads or as a garnish in the form of alfalfa sprouts.
Bought as dry seeds, alfalfa needs next to no specialist equipment and requires very little house space, and our expert guide will show you how to grow alfalfa sprouts.
How to grow alfalfa sprouts

Give growing alfalfa sprouts a go and find out just how easy and rewarding they are. ‘These super quick crops are packed full of surprising and intriguing flavours that will enthrall your taste buds,’ say the team at Suttons.
Even more space-efficient than vegetable garden container ideas, alfalfa sprouts can be grown in a jar, tray, or even on paper towel.
A word of caution first. The CDC (Centers for Disease Control and Prevention) says that sprouts can cause foodborne illness. ‘Cook sprouts thoroughly to reduce the risk of illness,’ it advises. ‘Thoroughly cooking sprouts kills the harmful bacteria.’ It also recommends, ‘Children, older adults, pregnant women, and people with weakened immune systems should avoid eating raw sprouts of any kind.’
Note also the cautions on alfalfa from the US NIH (United States National Institutes of Health).
How much seed to use
A little goes a long way with sprouting seeds so start with a small amount to work out exactly what you need. Roughly 0.35oz (10g) of seed grows into 3.5oz (100g) of sprouts – that’s roughly 1½ cups worth – within five to six days.
How to grow alfalfa sprouts in a jar
In order to grow alfalfa sprouts, besides alfalfa sprouting seed, you will need a sprouting jar or similar wide-mouthed glass jar (a mason or pickling jar will work well) and a special mesh-covered sprouting lid or piece of muslin or open weave cotton and elastic band. This is essential for letting the seed breath and encouraging the sprouts to form. A fine sieve or strainer is also very useful for draining soaked seed. These are the steps to follow.
1. Soak and drain the seed
Fill the jar with cool water (not cold) and pour in all of the seed. Cover with the sprouting lid or open weave cloth secured with an elastic band. Leave to soak for eight to 10 hours (or overnight) before emptying out the water, using the strainer to catch any seed.
2. Leave to sprout
Shake out any remaining moisture and encourage the damp seed to spread out within the jar by gently shaking from side to side. Any moisture left within the jar will cause the seed to rot. Leave somewhere away from direct light at room temperature for eight to 10 hours.
3. Repeat the process
Rinse the seed once again with cool water, drain thoroughly, before spreading out in the jar and leaving for another eight to 10 hours. Sprouts should appear at the end of day one but repeat the rinsing/drying cycle for another four days until the sprouts reach your preferred size.
4. Allow air circulation
‘Whilst growing, leave the sprouts out of direct sunlight and at room temperature, and make sure they have some air circulation,’ say the sprouting seed experts Sky Sprouts. ‘If it is warm, the sprouts will grow faster, and if it is cool they will grow slower. Whether it is light or dark makes no difference until the sprouts have leaves.
5. Harvest alfalfa sprouts
When the sprouts have reached your ideal size, tip them out of the jar and spread them out on a tray in the sunlight. After 15 minutes they should have turned green – the sunlight will activate the enzymes. The sprouts can then be prepared for eating.
How to grow alfalfa sprouts on a tray
To grow alfalfa sprouts on a tray, follow the same process as growing them in a jar. Start by soaking the seed in a jar for between eight to 10 hours, before straining all the water off. Spread the seed evenly over the base of an unglazed clay tray or pot saucer.
Place the saucer in a watertight tray and fill until the water level is halfway up the side of the saucer. Place in a dark area and keep water levels topped up over the next four to five days. The clay will absorb enough water to nourish the seeds.
Once the sprouts are half to 2in (1.3 to 5.1cm) high move the saucer to a sunny windowsill. The sprouts can be eaten when they’ve turned green.
How to grow alfalfa sprouts on paper towel
To grow alfalfa sprouts on paper towel, soak the seeds in a jar overnight and strain through a fine sieve or piece of muslin. Once drained, soak a few sheets of paper towel in water, wring out until damp and spread on a shallow tray or plate.
Carefully spoon the soaked seed evenly on to the paper towel. Cover with another sheet before moving the tray to somewhere dark. Keep the paper towel slightly damp by misting with a water spray when needed. Sprouts should appear after two or three days.
Keep the paper towel in the dark until the sprouts are the desired size – usually around five to seven days. Remove the tray and place on a sunny windowsill to ‘green’ up before harvesting.
‘To harvest your greens without any waste, you can gently pull them away from the paper towel and they should separate. This will leave the roots and seed hulls intact,’ say Adam Sayner and Eric Jong of Grocycle.
Is it safe to grow your own alfalfa sprouts?
Is it safe to grow your own alfalfa sprouts, but always opt for those sold as being for sprouting. Alfalfa is grown as a farm and forage crop, as well as a cover crop, so it’s important to used seeds that are destined for human consumption.
How long does it take to grow alfalfa sprouts?
It takes very little time to grow alfalfa sprouts. The sprouts will likely appear at the end of the first day of growing, but they’ll take around five days in total to get to a suitable size.
Sign up to the Homes & Gardens newsletter
Design expertise in your inbox – from inspiring decorating ideas and beautiful celebrity homes to practical gardening advice and shopping round-ups.

Journalist Jill Morgan has spent over 20 years writing and editing gardening, interior and property features. Titles she has worked on include The English Home, House Beautiful, Ideal Home, Houzz and Modern Gardens and she writes regularly for H&G as a Contributing Editor. Whilst she is a dab hand at renovation projects and DIY, she is happiest when out digging in the garden or planning a new border.
-
 How to grow impatiens – garden experts reveal the secrets to growing this shade-tolerant, sparkling summer plant
Both 'Busy Lizzie' and 'New Guinea' impatiens can thrive in shady yards
By Ellen Wells Published
-
 Charli XCX's dining room is a 'treasure-trove' of one-of-a-kind pieces – it's the most unique hosting space I've ever seen (and surprisingly replicable)
The singer's Tudor-style dining room features eclectic furnishings, a mix of patterns and bright colors that all work together beautifully
By Hannah Ziegler Published