DIY greenhouse ideas – 10 budget-friendly ways to add one to your yard
From simple designs made from recycled materials to DIY kits, it's easy to protect your plants without blowing the budget
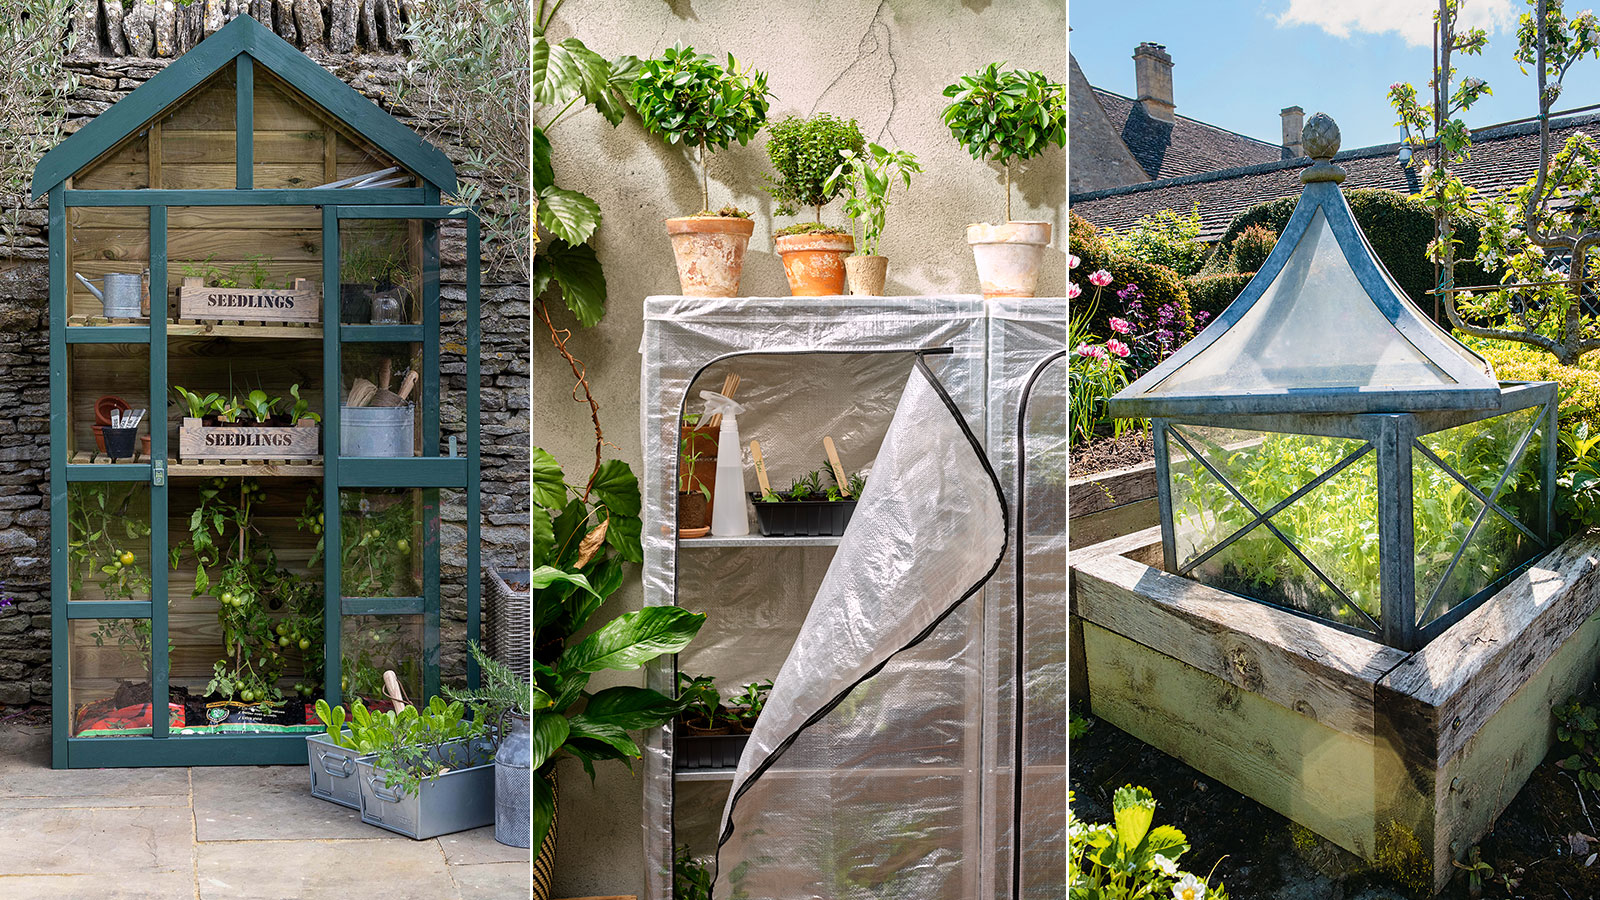

A greenhouse is a useful tool for any home gardener, allowing you to expand your growing season and keep tender seedlings and plants protected from cooler weather. And while a beautiful greenhouse can certainly be a worthwhile investment (and look great too), they aren’t always the most budget-friendly of buys.
The good news is that adding a greenhouse to your backyard doesn’t have to be expensive. With a few clever tricks you can create everything from some mini greenhouse ideas that are ideal for covering individual plants, to a recycled design that makes use of waste materials for a cozy spot for tender plants and crops.
'All garden plants benefit from a bit of protection, especially when starting into growth in late winter and spring. Even hardy plants fair better, being less damaged by wind or hailstones, and making strong early growth in the slightly warmer covered space,' says gardening expert Tim Rumball. 'They’ll come on earlier and develop into sturdy plants more quickly, giving earlier flowers or crops.'

Beth has been writing about homes and gardens for over 20 years, contributing to a number of leading magazines, including Real Homes, 4Homes, Period Living and Grand Designs. In 2020, Beth took on the role of launch Editor in Chief of Gardeningetc.com, a website dedicated to gardening and outdoor living. At the start of 2023, she moved to Homes & Gardens as the Head of Gardens, bringing her passion and knowledge for all things outdoors to our team.
10 simple yet clever DIY greenhouse ideas
Whether you're after a quick way to protect plants, or want to create more growing space for young seedlings, these methods are easy to achieve and won't cost you big bucks. They are certainly worthy of a place on my list of backyard ideas on a budget.
1. Add a cover to a basic shelving unit
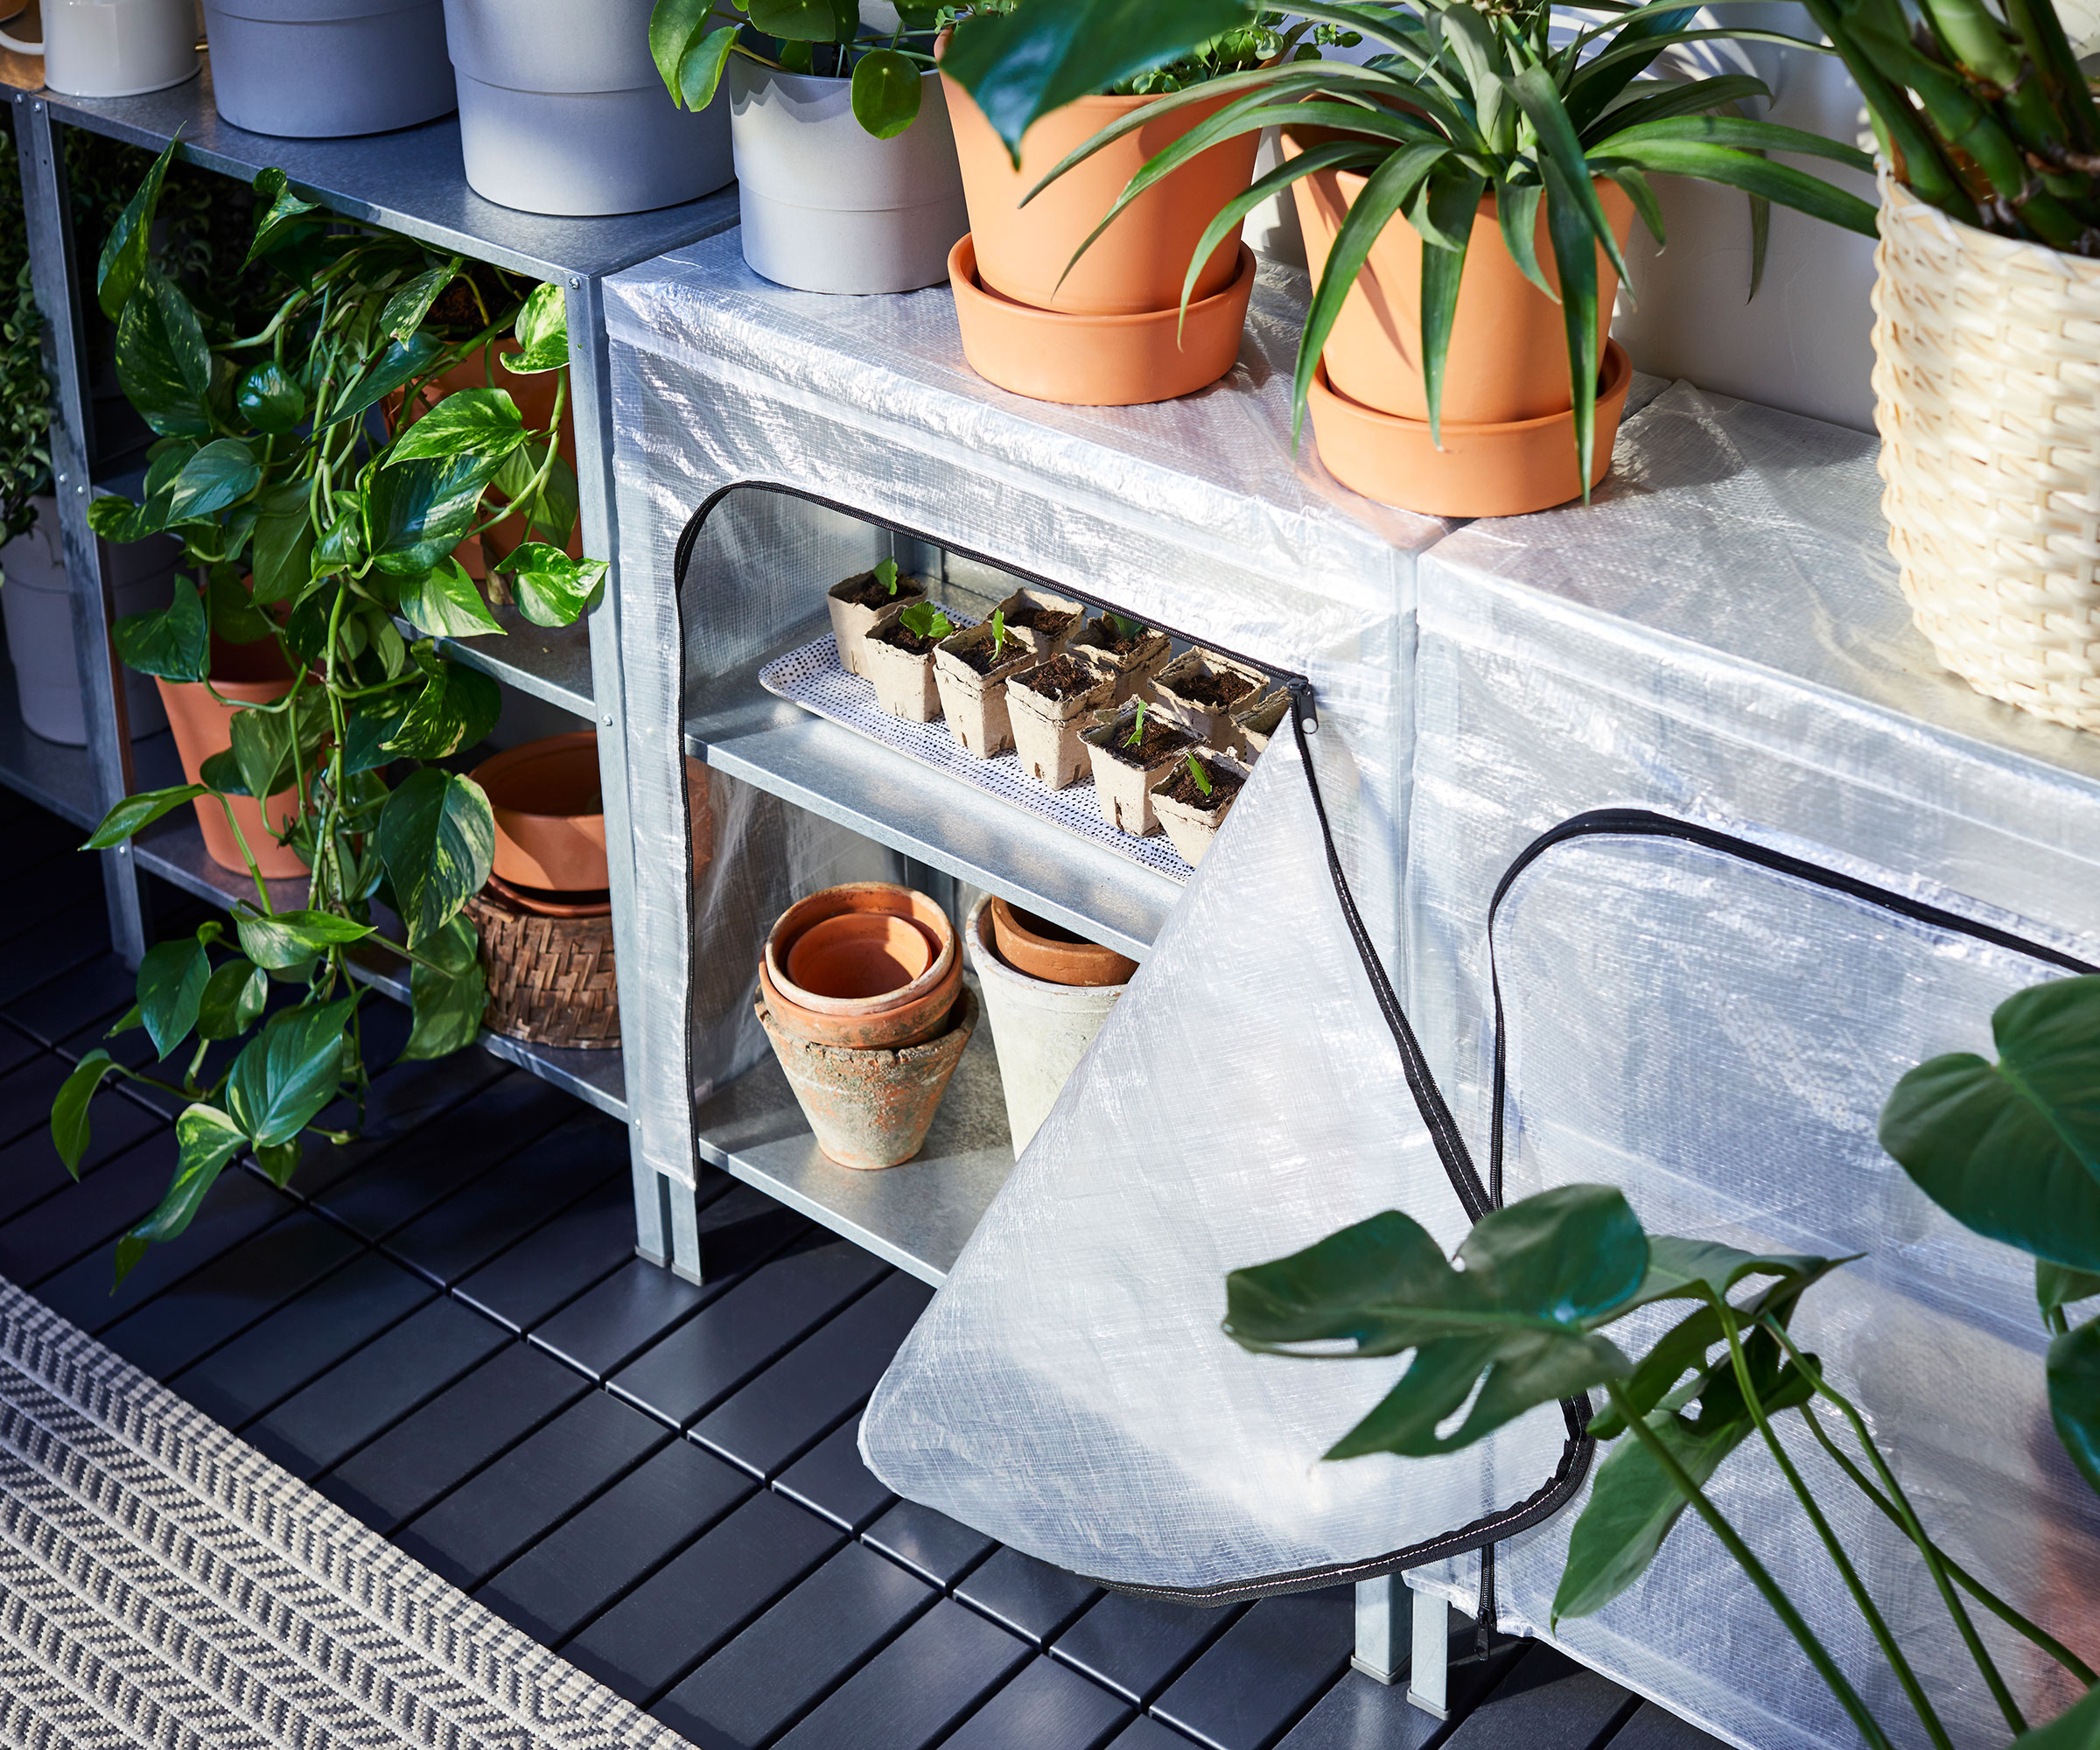
Hyylis shelving unit and matching cover from Ikea
If you're short on growing space, a mini greenhouse is a brilliant addition to a small backyard or balcony garden. And you don't need to buy a specially-made one either. You can easily adapt an indoor/outdoor shelving unit you already own by simply insulating it with a plastic cover to turn it into a greenhouse.
A metal backyard storage or shelving unit is likely to be the best option as it will be able to withstand most weather conditions and will be sturdier on windy days. If you've got an old wooden shelving unit in your home that you no longer use, you could still adapt this, but giving it a coat of exterior wood paint would be advisable to ensure it is more durable. Paint it to match your outdoor color scheme and you've got yourself a new focal feature too.
Opt for a cover that has vents or a front that can be opened up so you can ensure there is plenty of airflow on warmer days.
4 Tier Greenhouse Cover | $24.99 from Amazon
Suitable for slotting over a simple shelving unit, this plastic cover features a zipped front door that can be rolled up to increase airflow inside the greenhouse. Made from heavy duty reinforced polyethylene, it's windproof and will provide plenty of protection for your plants.
2. Create a greenhouse area in a raised bed
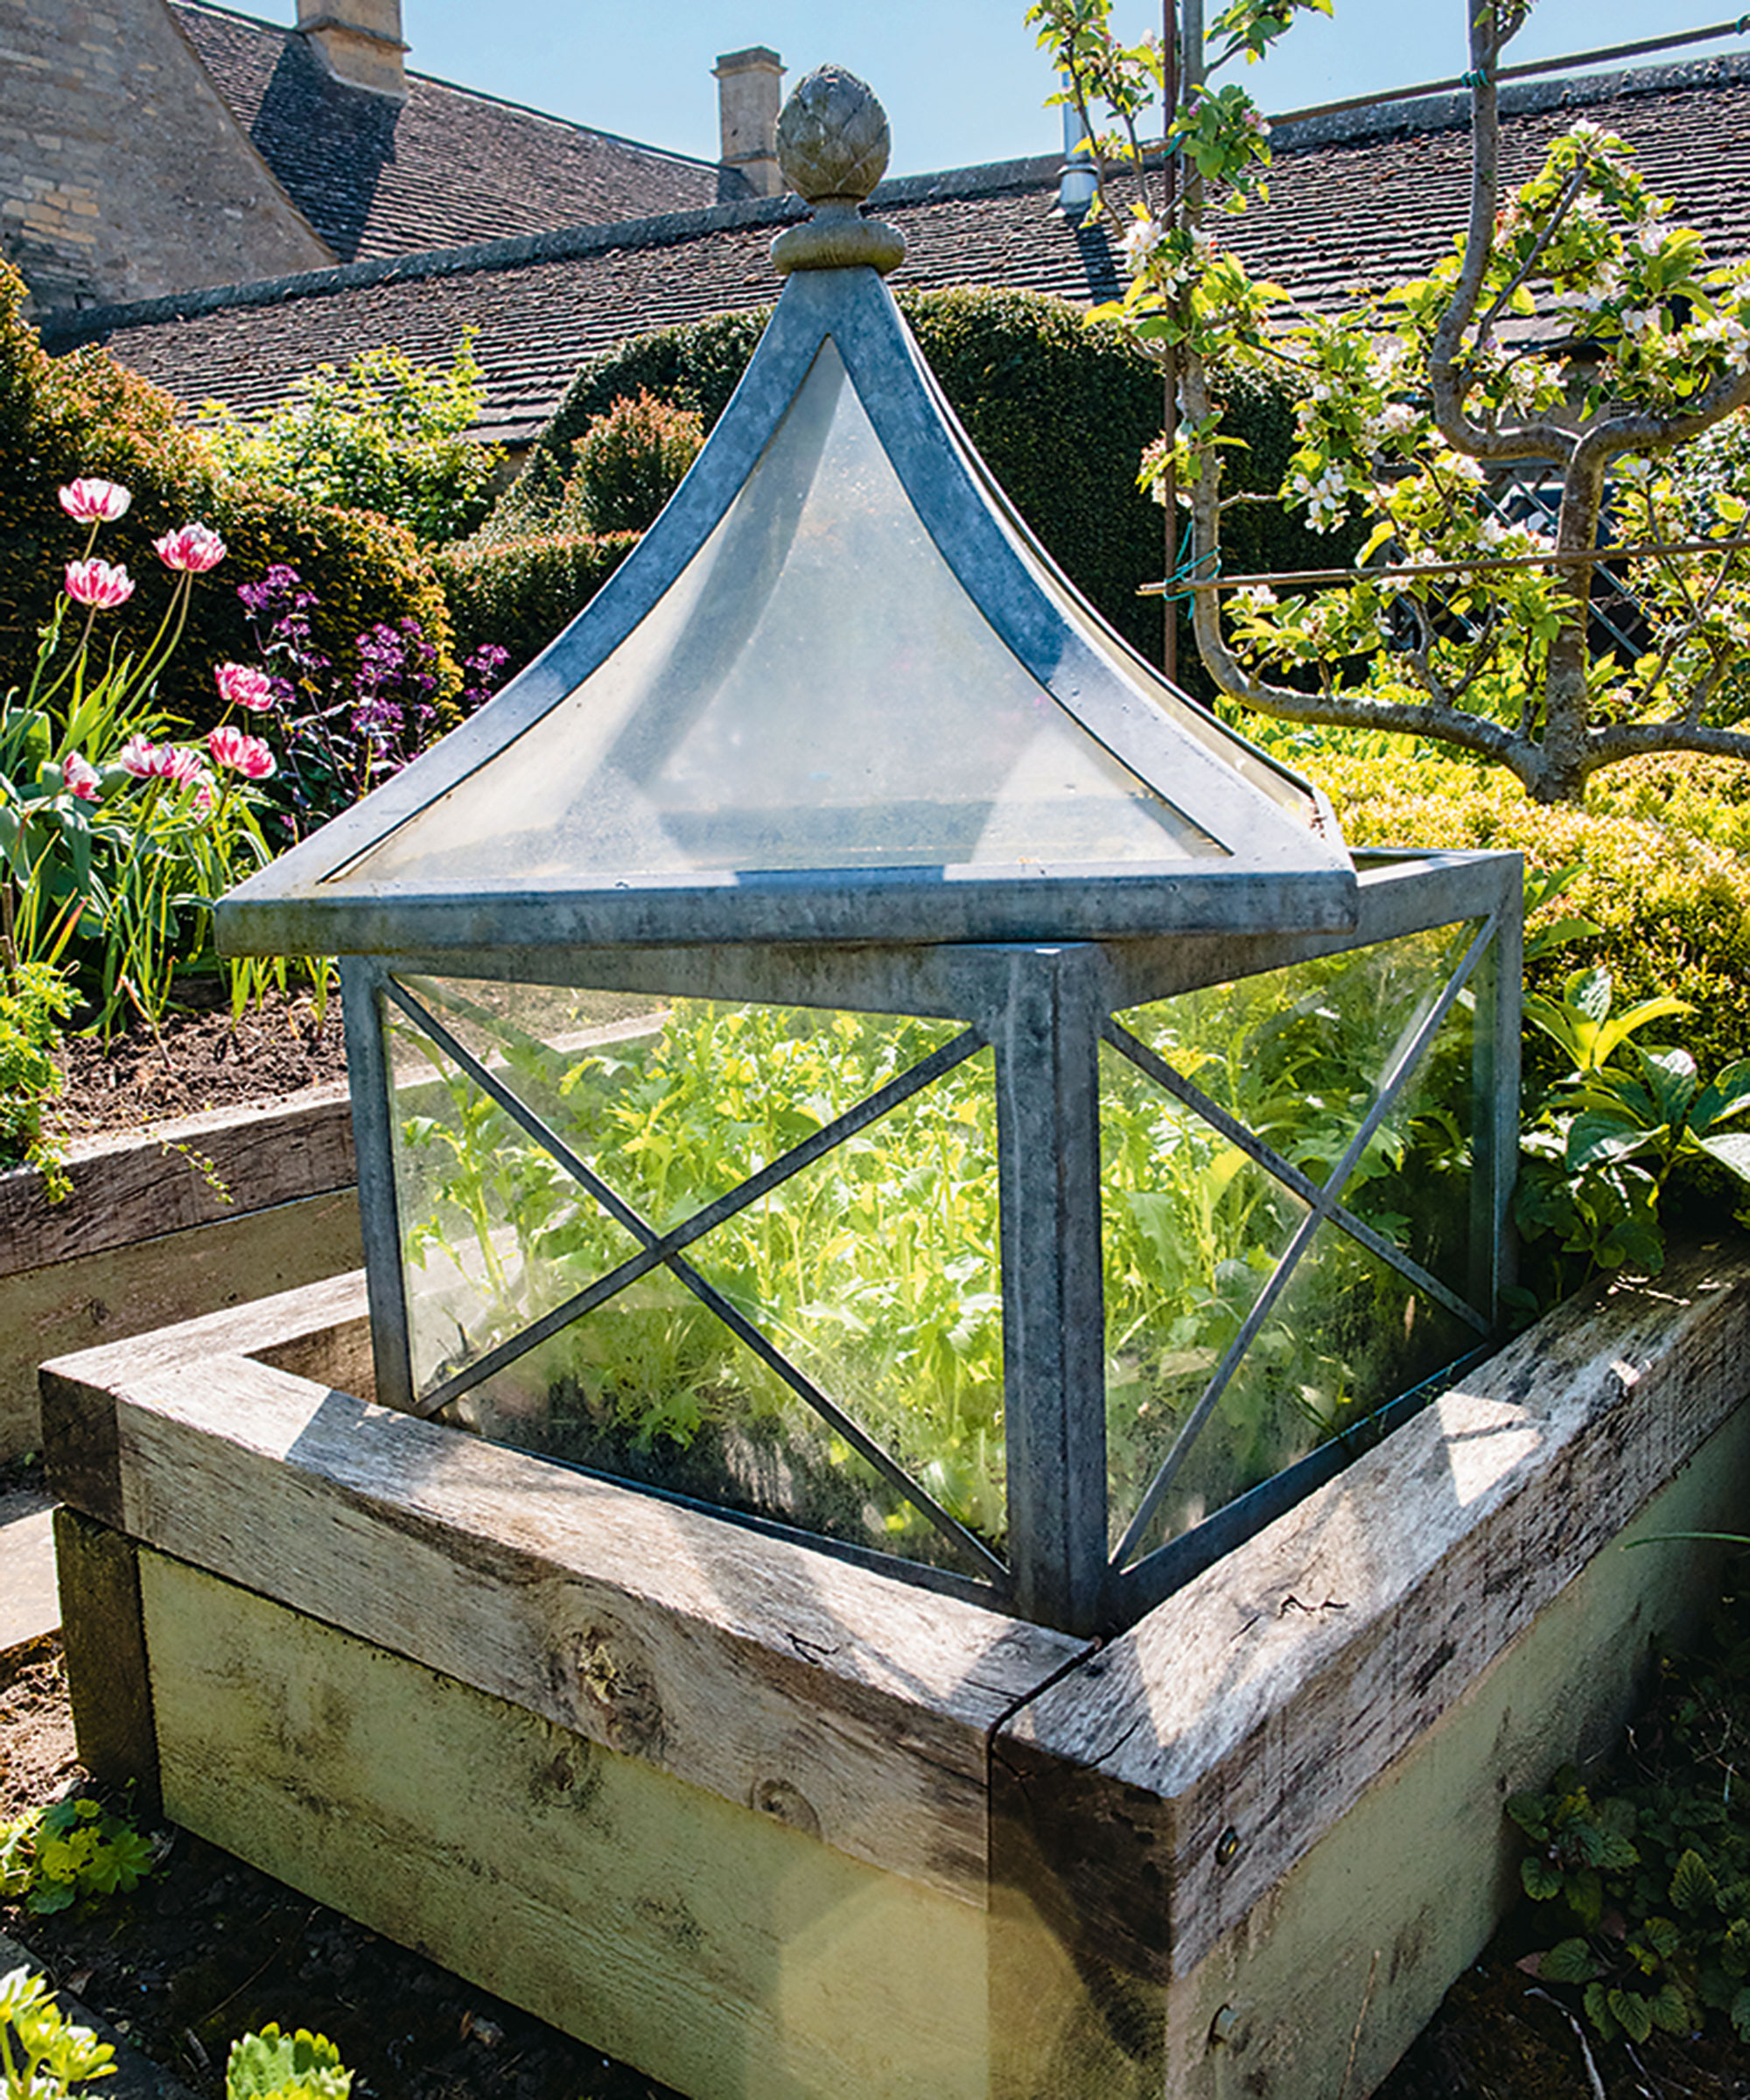
A cloche allows you to create a mini greenhouse where you need it most
If you use raised garden beds for growing flowers or fruit and vegetable crops, being able to create a micro climate in one part of the bed can be useful for protecting tender plants, or those that prefer warmer growing conditions. It can also be an effective way of warming up soil in early spring before planting any seeds.
Your cloche (the protective cover) needs to be big enough so that your plants don't touch the side of it. This is important to ensure good air circulation and to stop the plants suffering from frost burn.
'Unless you’re using a heavy glass Victorian design, it is essential to fix the cloche in place,' says Tim Rumball. 'Light plastic structures will blow away in strong winds. Some rigid plastic cloches have holes around the base so you can fix them in the soil with wire tent pegs. Supplement these in windy areas by piling soil or placing stones on the lip around the base.'
Tim Rumball was editor of Amateur Gardening magazine in the UK for 20 years. He is a keen grower of edibles and wrote a popular series called Grow, Cook and Eat. He is also known for his practical no-nonsense approach to gardening.
Reusable Plant Protector | $17.99 for three at Walmart
Protect young seedlings or tender plants with this simple plastic cloche. It comes as a pack of three covers, and each one has three anchor pins to help secure it in the soil. It can also prevent animals from tucking into your plants or crops.
Erinn Witz, a garden expert and co-founder of Seeds And Spades has another suggestion for creating a DIY greenhouse on a raised bed: 'I have a small hoop-house top on one of my raised beds. The bed itself is made from cinder blocks and cedar wood, and the top hoop portion is made from curved PVC piping and heavy-duty UV plastic,' she says. 'One really nice thing is that the hoop top is hinged, so it’s a breeze to open or close. I’ve found that I can plant leafy greens and lettuces several weeks earlier in the spring versus uncovered beds, and some hardy greens have survived into December under the protective cover (pretty impressive for northern Illinois!).'
3. Re-use old windows to shelter plants
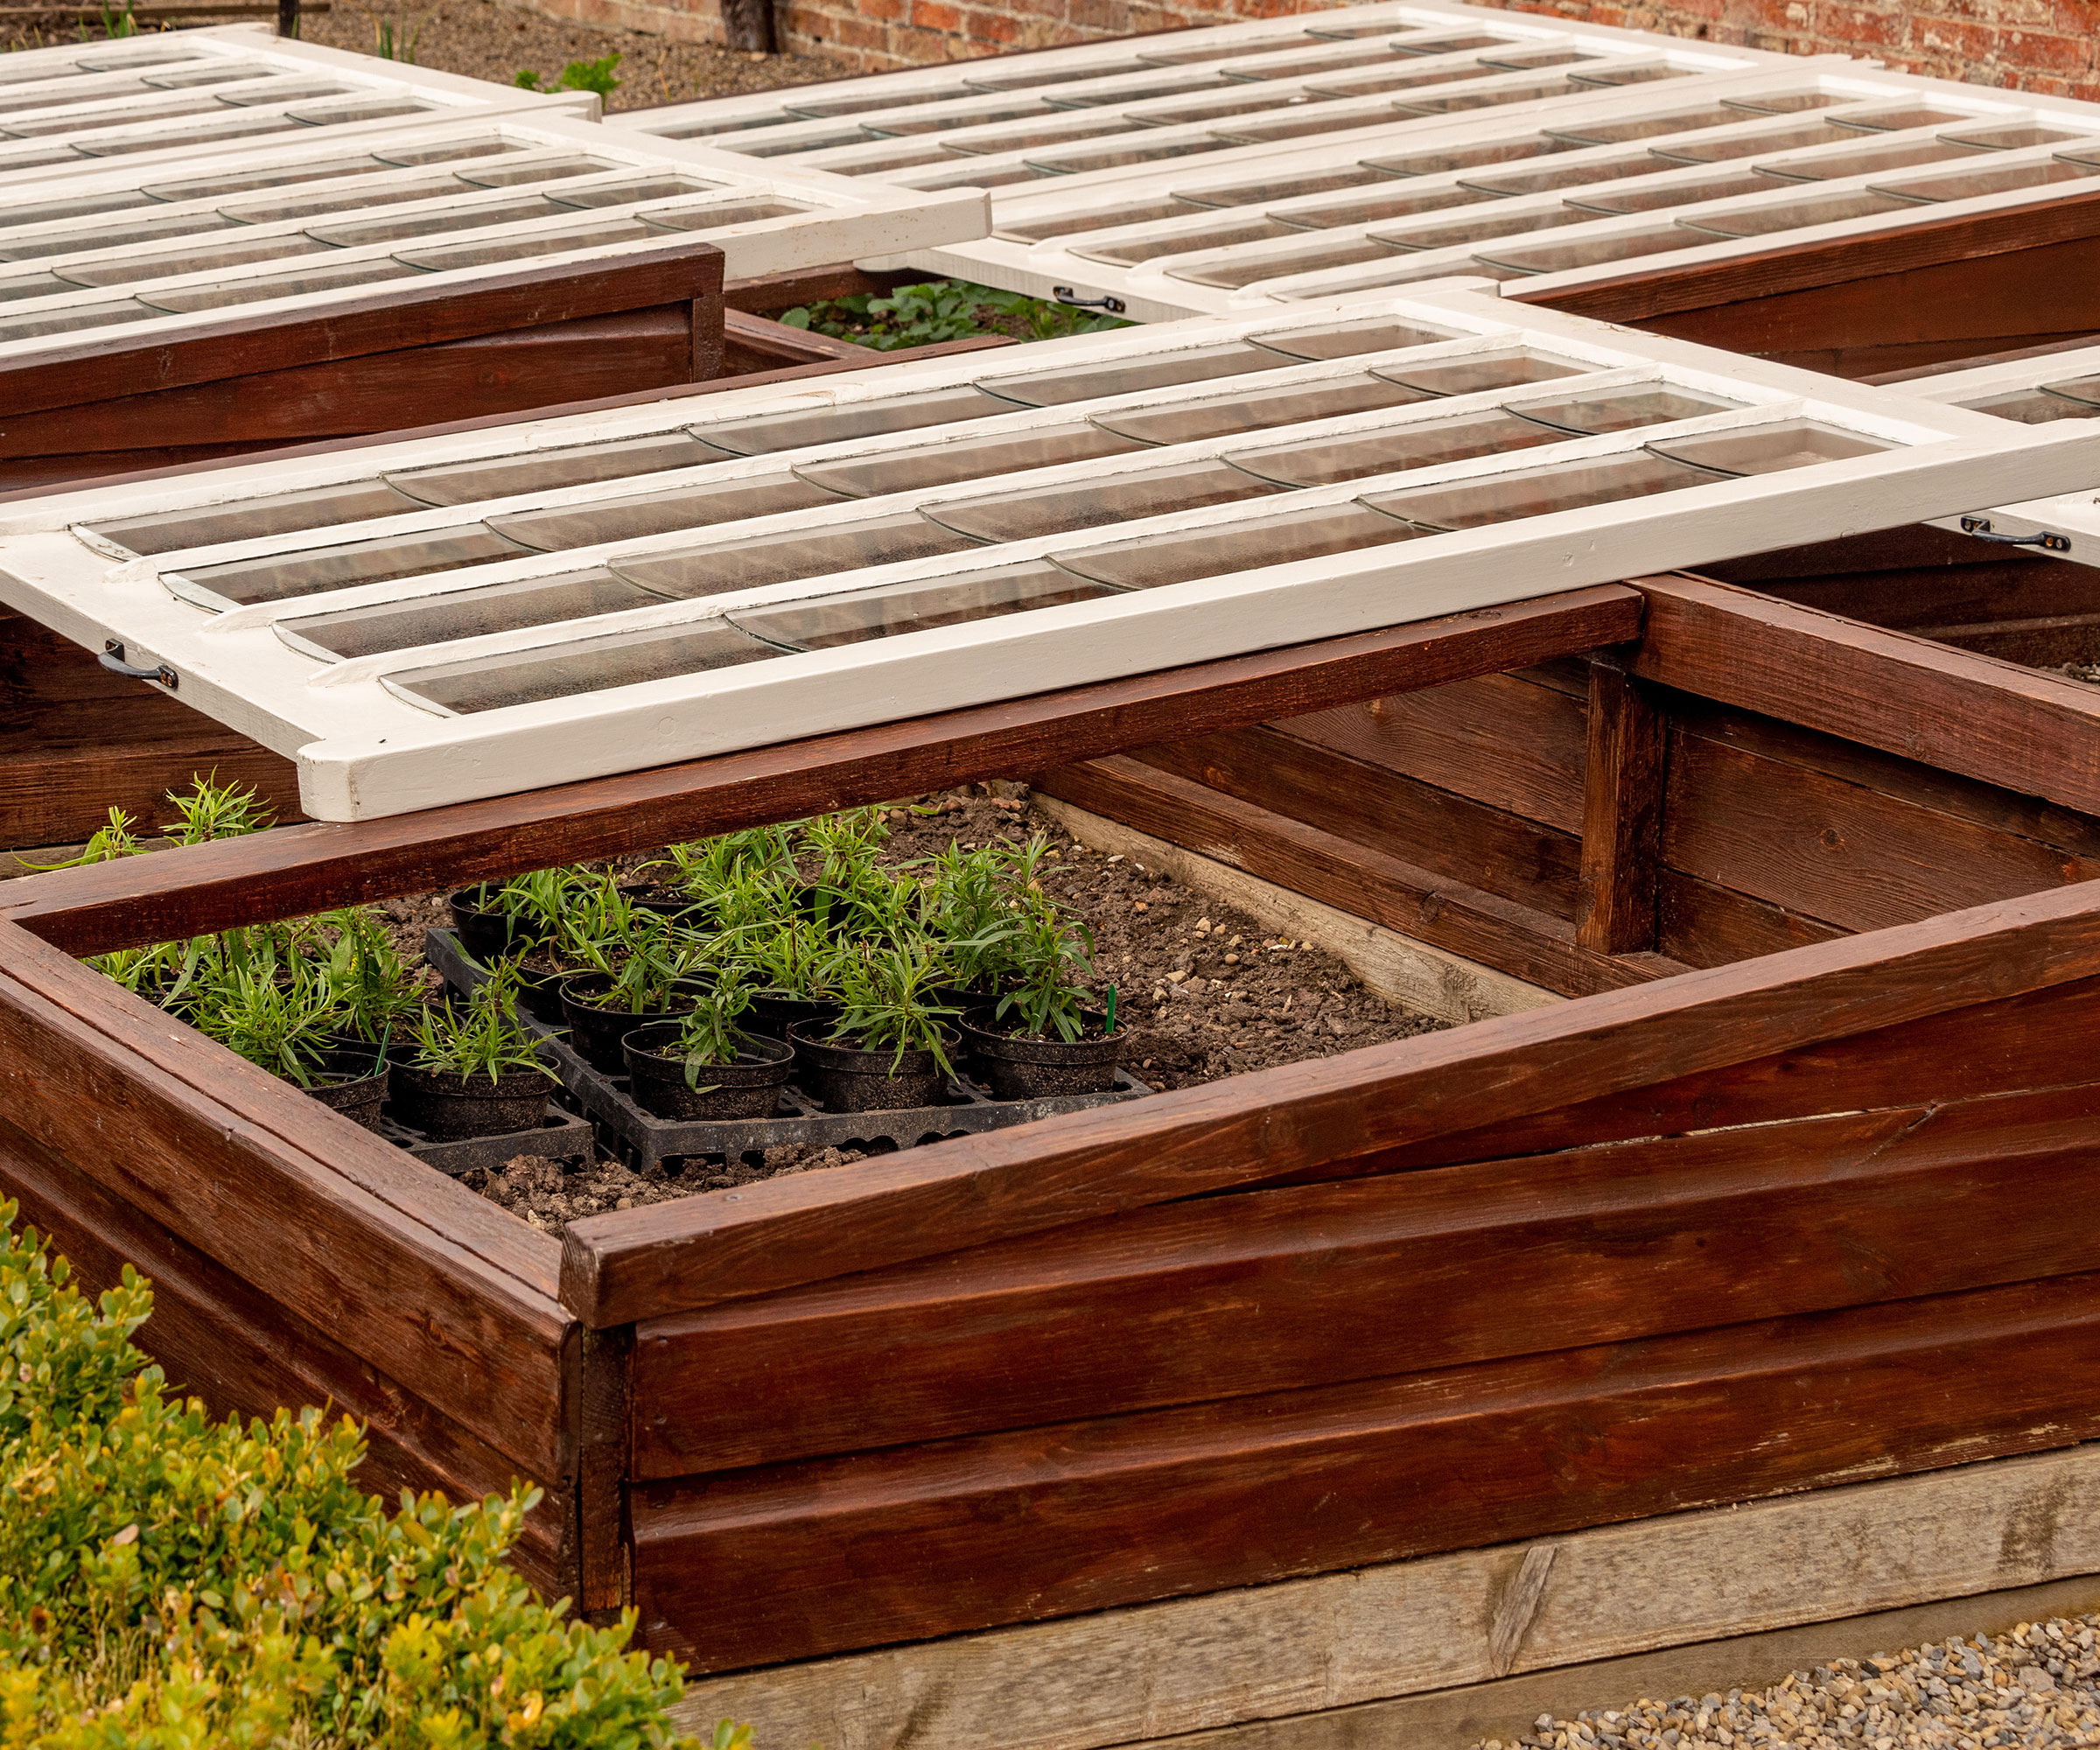
Make use of salvaged items for your DIY greenhouse
I love the idea of putting old materials to use in my garden, giving items I no longer need a new lease of life. I've created compost bins from old wooden pallets and built an insect house from leftover bricks and scraps of wood. So the idea of using old window frames as a temporary lid or cover for a cold frame gets my vote.
Erinn Witz is a fan too: 'One great way to build a small cold frame greenhouse is with old glass windows – the kind you take out when you replace windows in your home or as a salvage from someone else’s remodel. You could build a wooden box structure with an open top, then attach the window to let in light and create the greenhouse effect. Insulating the cold frame outer walls with straw bales can allow you to grow even earlier or later in the year.'
'A cold frame can be an alternative to a more expensive greenhouse as it offers a plethora of benefits to the home gardener. It can protect plants from frost and cold weather, and is vital when hardening off plants as you can adjust the lid to give young plants just the right amount of protection. On top of that, the cold frame can also be used as a cover to shield plants from excessive rain,' says Drew Swainston, a former professional gardener and content editor for Homes & Gardens. 'Cold frames also allow growers to extend the growing season and start sowing seeds earlier than you could outdoors. A cold frame offers many of the benefits of a greenhouse, without the same price tag attached.'
Drew is a former professional gardener in the UK who worked in productive kitchen gardens growing fruit, vegetables, and herbs for chefs. As content editor for Homes & Gardens he now shares his extensive knowledge on everything from growing vegetables successfully outdoors to raising crops and seedlings in greenhouses and cold frames.
4. Make a basic greenhouse using plastic bottles
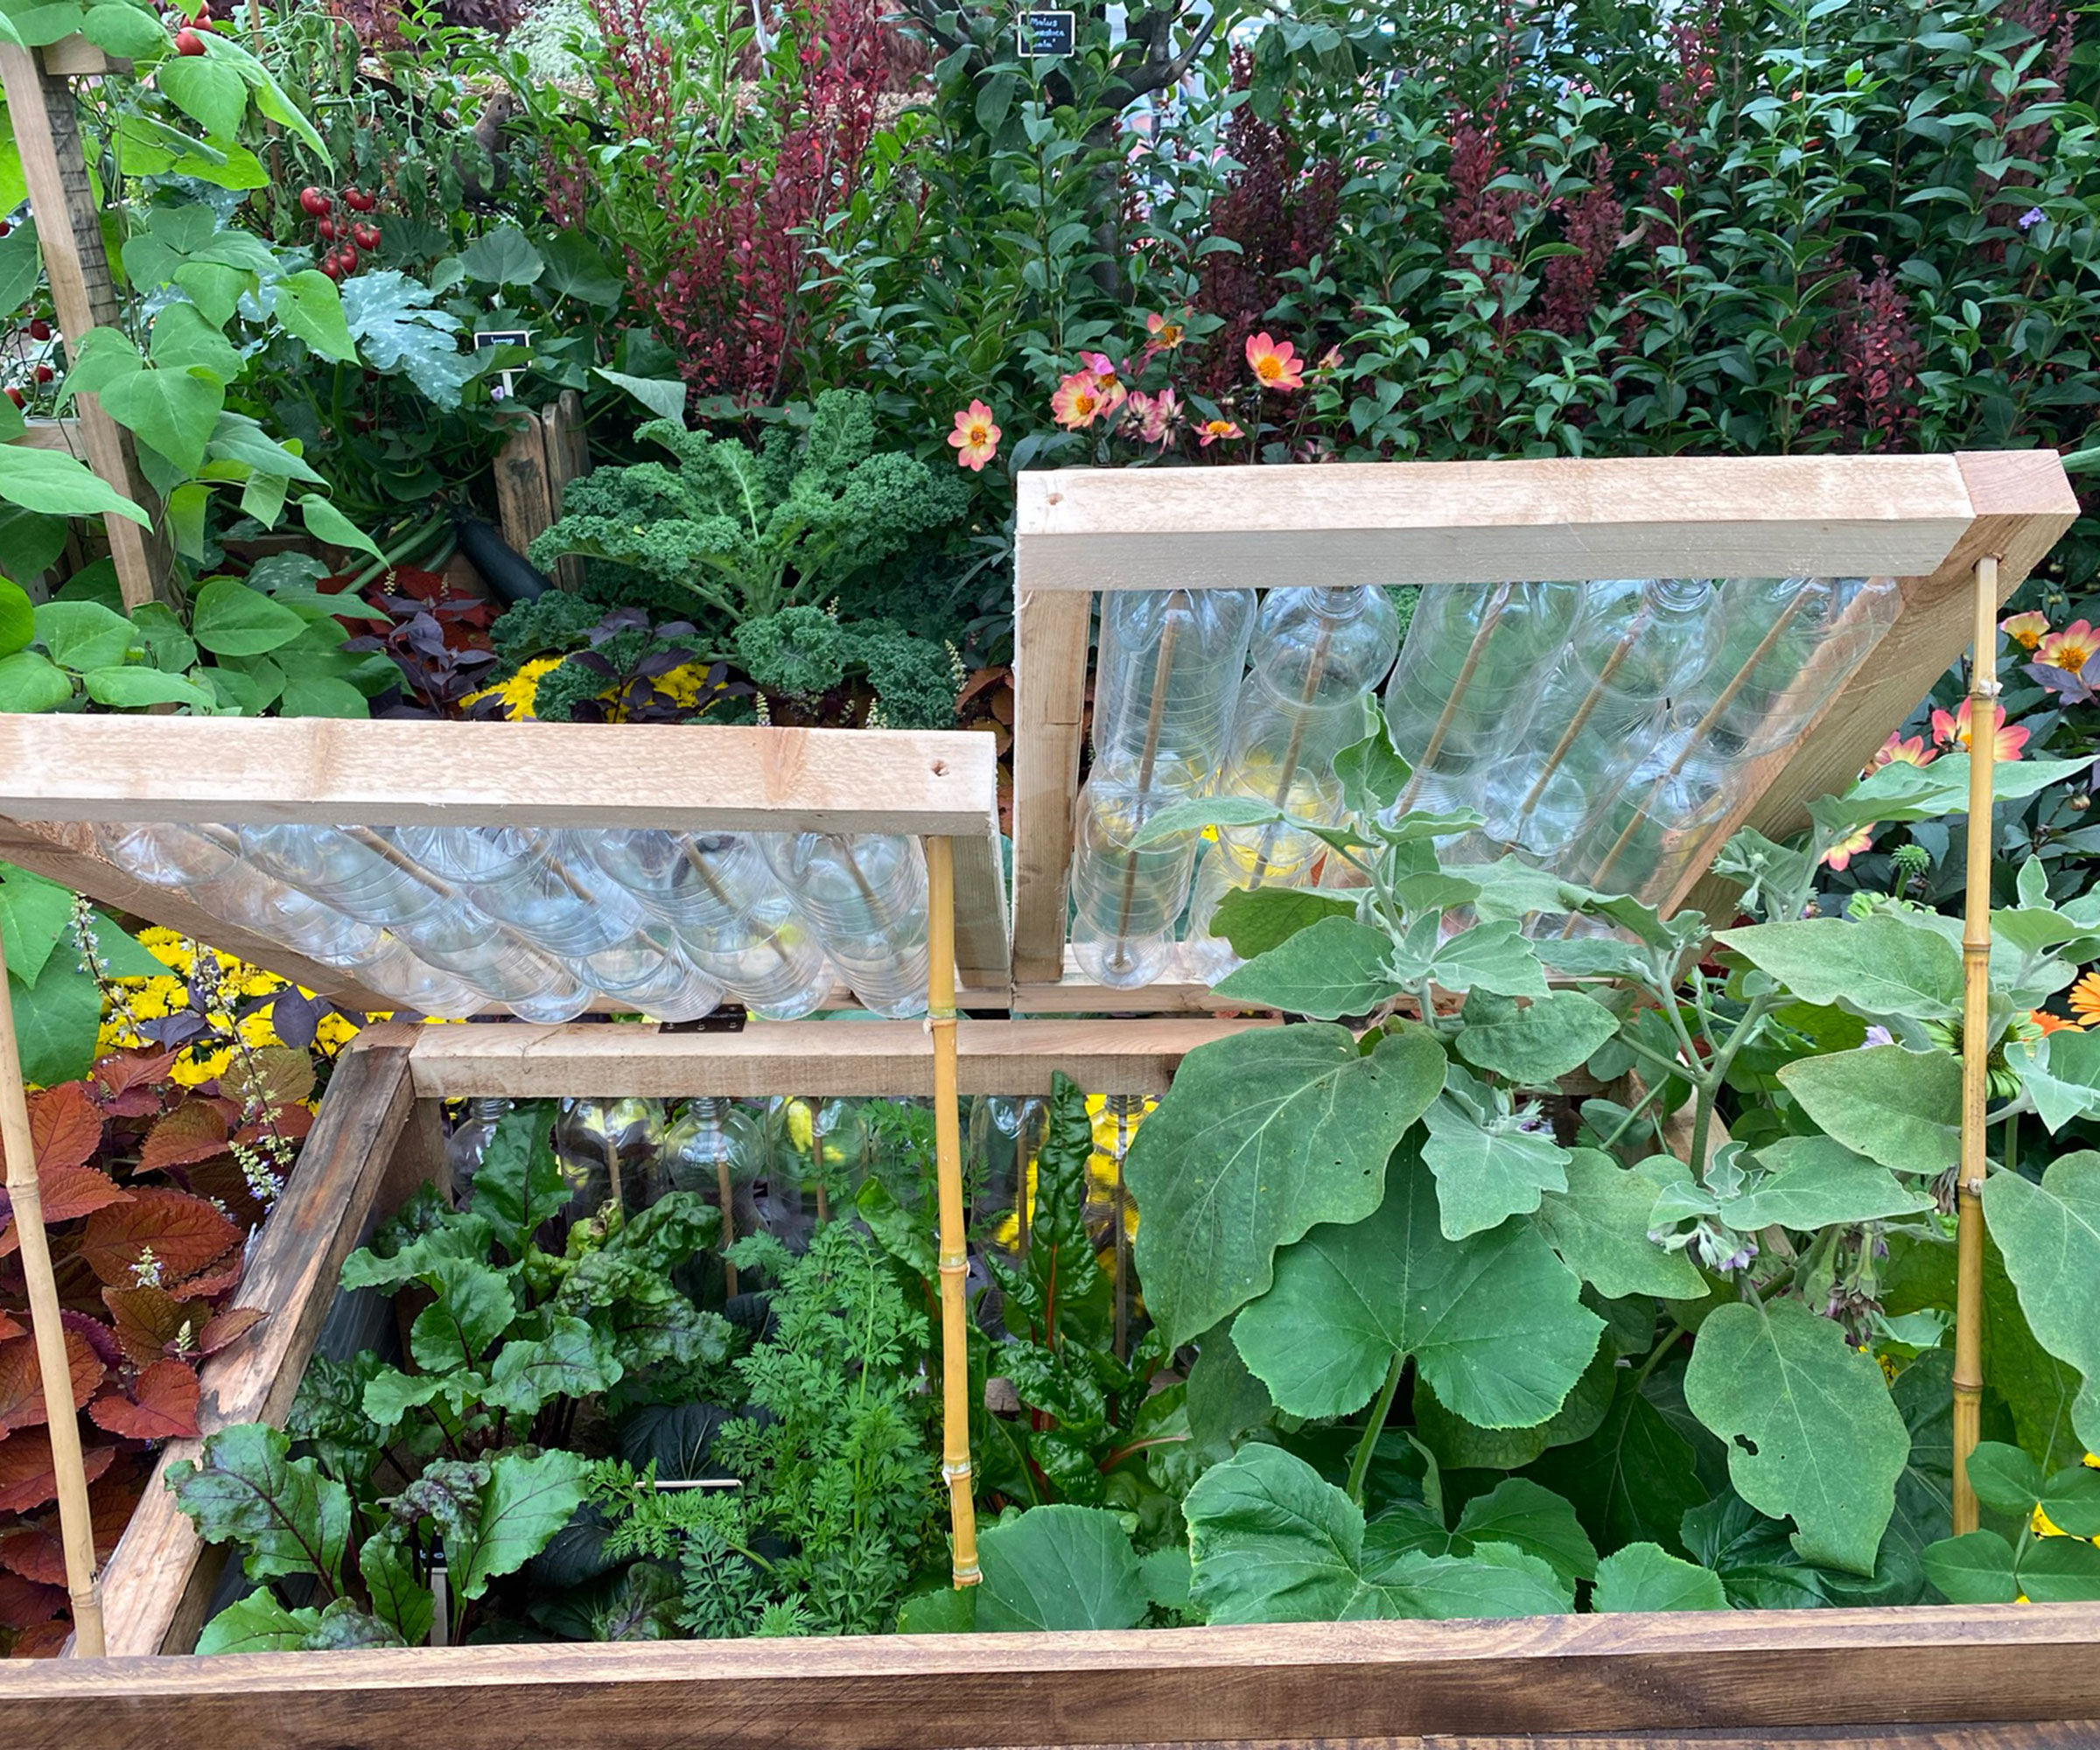
Plastic bottles will help to insulate your plants
If you don't have any windows available to use as the roof of your cold frame, how about this sustainable gardening idea instead? I spotted this on a recent visit to Chelsea Flower Show in the UK and loved how simple yet effective it was.
A basic wooden structure forms the main frame of the cold frame, while bamboo canes are pushed through the plastic bottles before being wedged into place on the frame to form the sides and lid. The plastic bottles are a great insulator, helping to keep plants protected inside the frame. A couple of extra bamboo canes at the front can be used to prop open the lid on warmer days and improve air circulation.
It's a great one to try in a vegetable garden as a way of getting your kids interested in both recycling and growing crops.
5. Buy a DIY greenhouse kit
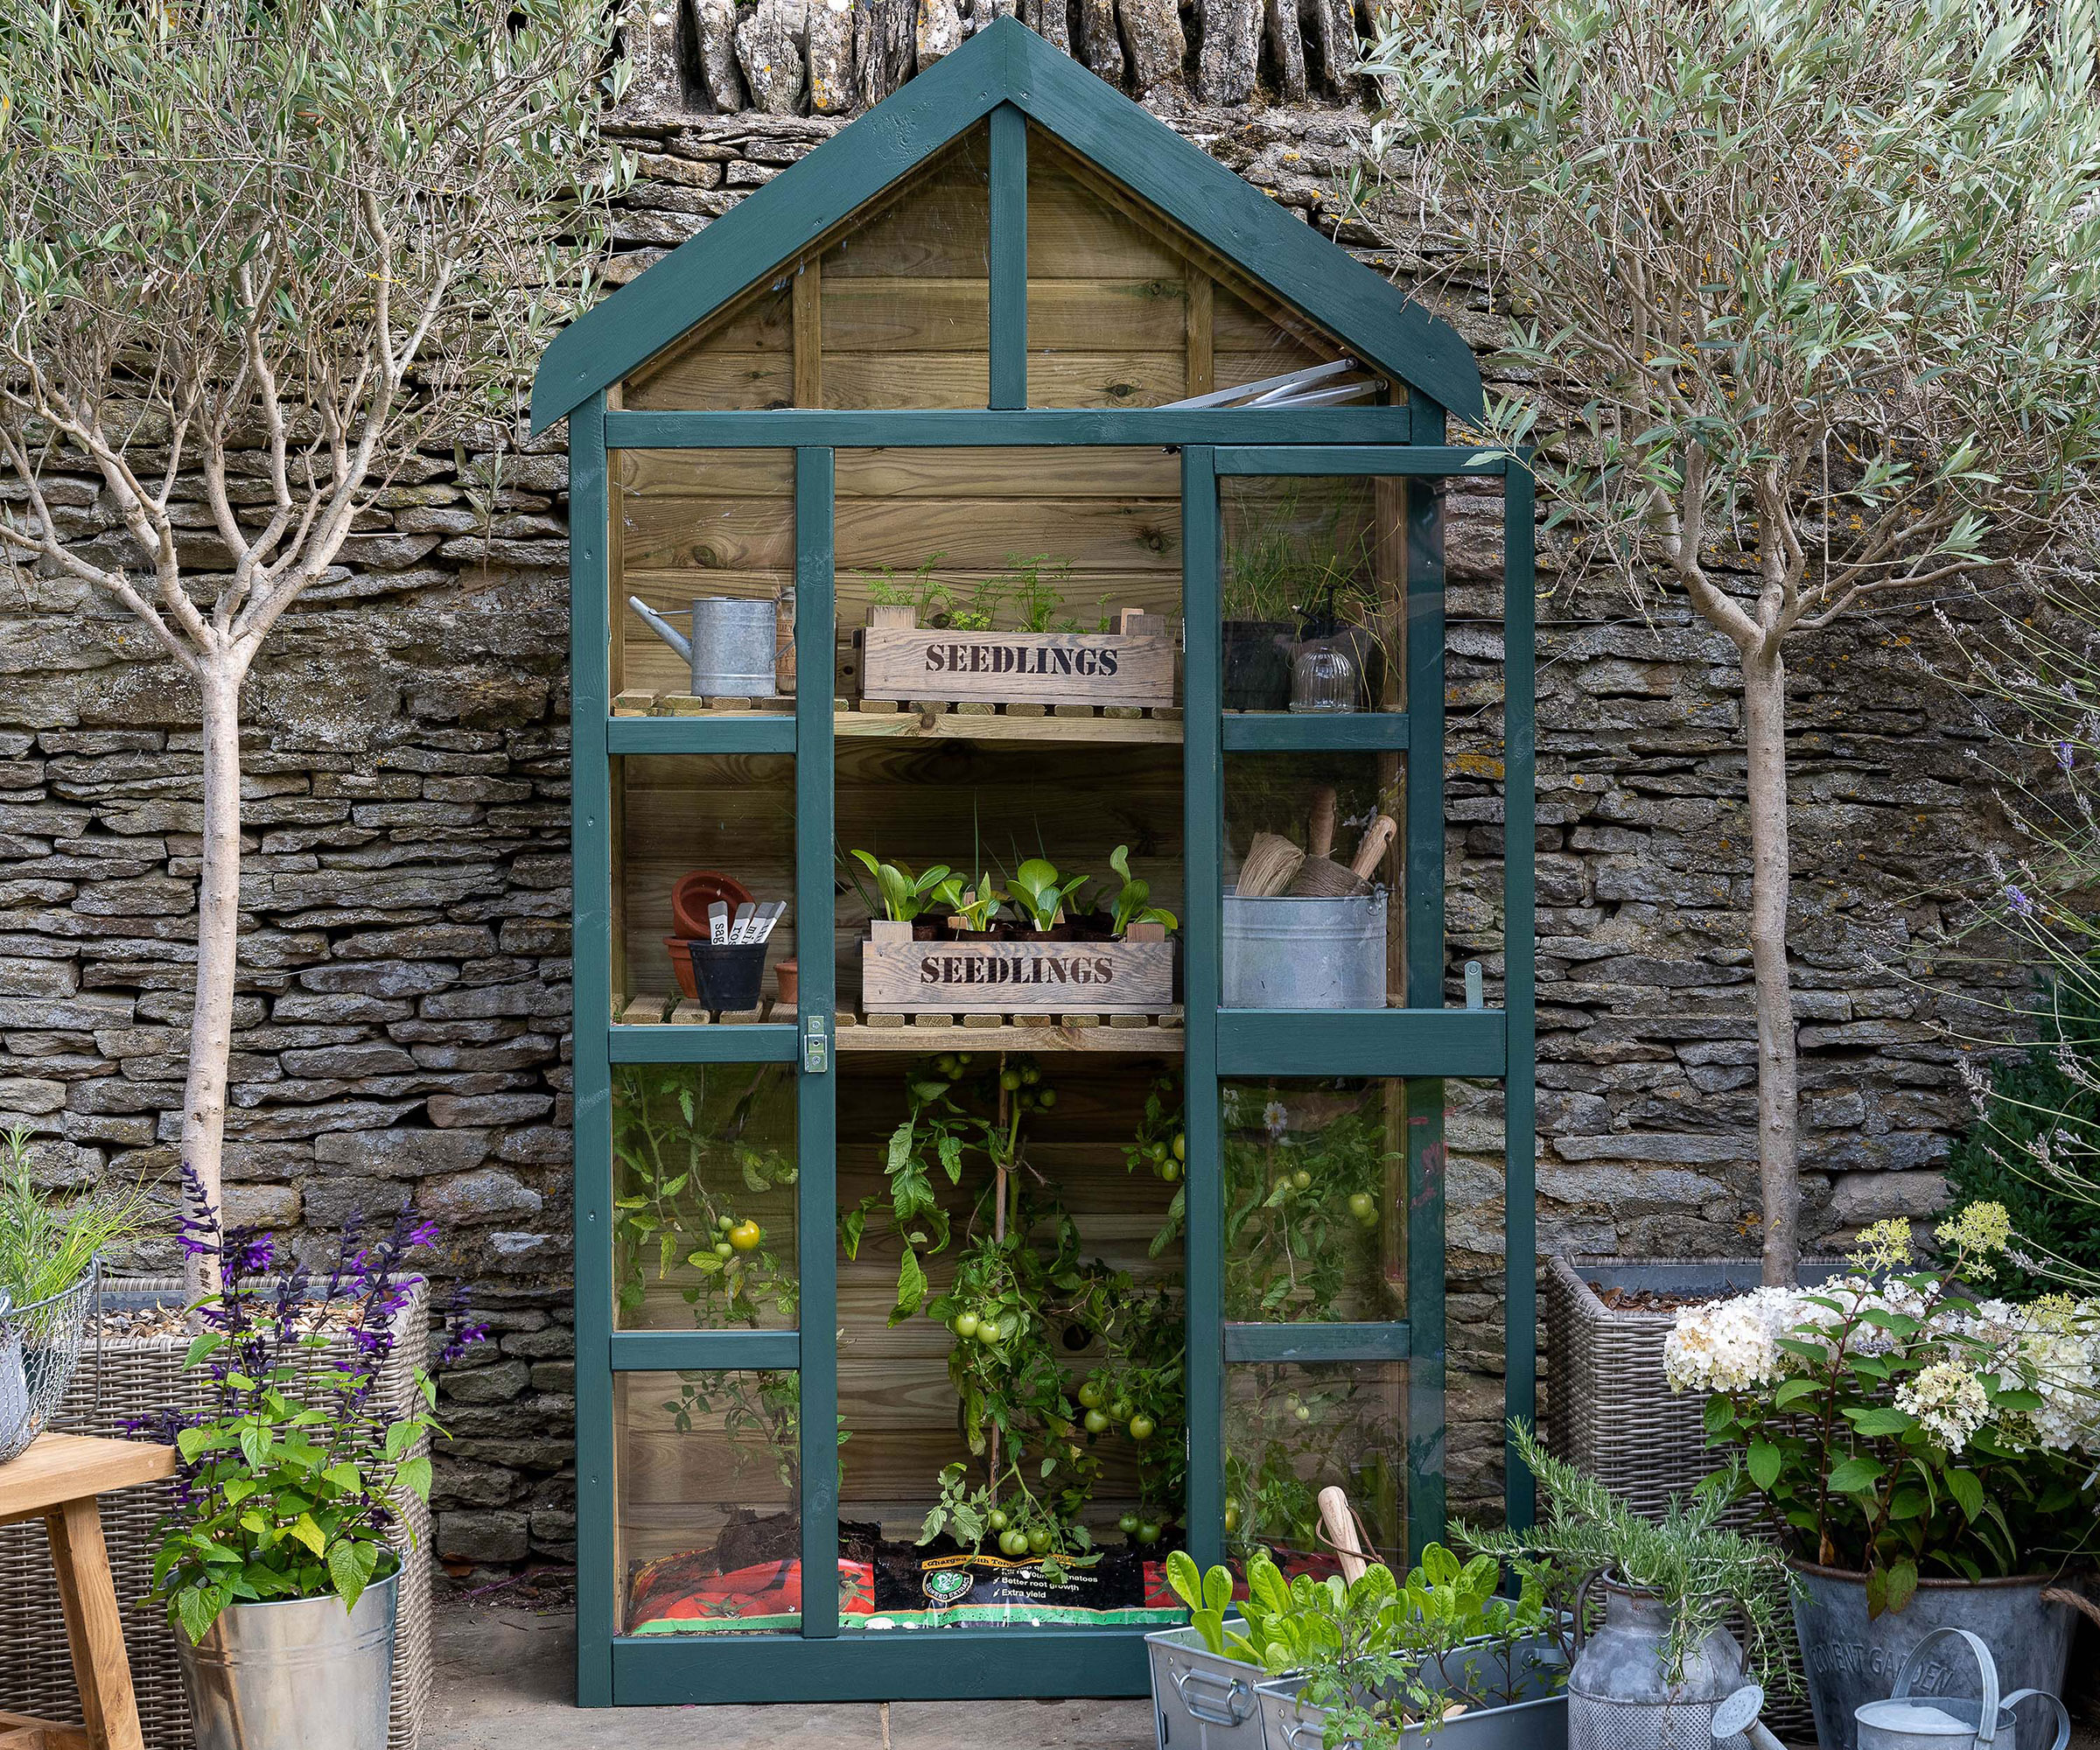
Building a greenhouse from a kit can be an affordable way to add one to your yard
I don't currently have space in my backyard for a full-size greenhouse thanks to a trampoline, climbing frame, and all the other paraphernalia that comes with having two kids, so a mini DIY greenhouse kit was the option I went for when I needed more growing space.
'A pre-fab polycarbonate greenhouse with a good foundation is a good move,' says David Angelov, CEO and founder of PlantParenthood in Massachusetts. 'Plexiglass windows make for easy and safe replacement. Make sure the structure is secured to the footing because these greenhouses (if the door swings open) can be prone to wind damage.'
Available in a range of sizes, timber kits are relatively easy to assemble in an afternoon. What's more, as they are typically made from wood you can easily update them with your choice of paint color to give them a more stylish look. I chose a dark shade of gray for the one in my own backyard, although I love the effect of the dark green color used above.
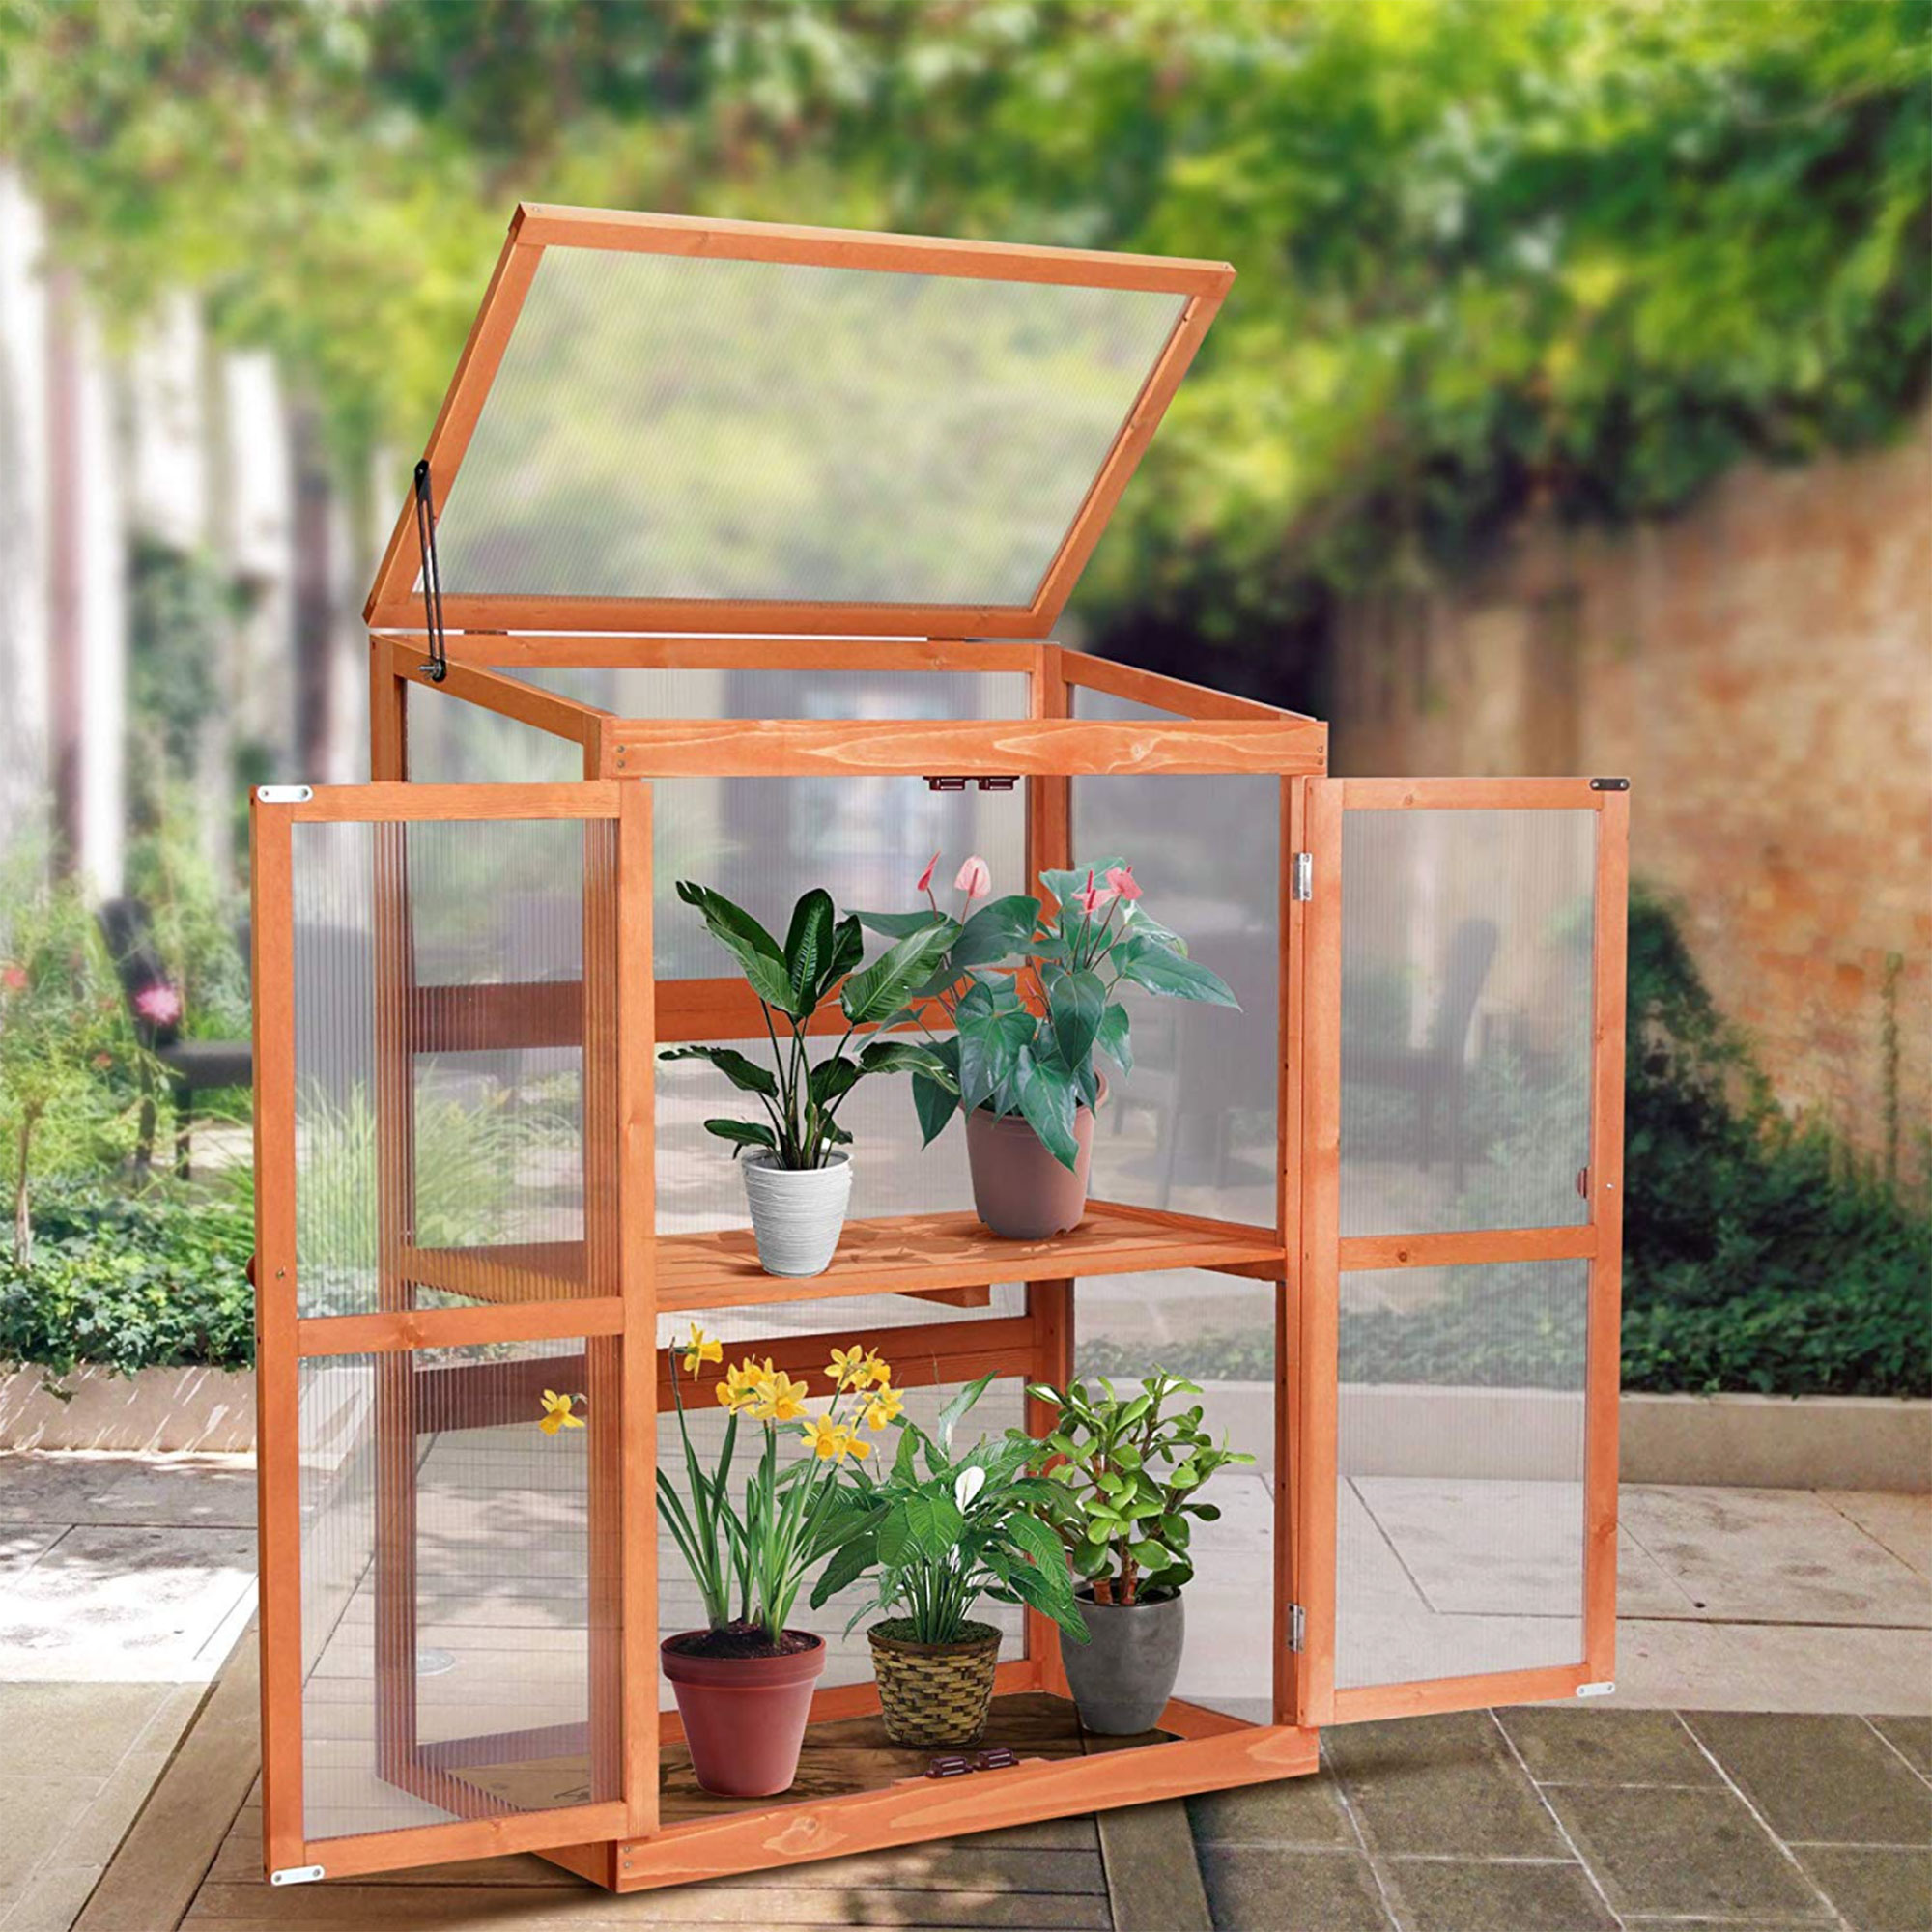
This simple wooden greenhouse is a similar design to the mini greenhouse I have in my own garden. The shelves can be adjusted to suit the height of your plants, and the lid can be propped open to provide ventilation when the doors are closed. Although mine is slightly taller, this one would still offer a decent amount of space for your plants.
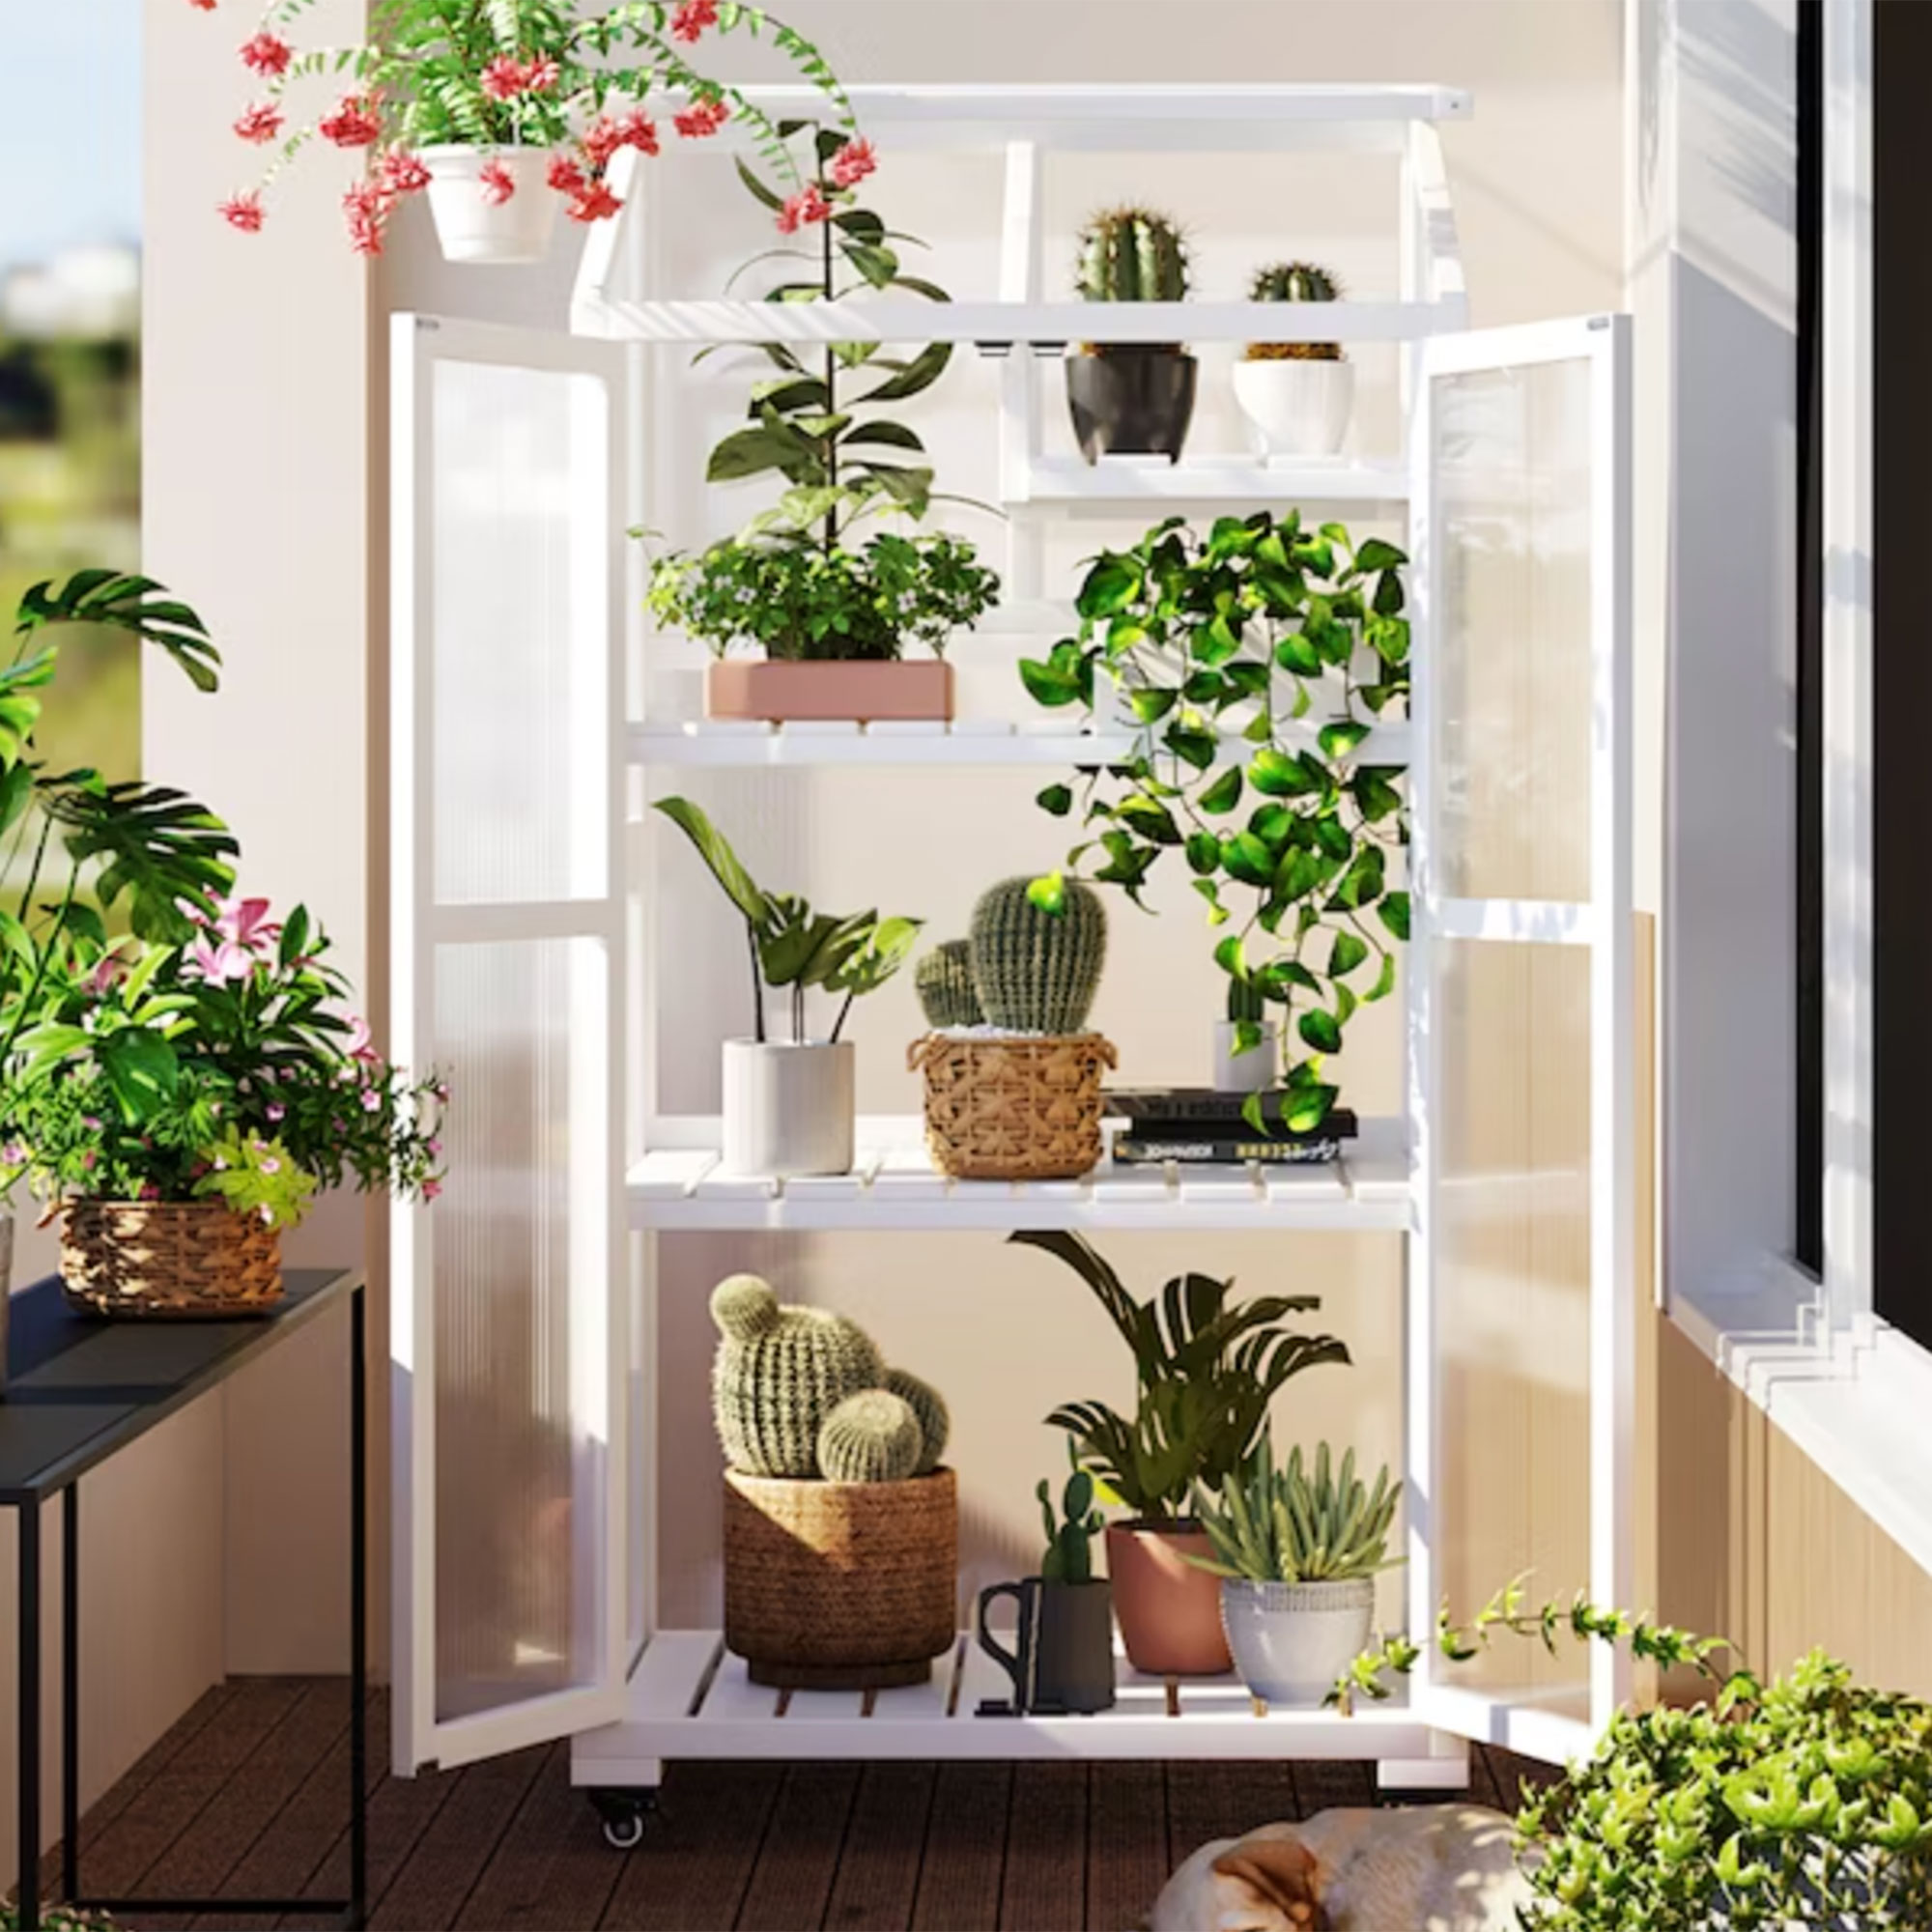
No painting necessary with this design as the white finish would look super smart in any space. Ideal for balconies or a small patio, the shelves in this self-assembly design can be moved to give you the optimum growing space. It also has four wheels and locking brakes so you can easily move it from one part of your yard to another.
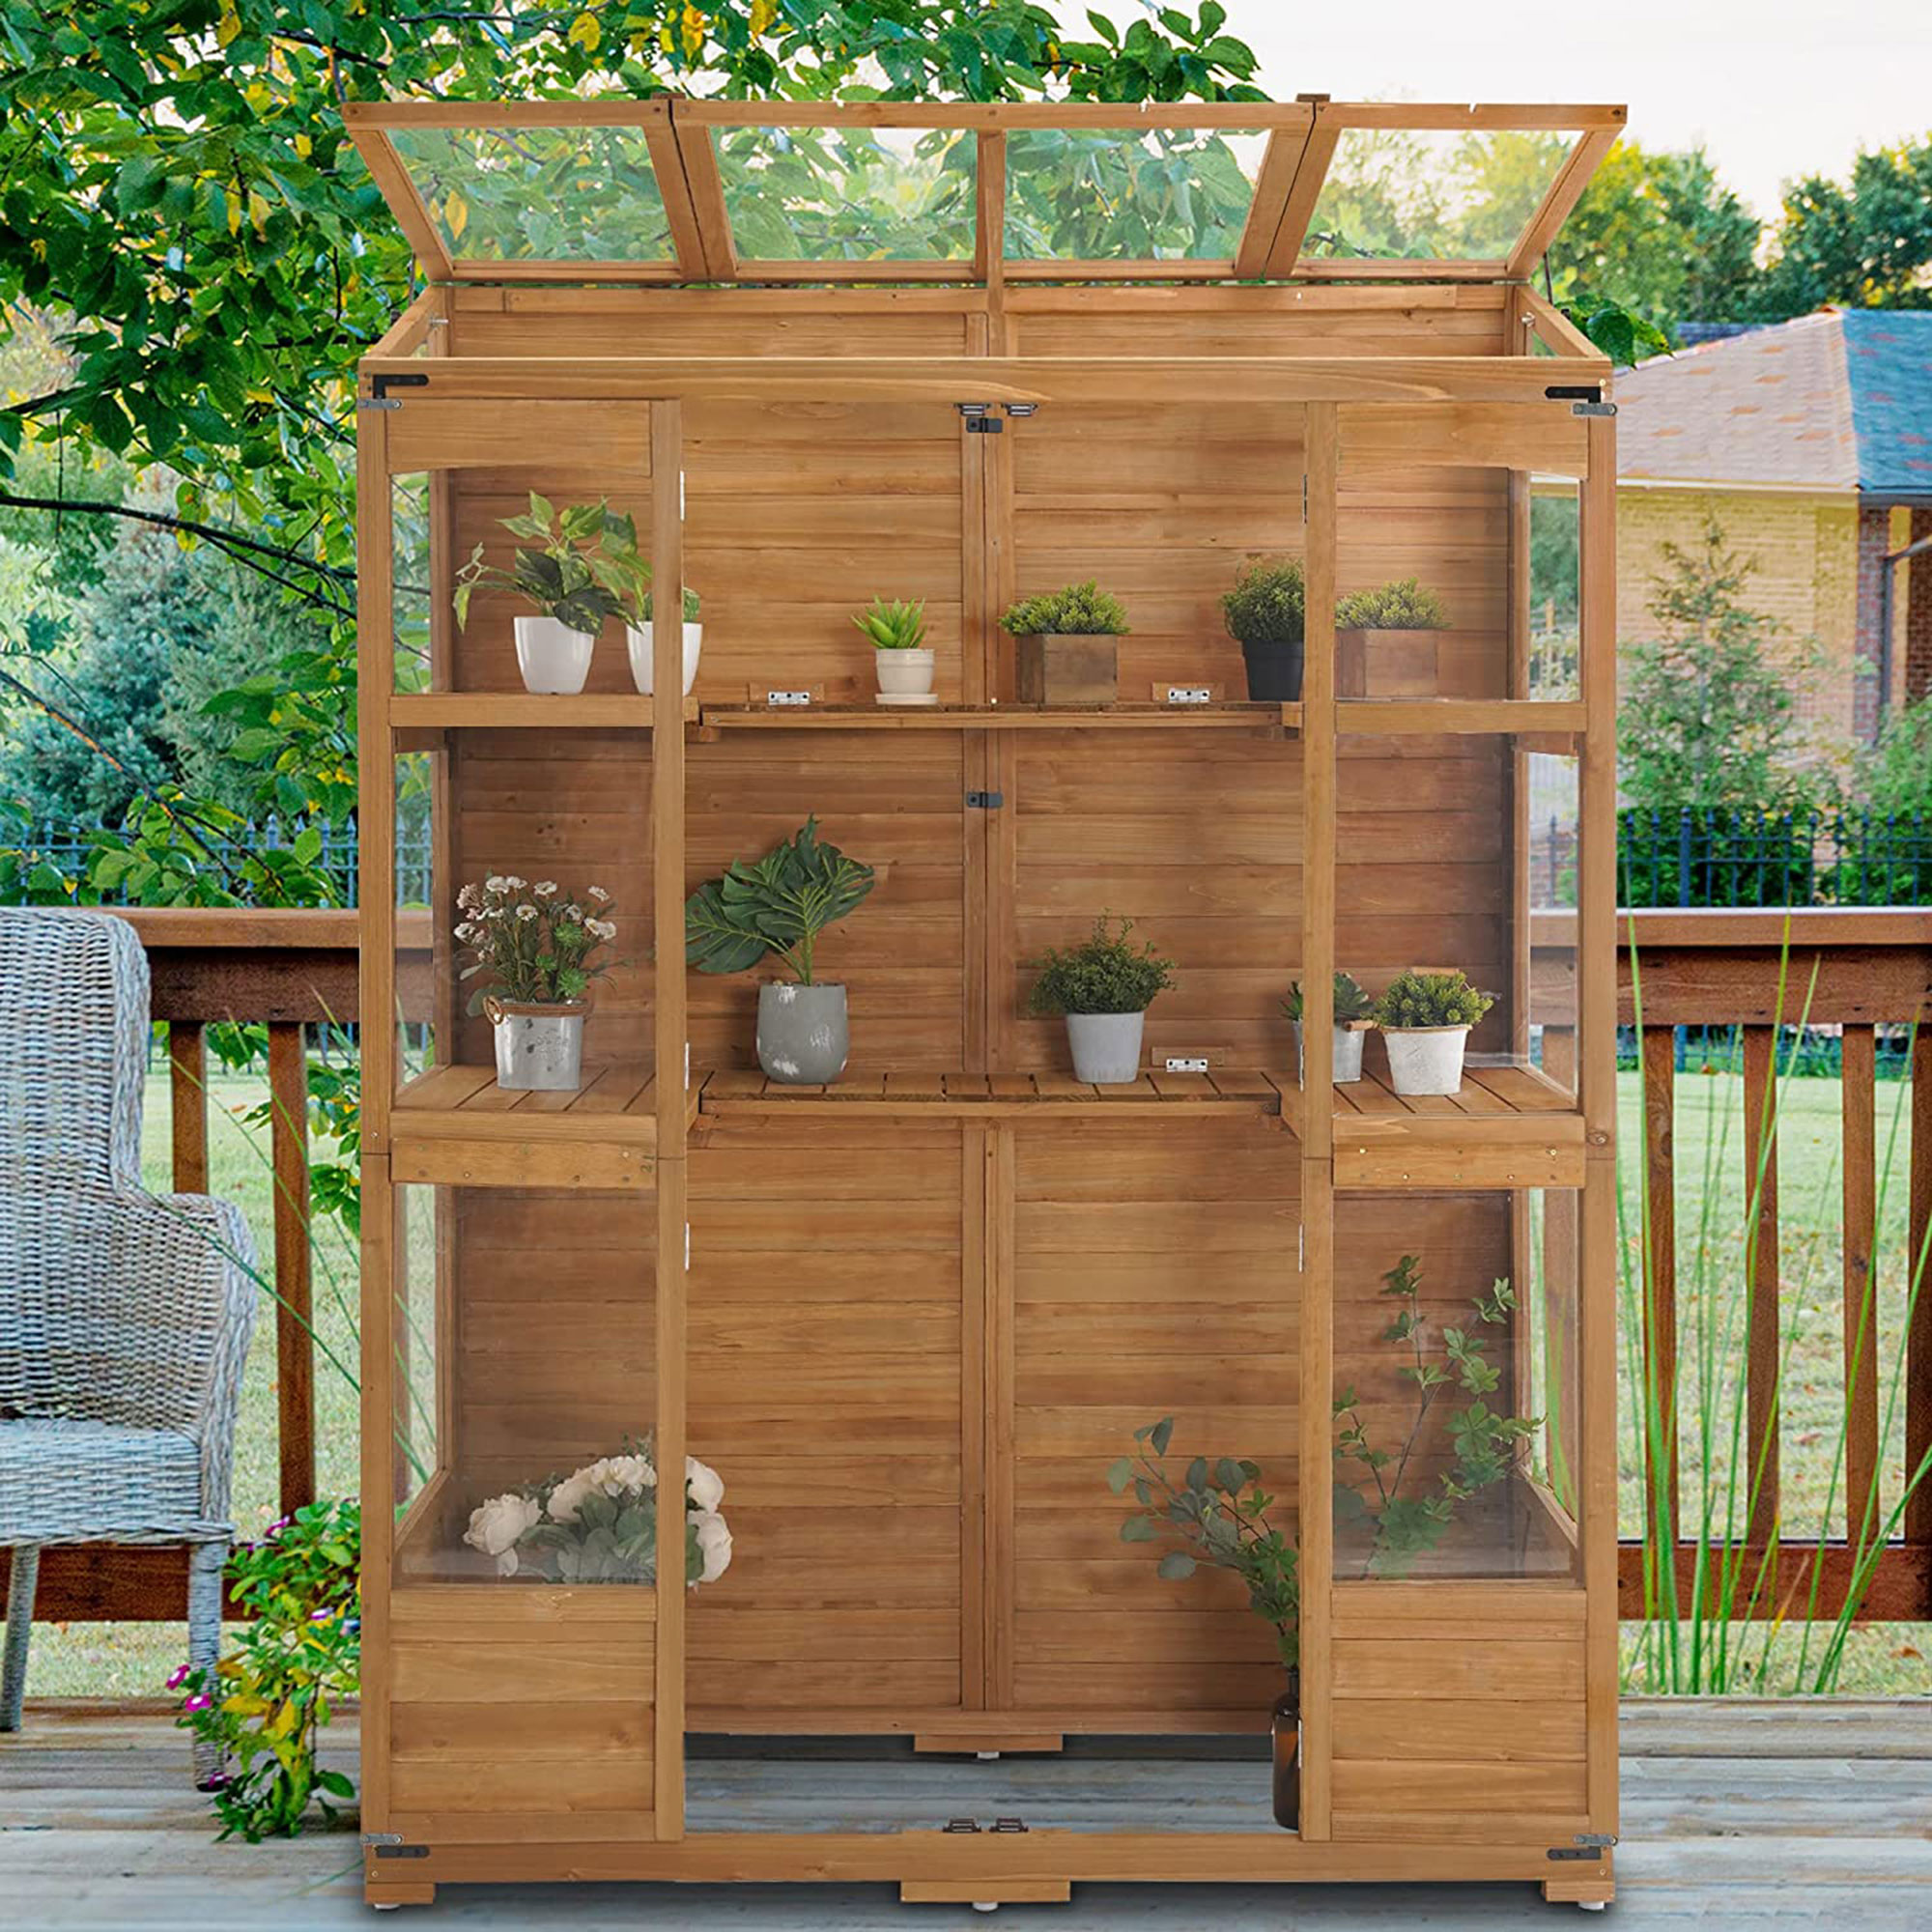
If you're looking to upgrade from a cold frame or a mini greenhouse, this walk-in design will offer you lots more growing space. Made from timber with polycarbonate panels, the doors slide open for easy access and the roof can be tilted to let in more air. Changing the look with paint would be easy if you're not a fan of this color timber.
9. Make a single plant greenhouse from a recycled bottle
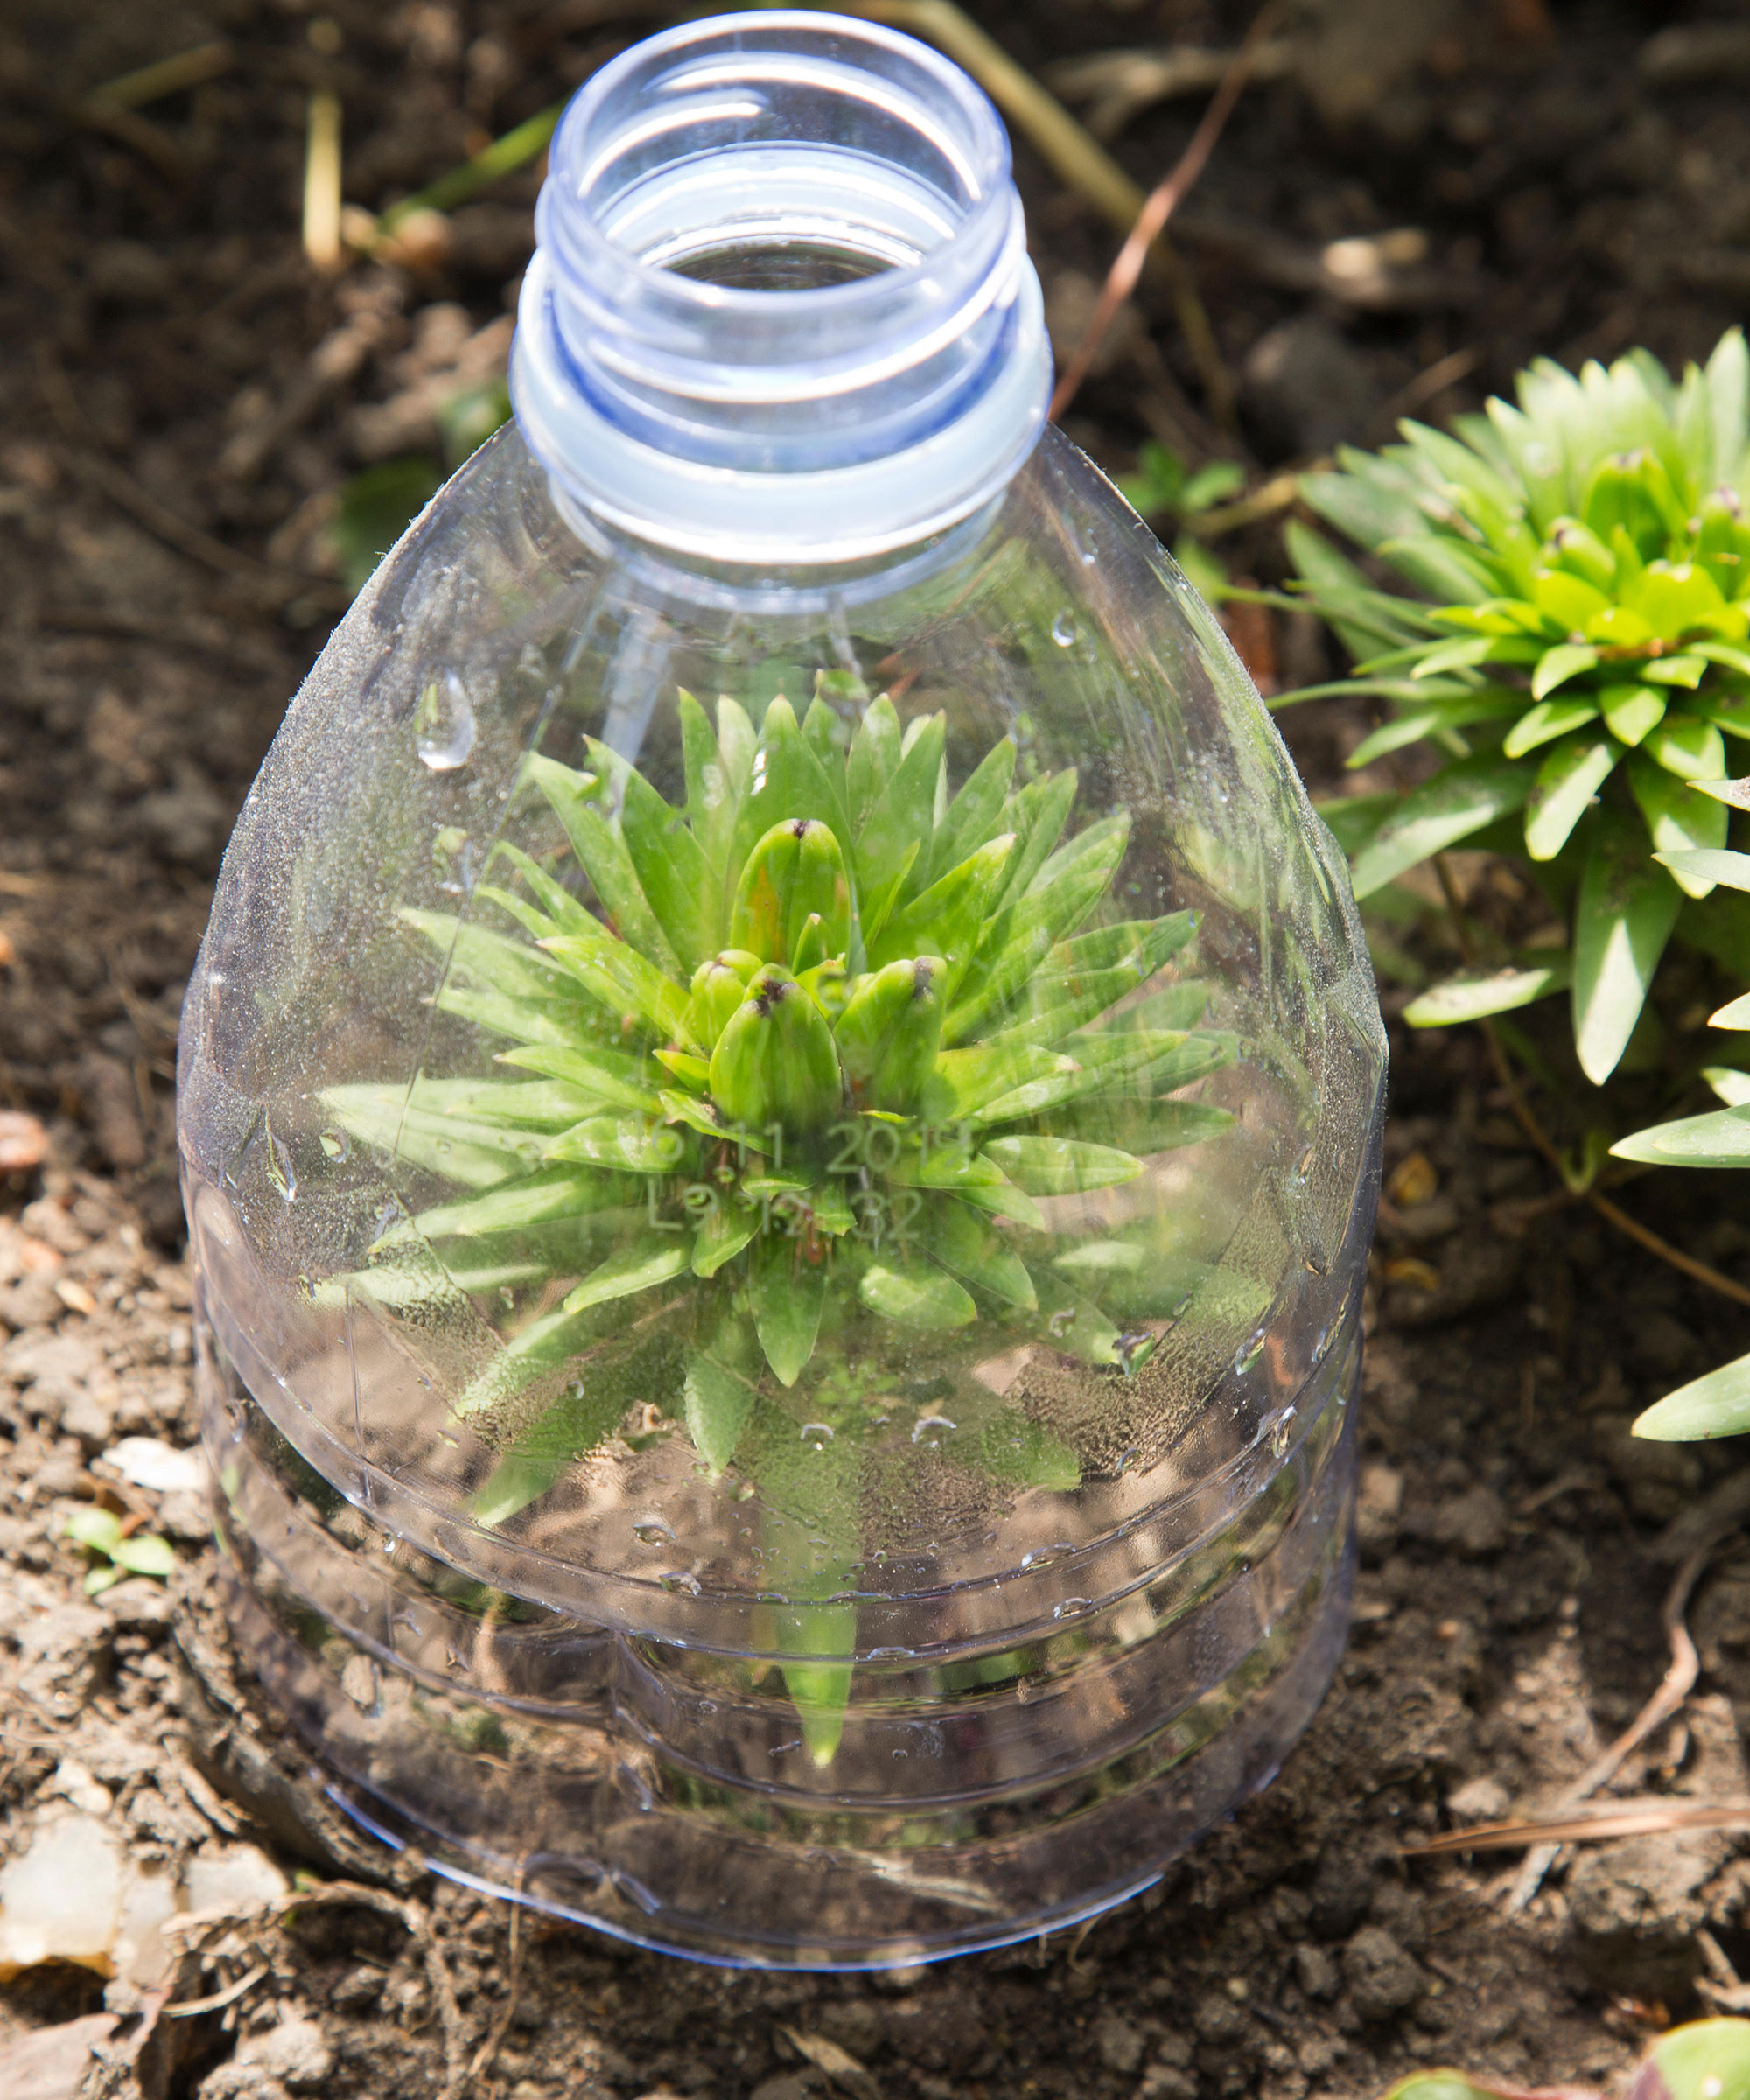
Turn waste plastic into a mini greenhouse with this simple method
Using a plastic bottle as a mini DIY greenhouse idea is a win-win on two levels. First, it means you can protect specific plants quickly and easily, and second, it recycles old materials and puts them to good use.
'These are so effective, especially for birdtasty snacks such as beetroot and windhating crops such as sweetcorn,' says organic fruit and veg expert Bob Flowerdew.
Although effective at creating a favorable growing environment, Bob does issue a word of caution. 'We cut off the bottoms of the bottles and throw the caps away, assuming the holes will ventilate sufficiently, but they may not. As temperatures inside soar in bright sun, seeds or seedlings may cook. Another unnoticed problem is that plants may be too sheltered, so when the bottles are removed they receive a check as bad as if they had just been put out without hardening off.
'So swap over to "tubular" cloches once the seeds are up,' he adds. 'These are plastic-bottle cloches that have had the tops cut off as well, leaving transparent plastic tubes. These keep off most crawling pests, harsh weather and strong winds. Admittedly, the open tops do make them marginally colder at night, but they still provide plenty of shelter. And along with allowing sufficient ventilation, these also allow the rain in.'
Bob Flowerdew is the organic expert for Amateur Gardening magazine in the UK. Every week he writes about a wide range of gardening tasks and offers advice on how to create a sustainble, eco-friendly garden. He has also written a wide range of books on organic gardening methods, all available on Amazon.
10. Opt for simple tunnel greenhouse
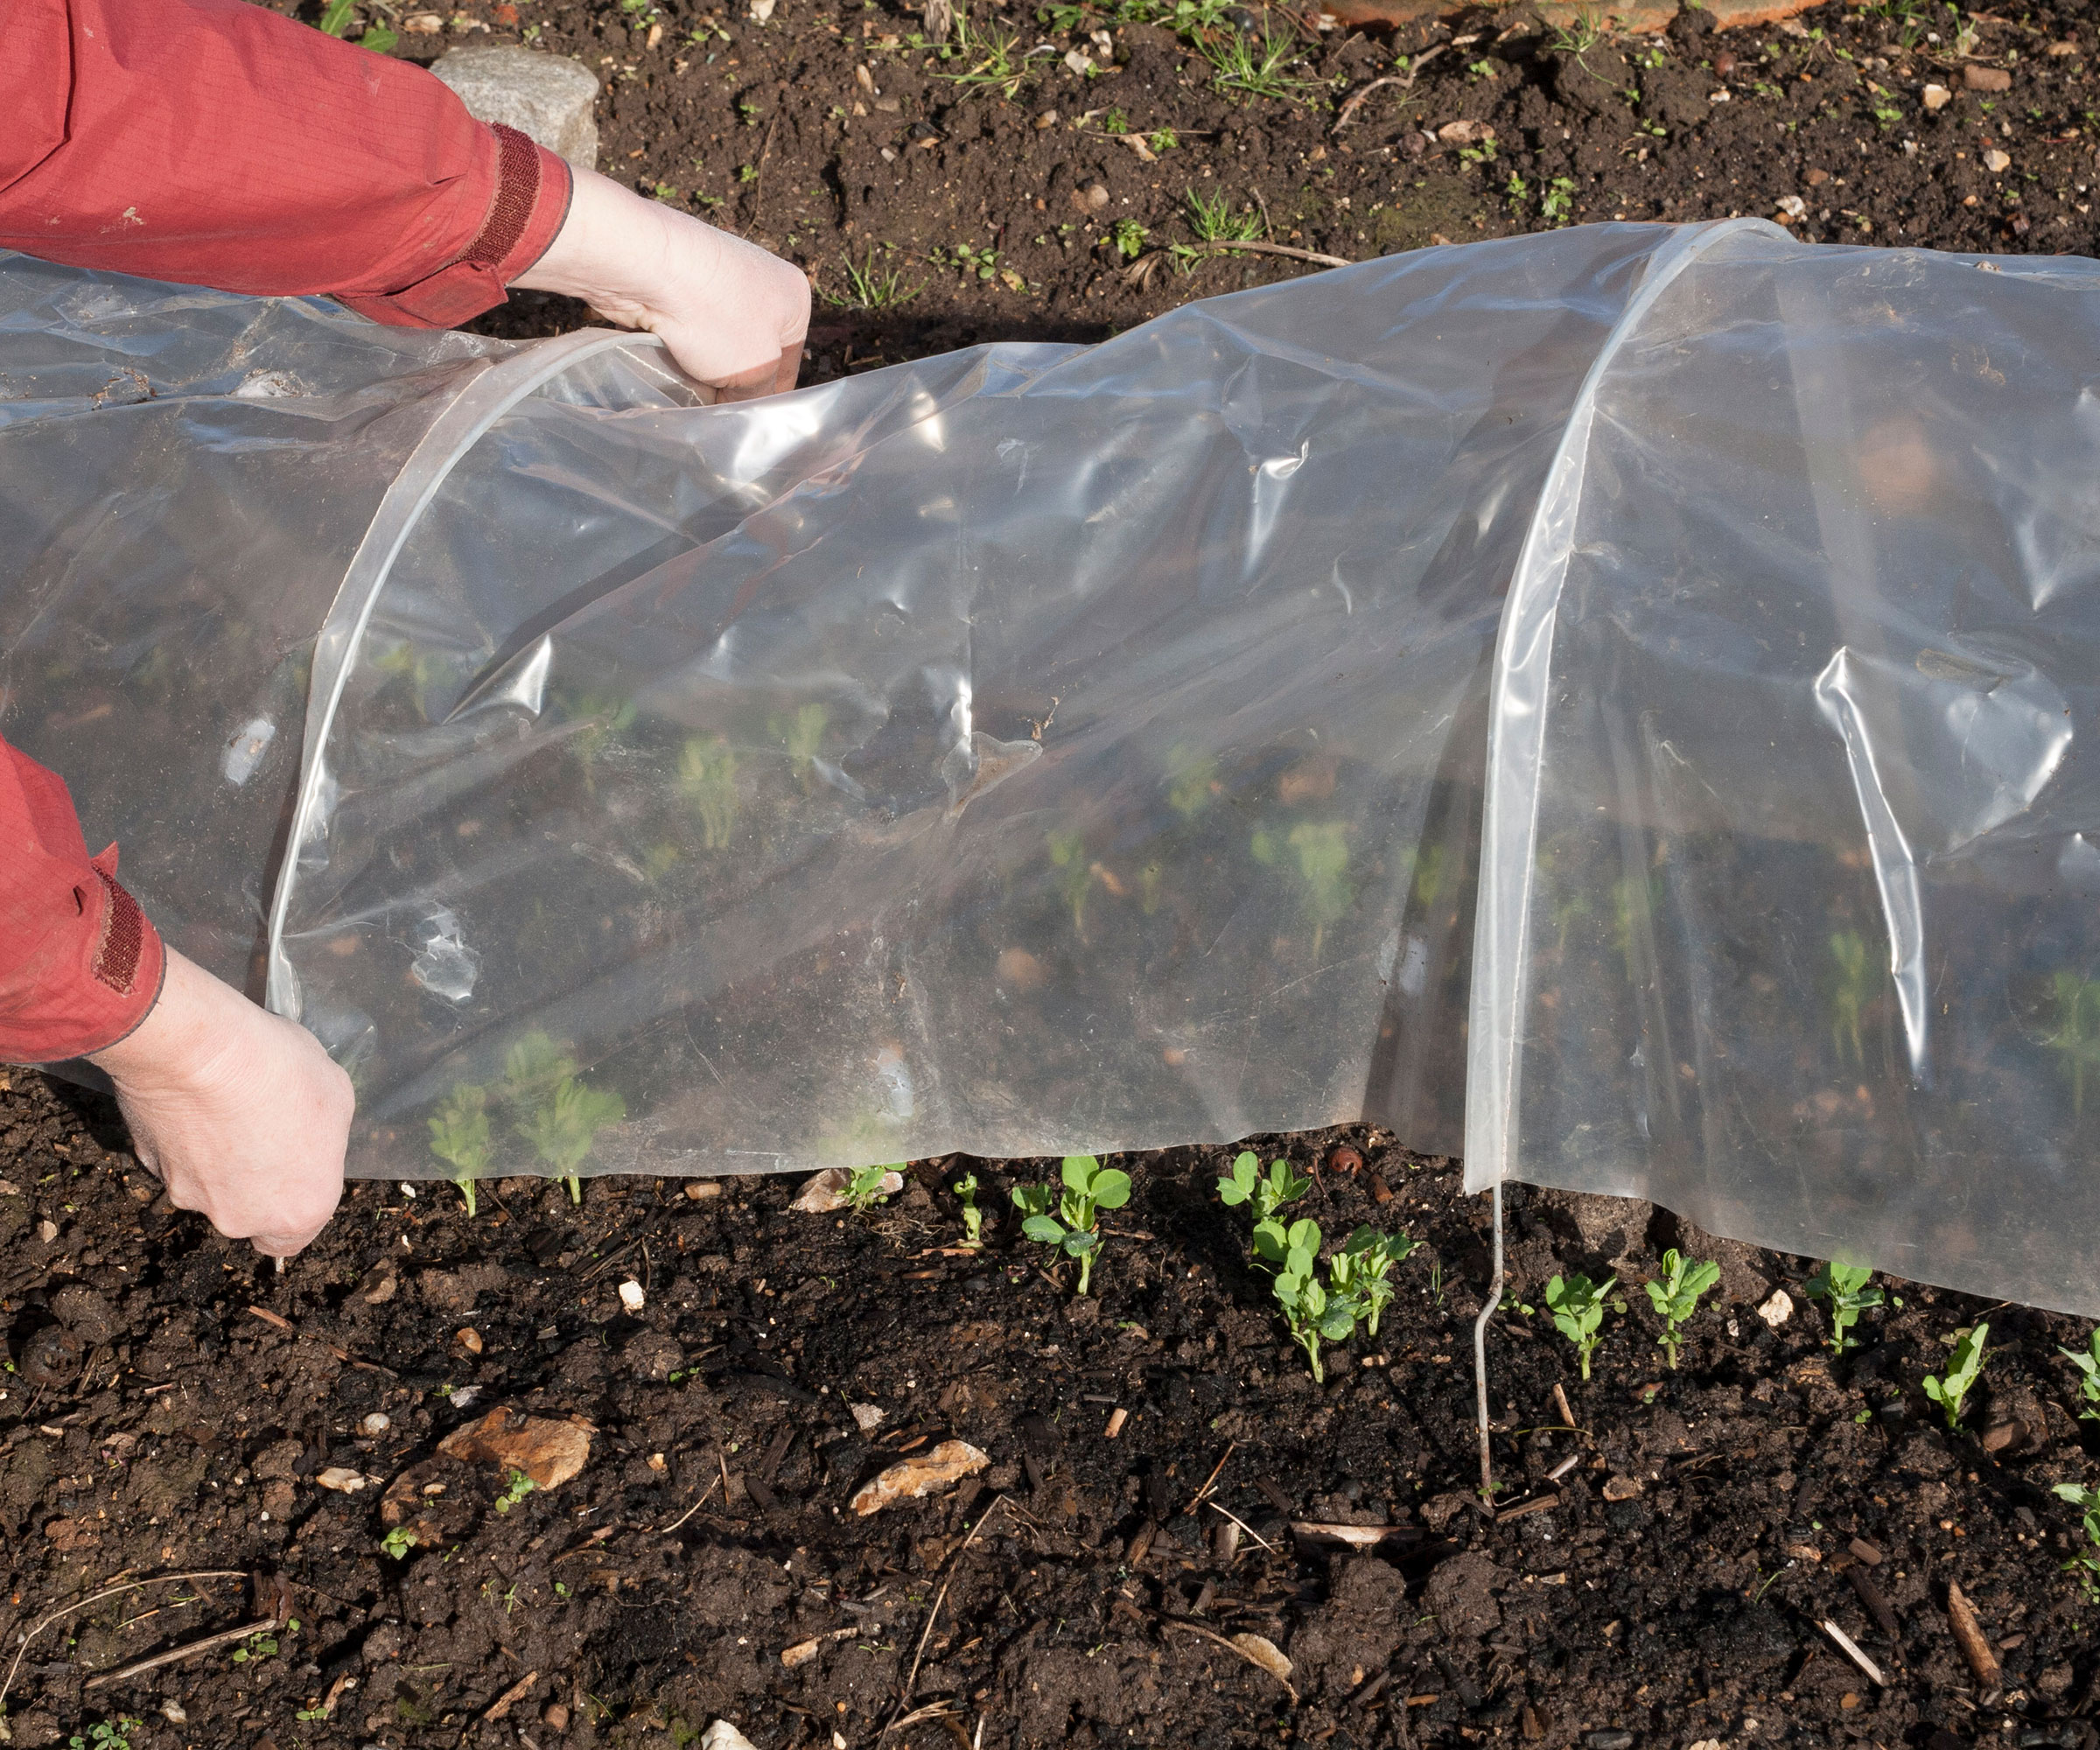
A basic tunnel made from plastic sheeting and wire hoops is all you need to create a temporary greenhouse on a veg patch
DIY tunnel greenhouses are the best option for covering rows of vegetable seedling and transplants in a kitchen garden. It's an easy and cost-effective way of covering large areas of soil, and they won't take long to construct.
'Sheet polythene tunnel greenhouses often have wire legs pushed into the soil and draw strings at each end to close them up,' says Tim Rumball. Push the legs deep into the soil – there should be no gaps between the edge of the plastic cover and the soil. Now close the ends and peg the drawstrings down tight. In windy areas, supplement this by hammering pegs into the soil, alternately down each side of the tunnel, and tying string firmly across from side to side. Whatever shape or size your greenhouse tunnel, it is vital to make sure it is securely fixed in place.'
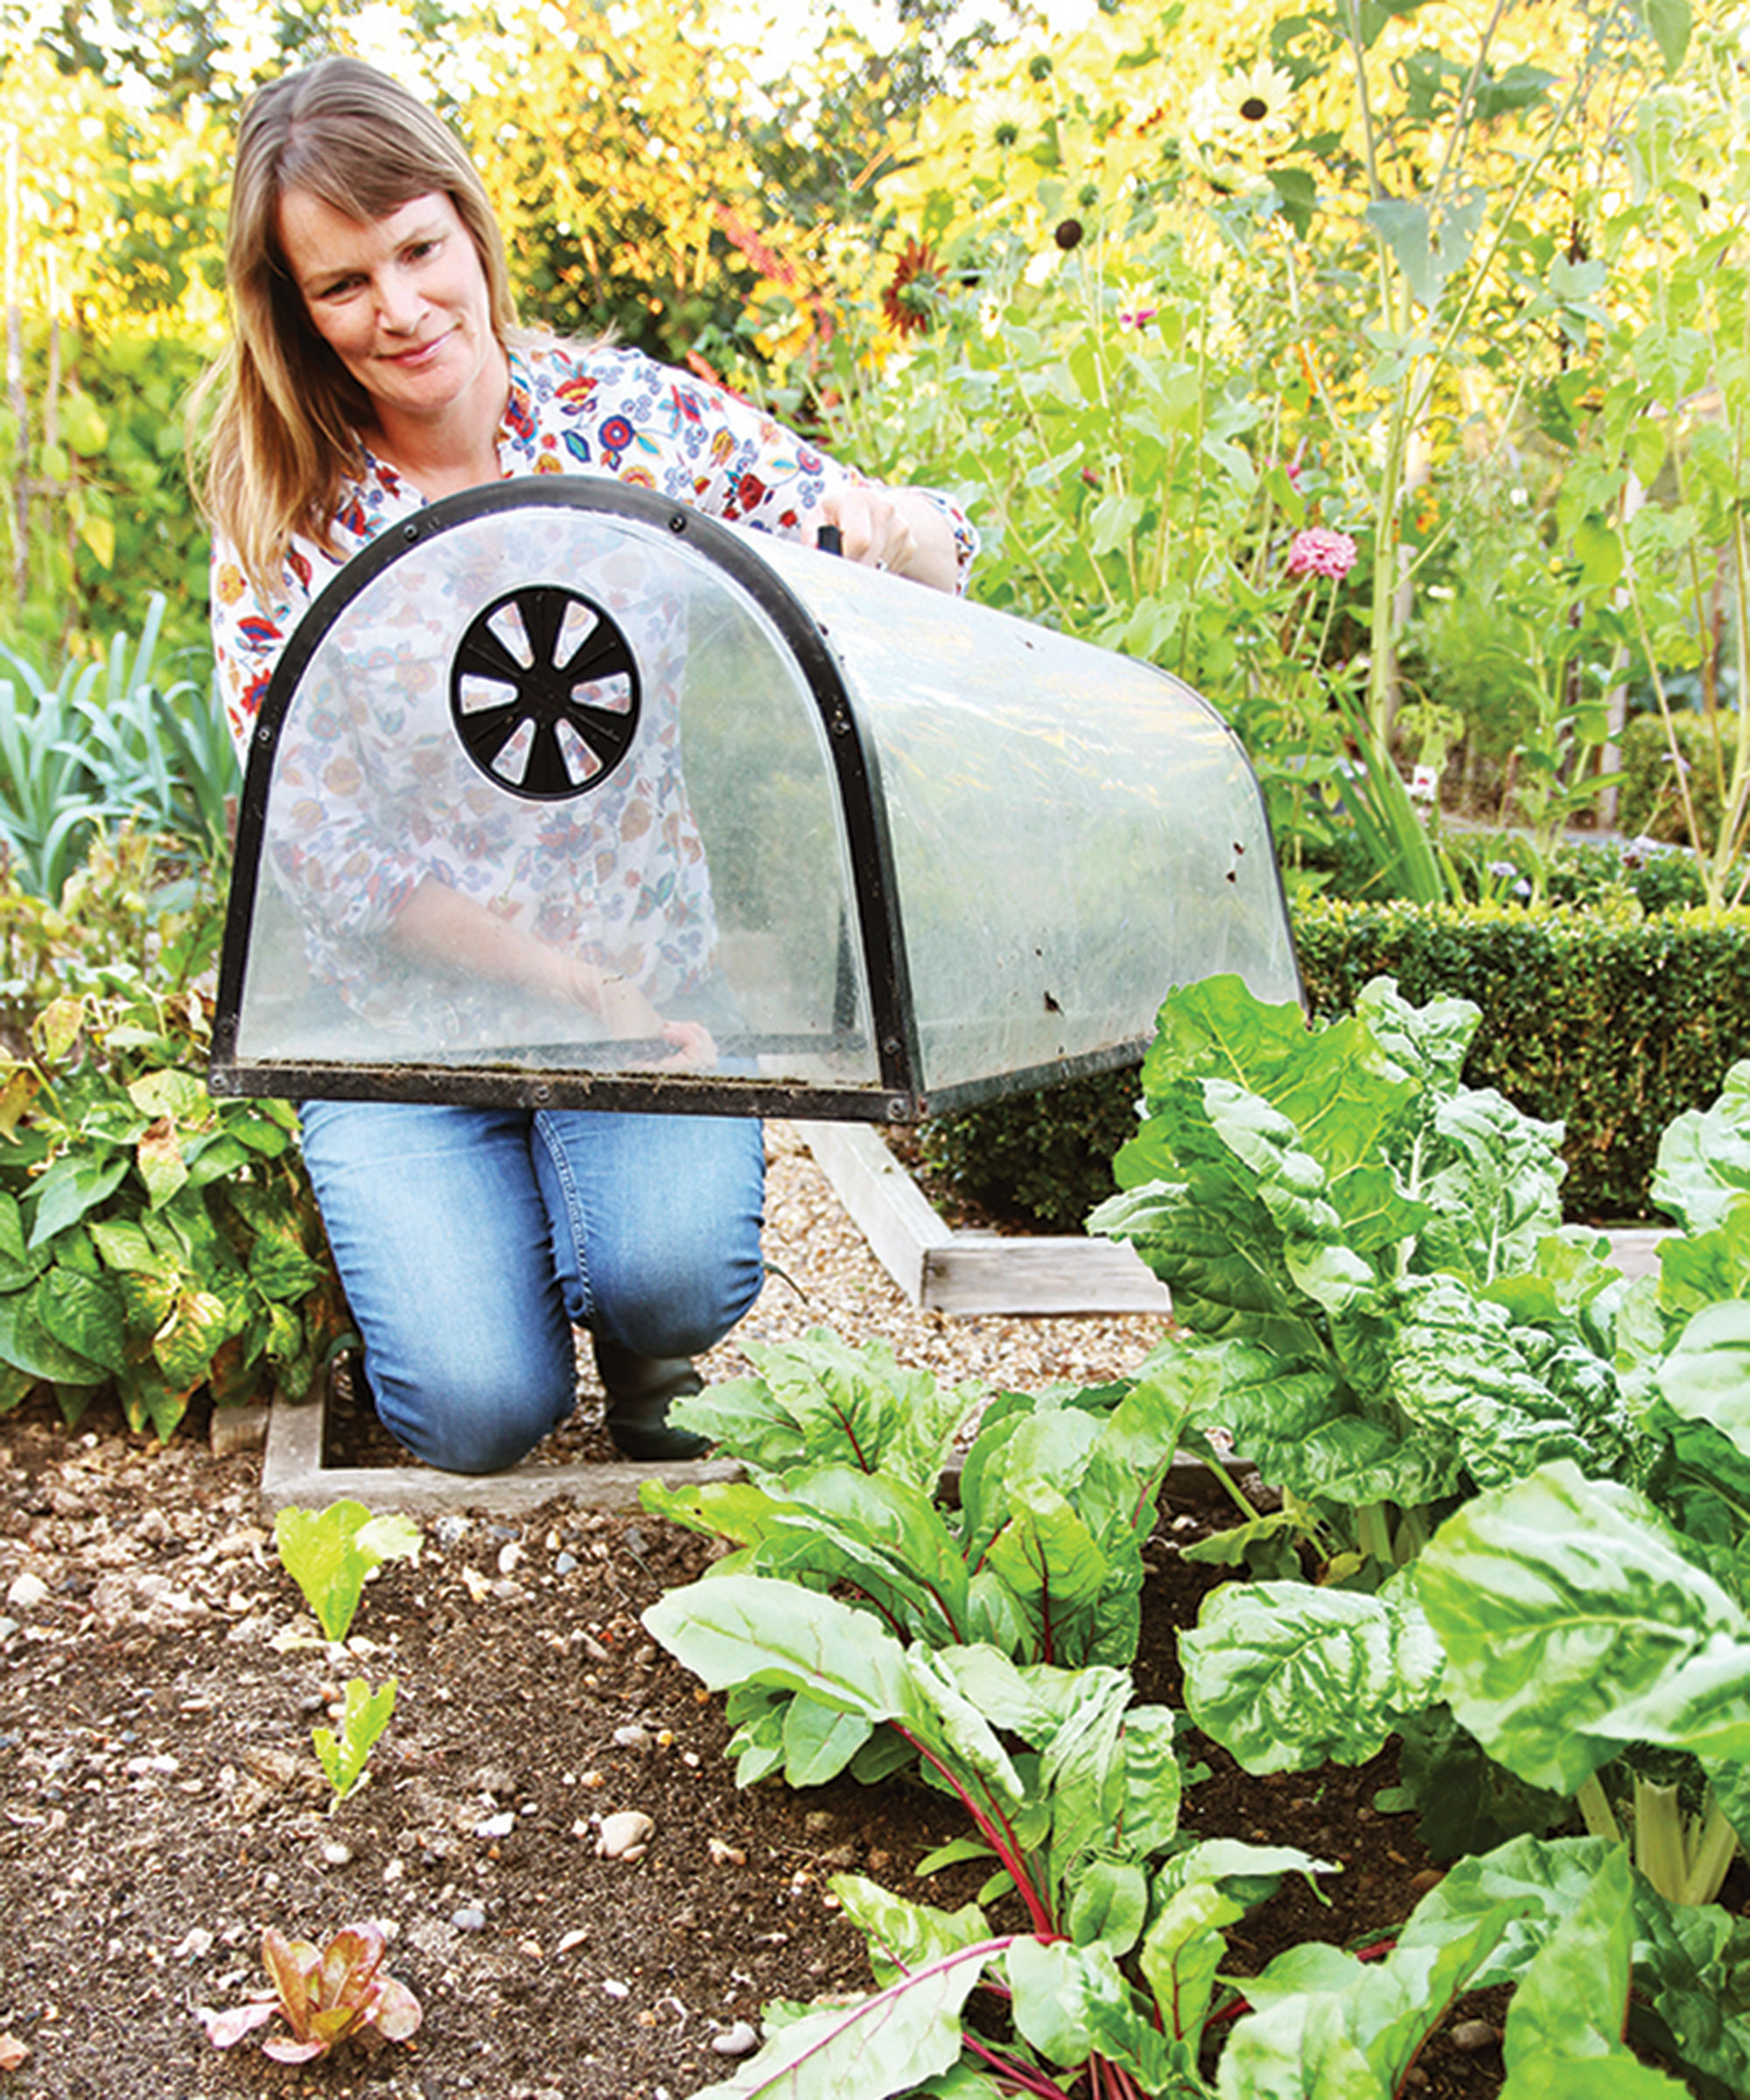
Garden expert Lucy Chamberlain favors more rigid tunnel greenhouses rather than simple polytunnels
'I use tunnel designs a lot in my own garden,' says fruit and veg growing expert Lucy Chamberlain. 'The milder area created underneath will let you plant and sow outside two or three weeks earlier than you can in open ground – but it’s important to choose the right design. Clear polythene tunnel cloches will store easily and are cheap to buy, however they offer minimal thermal insulation compared to other designs made from stronger materials.'
Lucy was a Horticultural Advisor at RHS Wisley and has been Head Gardener on a 100-acre estate in England for many years, but writes regularly for titles such as The Garden, Gardeners’ World, The Guardian and Amateur Gardening. She’s also the author of RHS Step by Step Veg Patch, available from Amazon, which covers 50 types of fruit and veg.
What's the quickest way to create a DIY greenhouse?
'Creating an inexpensive DIY greenhouse doesn't have to be difficult or time consuming, says Lindsey Hyland, a gardening expert and the founder of Urban Organic Yield. 'One of the simplest solutions is to purchase a large plastic sheet or drop cloth and use it as a temporary cold frame by covering plants in your garden with the sheet during cold weather.
'You can also construct larger greenhouses using wood frames, sheets of plastic, PVC pipes, and other materials that are typically available in most hardware stores.'
Does a DIY greenhouse need ventilation?
All greenhouses, no matter what their size or how they are made, will need some sort of ventilation. It's essential for ensuring there is good airflow around your plants to give them the best possible conditions for optimum growth. It also allows excess heat to escape so that your plants don't overheat. This could simply mean raising the lid of a cold frame by a few inches during the day, or rolling up the plastic door of a mini greenhouse.
Creating a DIY greenhouse can be a wonderful first step to increasing the type of flowers and crops you can grow successfully, as well as a way of protecting tender plants from poor weather.
Planning a greenhouse isn't really necessary with some of the smaller DIY designs either, so you can simply choose your favorite method and start reaping the benefits of your DIY glasshouse in no time at all.
Sign up to the Homes & Gardens newsletter
Design expertise in your inbox – from inspiring decorating ideas and beautiful celebrity homes to practical gardening advice and shopping round-ups.

For the past 20 years, Beth has worked for and contributed to a number of leading magazines and websites in the UK, including Real Homes, Ideal Home, Period Living and Grand Designs. She was the Editor in Chief of Gardeningetc.com for nearly three years and is now the the Head of Gardens at Homes & Gardens. Beth's own garden is a really important part of her family's home, and she loves spending time tending to her veg patch or entertaining friends and family at a summer BBQ or alfresco pizza night.
-
 Extend the lifespan of your appliance with 5 simple but crucial washing machine maintenance tips
From cleaning the filters to keeping the door open, experts reveal the washer tips they swear by
By Andy van Terheyden Published
-
 These are the 6 must-have colors to decorate with in April 2025
What do retro-inspired yellows and beautiful blues all have in common? They're on our hot list for the season ahead
By Sophia Pouget de St Victor Published
