How to make a Christmas wreath – and discover the secrets to getting a professional look
Our step-by-step guide to creating an elegant, timeless Christmas wreath will elevate your front door for the holidays


Carving out some time for creating your own Christmas wreath is one of the ultimate joys of the holiday season. This time of year can feel quite overwhelming for many of us, so taking a couple of hours to create, whether on your own or with friends, is a wonderful tonic to the noise and pace of Christmas.
And of course, discovering how to make a Christmas wreath will mean you can bring your own unique festive look, wonderful seasonal aromas and a personalized color scheme to your home.
I've been a floral designer for seven years, and in that time have taught hundreds of people how to make their own Christmas wreath. What's more, I've made countless wreaths for clients, and so I know how to get that professional, expensive finish. If you want to adapt our Christmas wreath ideas, I've shared all my tips and advice for creating a beautiful wreath that will last the season, plus simple ways to elevate your design to get that pro look.

How to make a Christmas wreath
Using fresh, evergreen foliage that will stay fresh even in the depths of winter season is the perfect start for your outdoor Christmas decor ideas. You won't have to worry about anything wilting or dying, plus these foliage varieties are often scented, adding an extra dimension to your festive front door decor.
Before you start, gather the essential kit together.
You will need:
- A wreath base, made from metal wire or willow twigs - these ones from Walmart are perfect for the job
- Moss or straw as base material
- Natural jute twine
- Pruning shears - you will need some good-quality ones such as the Fiskars pruners from Walmart to get through your branch foliage
- Floristry stub wires - these are the ones I use from Walmart
- Evergreen foliage, such as Nordmann Fir spruce, juniper, berried eucalyptus, conifer, and pine
- Natural decorations, including pine cones, dried flowers, cinnamon stick bundles, dried fruit, and lichen branches
- Additional, optional decorations such as feathers, baubles, or faux flowers
- Velvet ribbon in rich, earthy tones
- Ribbon scissors - you can use a standard pair of household scissors, but I always have a pair on hand, such as these fabric scissors from Walmart, to make sure the cuts are super sharp and your snips don't dirty the ribbon
1. Attach moss to your wreath base
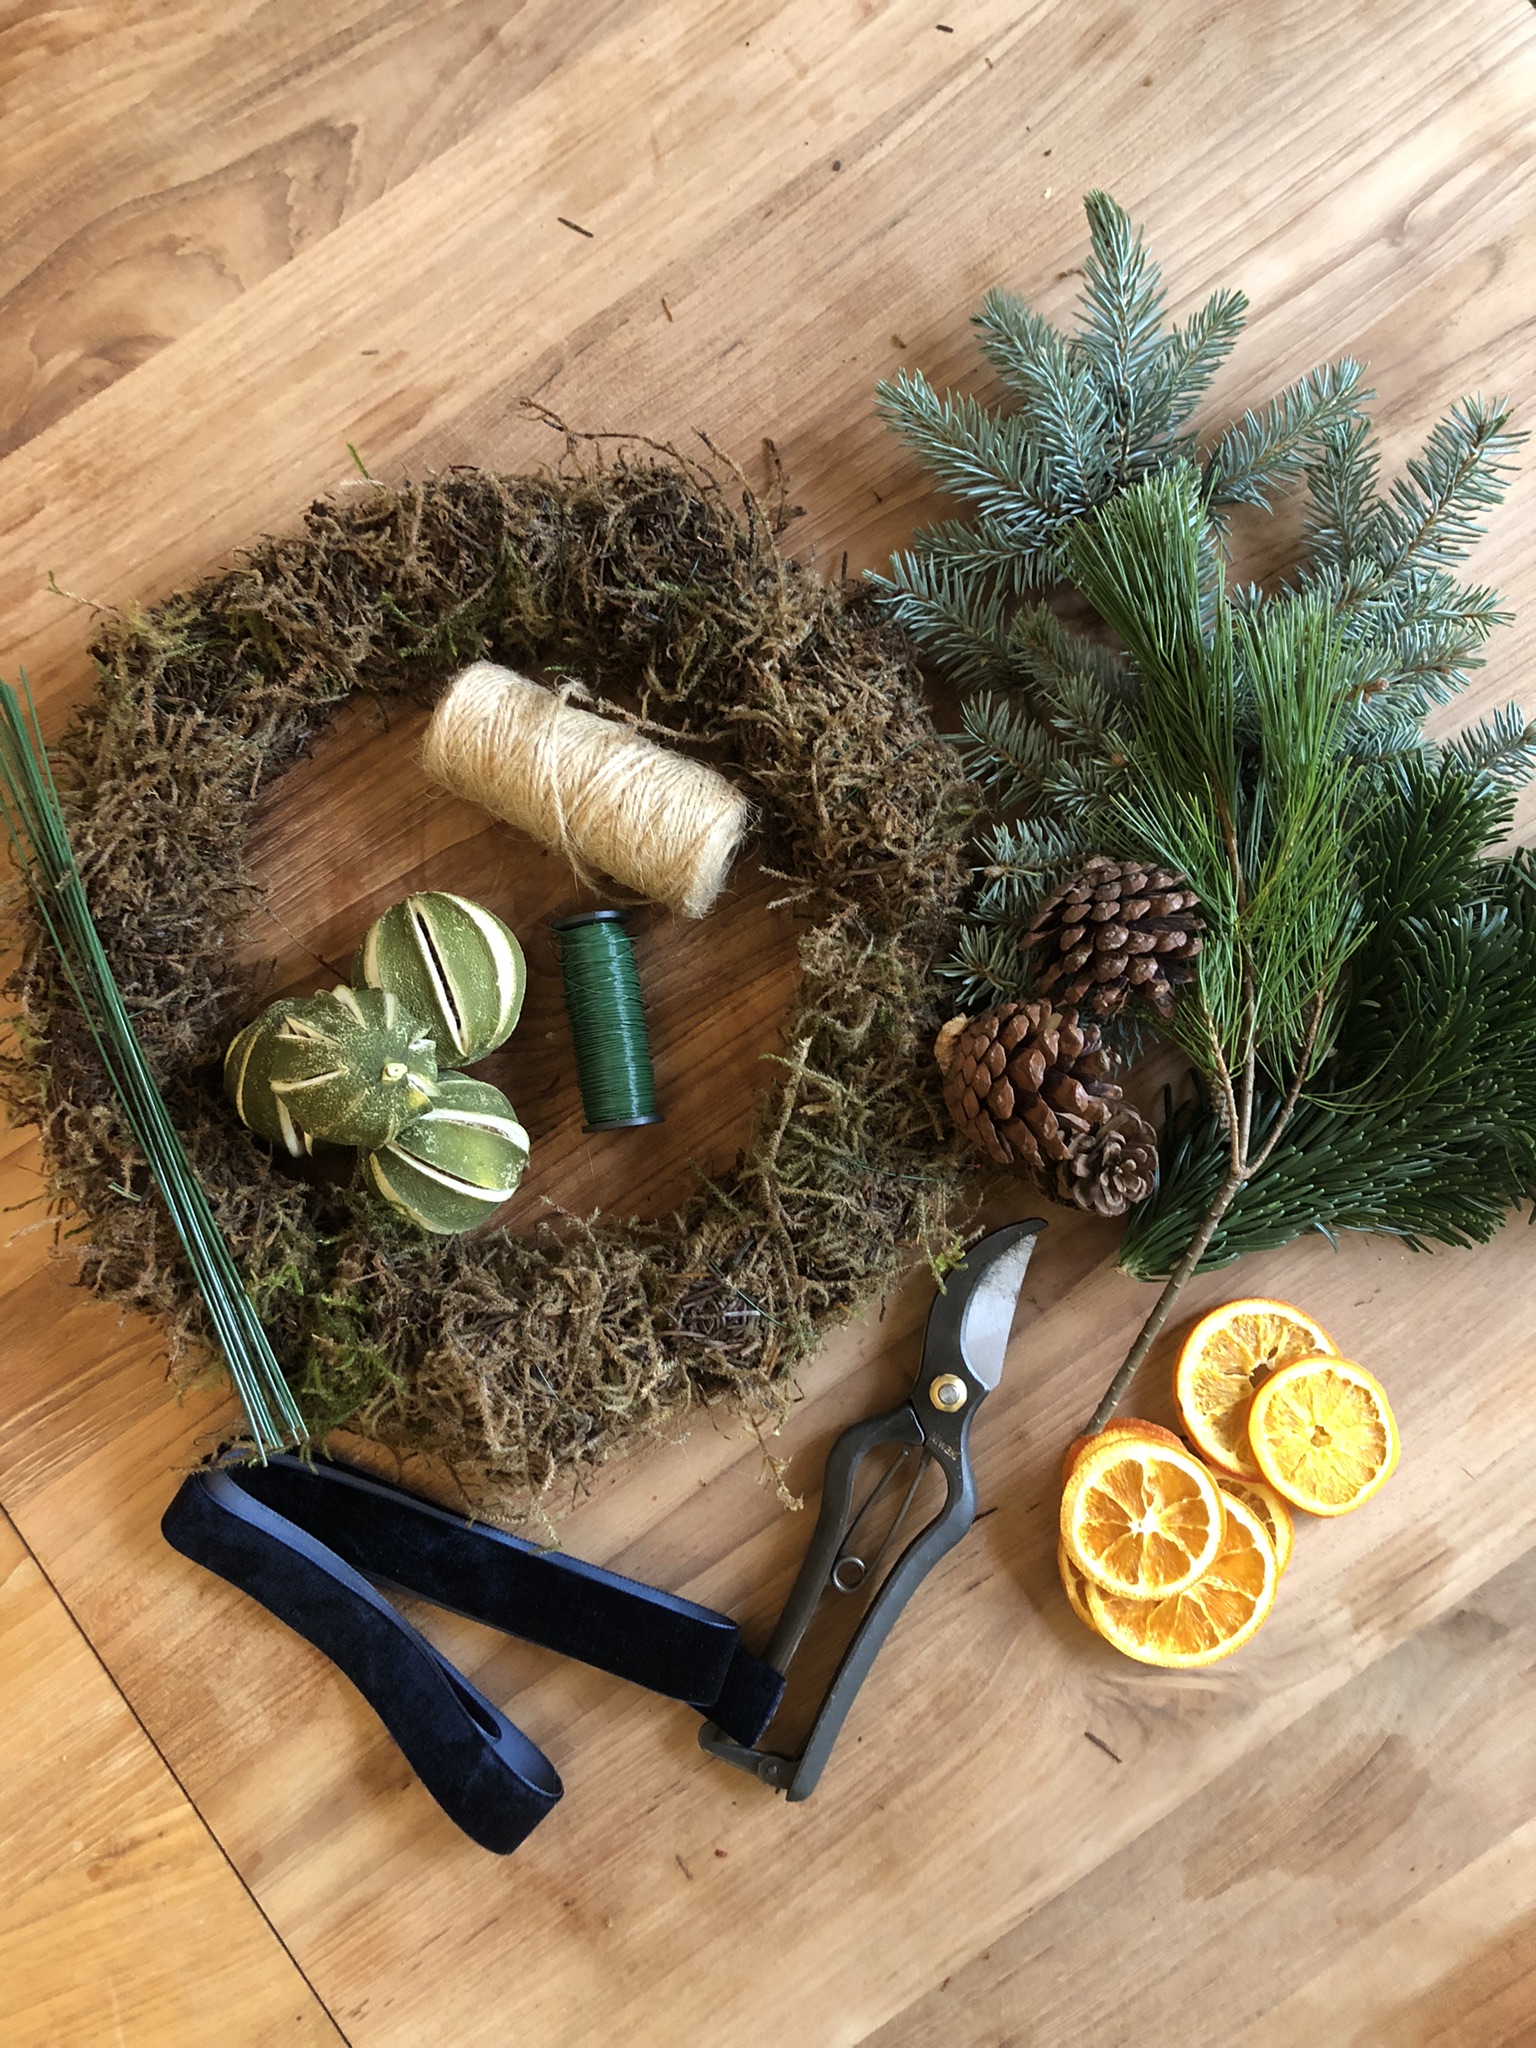
A Christmas wreath needs a base, and the two strongest options are a metal ring or a natural base of twigs or vines, usually willow or hazel. If you want your wreath to be fully compostable after the holidays, go with the twigs option.
Design expertise in your inbox – from inspiring decorating ideas and beautiful celebrity homes to practical gardening advice and shopping round-ups.
Once you have selected your base, the next step is to cover it in moss (or straw if you prefer). I usually opt for moss for several reasons. It creates a large surface area on which to create your wreath - and a larger wreath looks much more premium. It provides moisture to your greenery, helping it to stay fresh for longer, and it also acts as a solid foundation within which you can secure your seasonal decorations, such as pine cones and cinnamon sticks.
Firstly, tie your jute twine onto the back of your wreath base to secure it.
To attach the moss, take a tennis ball-sized piece, pull out any stray twigs and create a mound shape in your hands. Place it directly on the front of your base, facing upwards towards you, and take your twine around the ball of moss a couple of times. Take another handful of moss, place this close-up against the first piece, and repeat the process. Carry on until all your base is covered, and leave your twine attached at this point to the wreath as we will use it in step two.
Attaching the moss is a very mindful, often therapeutic part of the wreath-making process, as you can smell and feel the earthiness of the soft moss as you secure it to your wreath base.
2. Create and attach foliage bundles
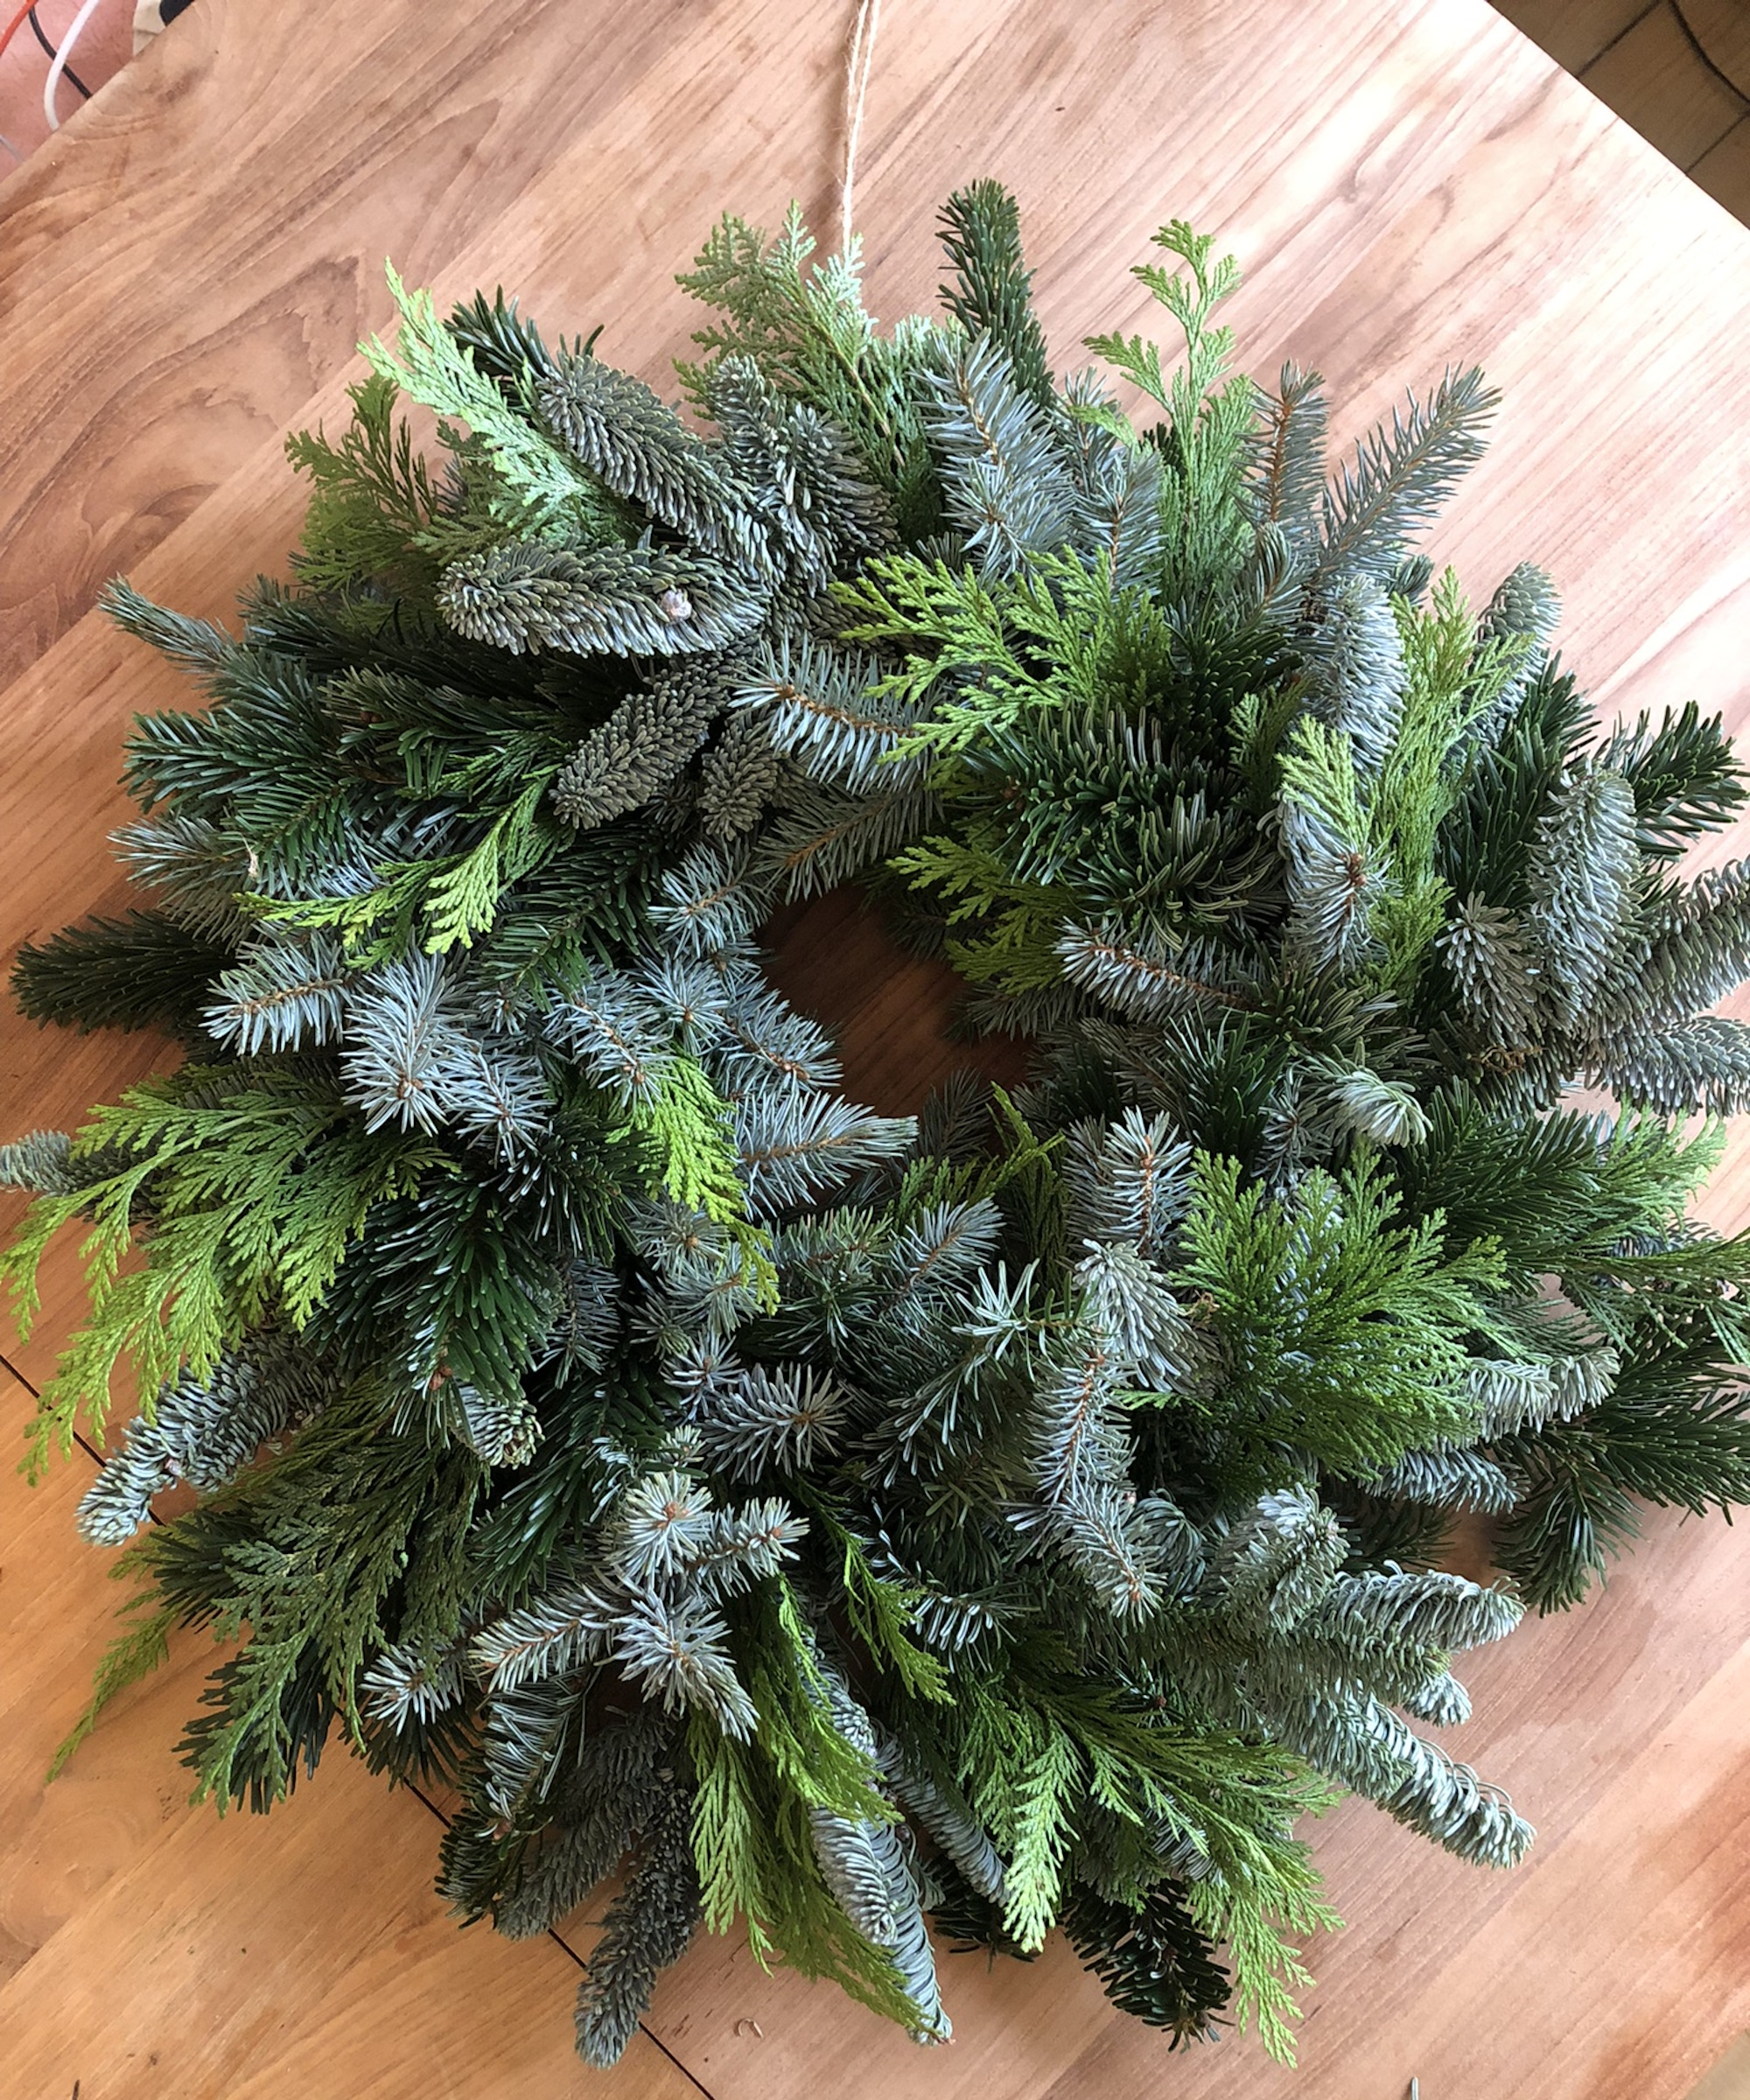
Another key tip for elevating your Christmas wreath is to use a mixture of different evergreen foliage to create contrasting textures. For example, spruce, conifer, pine and berried ivy is a classic combination. Bear in mind also that different textures of the same colour greenery will also ensure your design remains tasteful and sophisticated.
Cut your greenery into lengths of around 8-10 inches, then layer them in your hand to create beautiful bundles. Place your first one at the top of your wreath base and secure about an inch from the stem ends with with the twine you left attached from when you added the moss.
Take the twine around a couple of times, then layer on your second bundle. Working in a clockwise direction, continue to attach the clusters until it is completely covered. To take your wreath from DIY to pro, as you work around it make sure you use smaller bundles to cover the outside edge and the inside of your wreath base. If there are any gaps, use small bunches of foliage to fill them in.
Flip your wreath over and knot off your twine.
Pro tip: Make sure each of your bundles are consistent in size as you work around your wreath, to avoid it looking a little lopsided when you've finished. The larger the lengths of foliage, the larger the wreath you will create. For a neat and compact look, use shorter pieces. For a wild and more open design, use longer stems.
Wear gardening gloves if you prefer to avoid scratches or possible skin irritation. Some festive foliage, such as juniper, is beautiful to look at but very spiky and unkind to the skin when handled.
3. Add seasonal decorations

To add your festive decor, such as pine cone decorations, dried flowers or dried orange slices, twist the floral stub wire around them, leaving around 6 inches (15cm) of wire as a stem. Use the stem to attach the decor to the wreath by poking it into the moss, folding any excess wire back into the moss so it doesn’t protrude and scratch your door – or you.
Consider whether you want to add any other design elements such as baubles. These can create a strong burst of color and impact – perfect if you want your wreath to really make a statement.
Pro tip: As you work keep standing back and reviewing your design. Aim to create a balanced effect – although you should avoid striving for complete symmetry which will look unnatural. I always work in odd numbers, and often cluster my decorations together rather than spacing them out evenly.
4. Finish your Christmas wreath with velvet ribbon
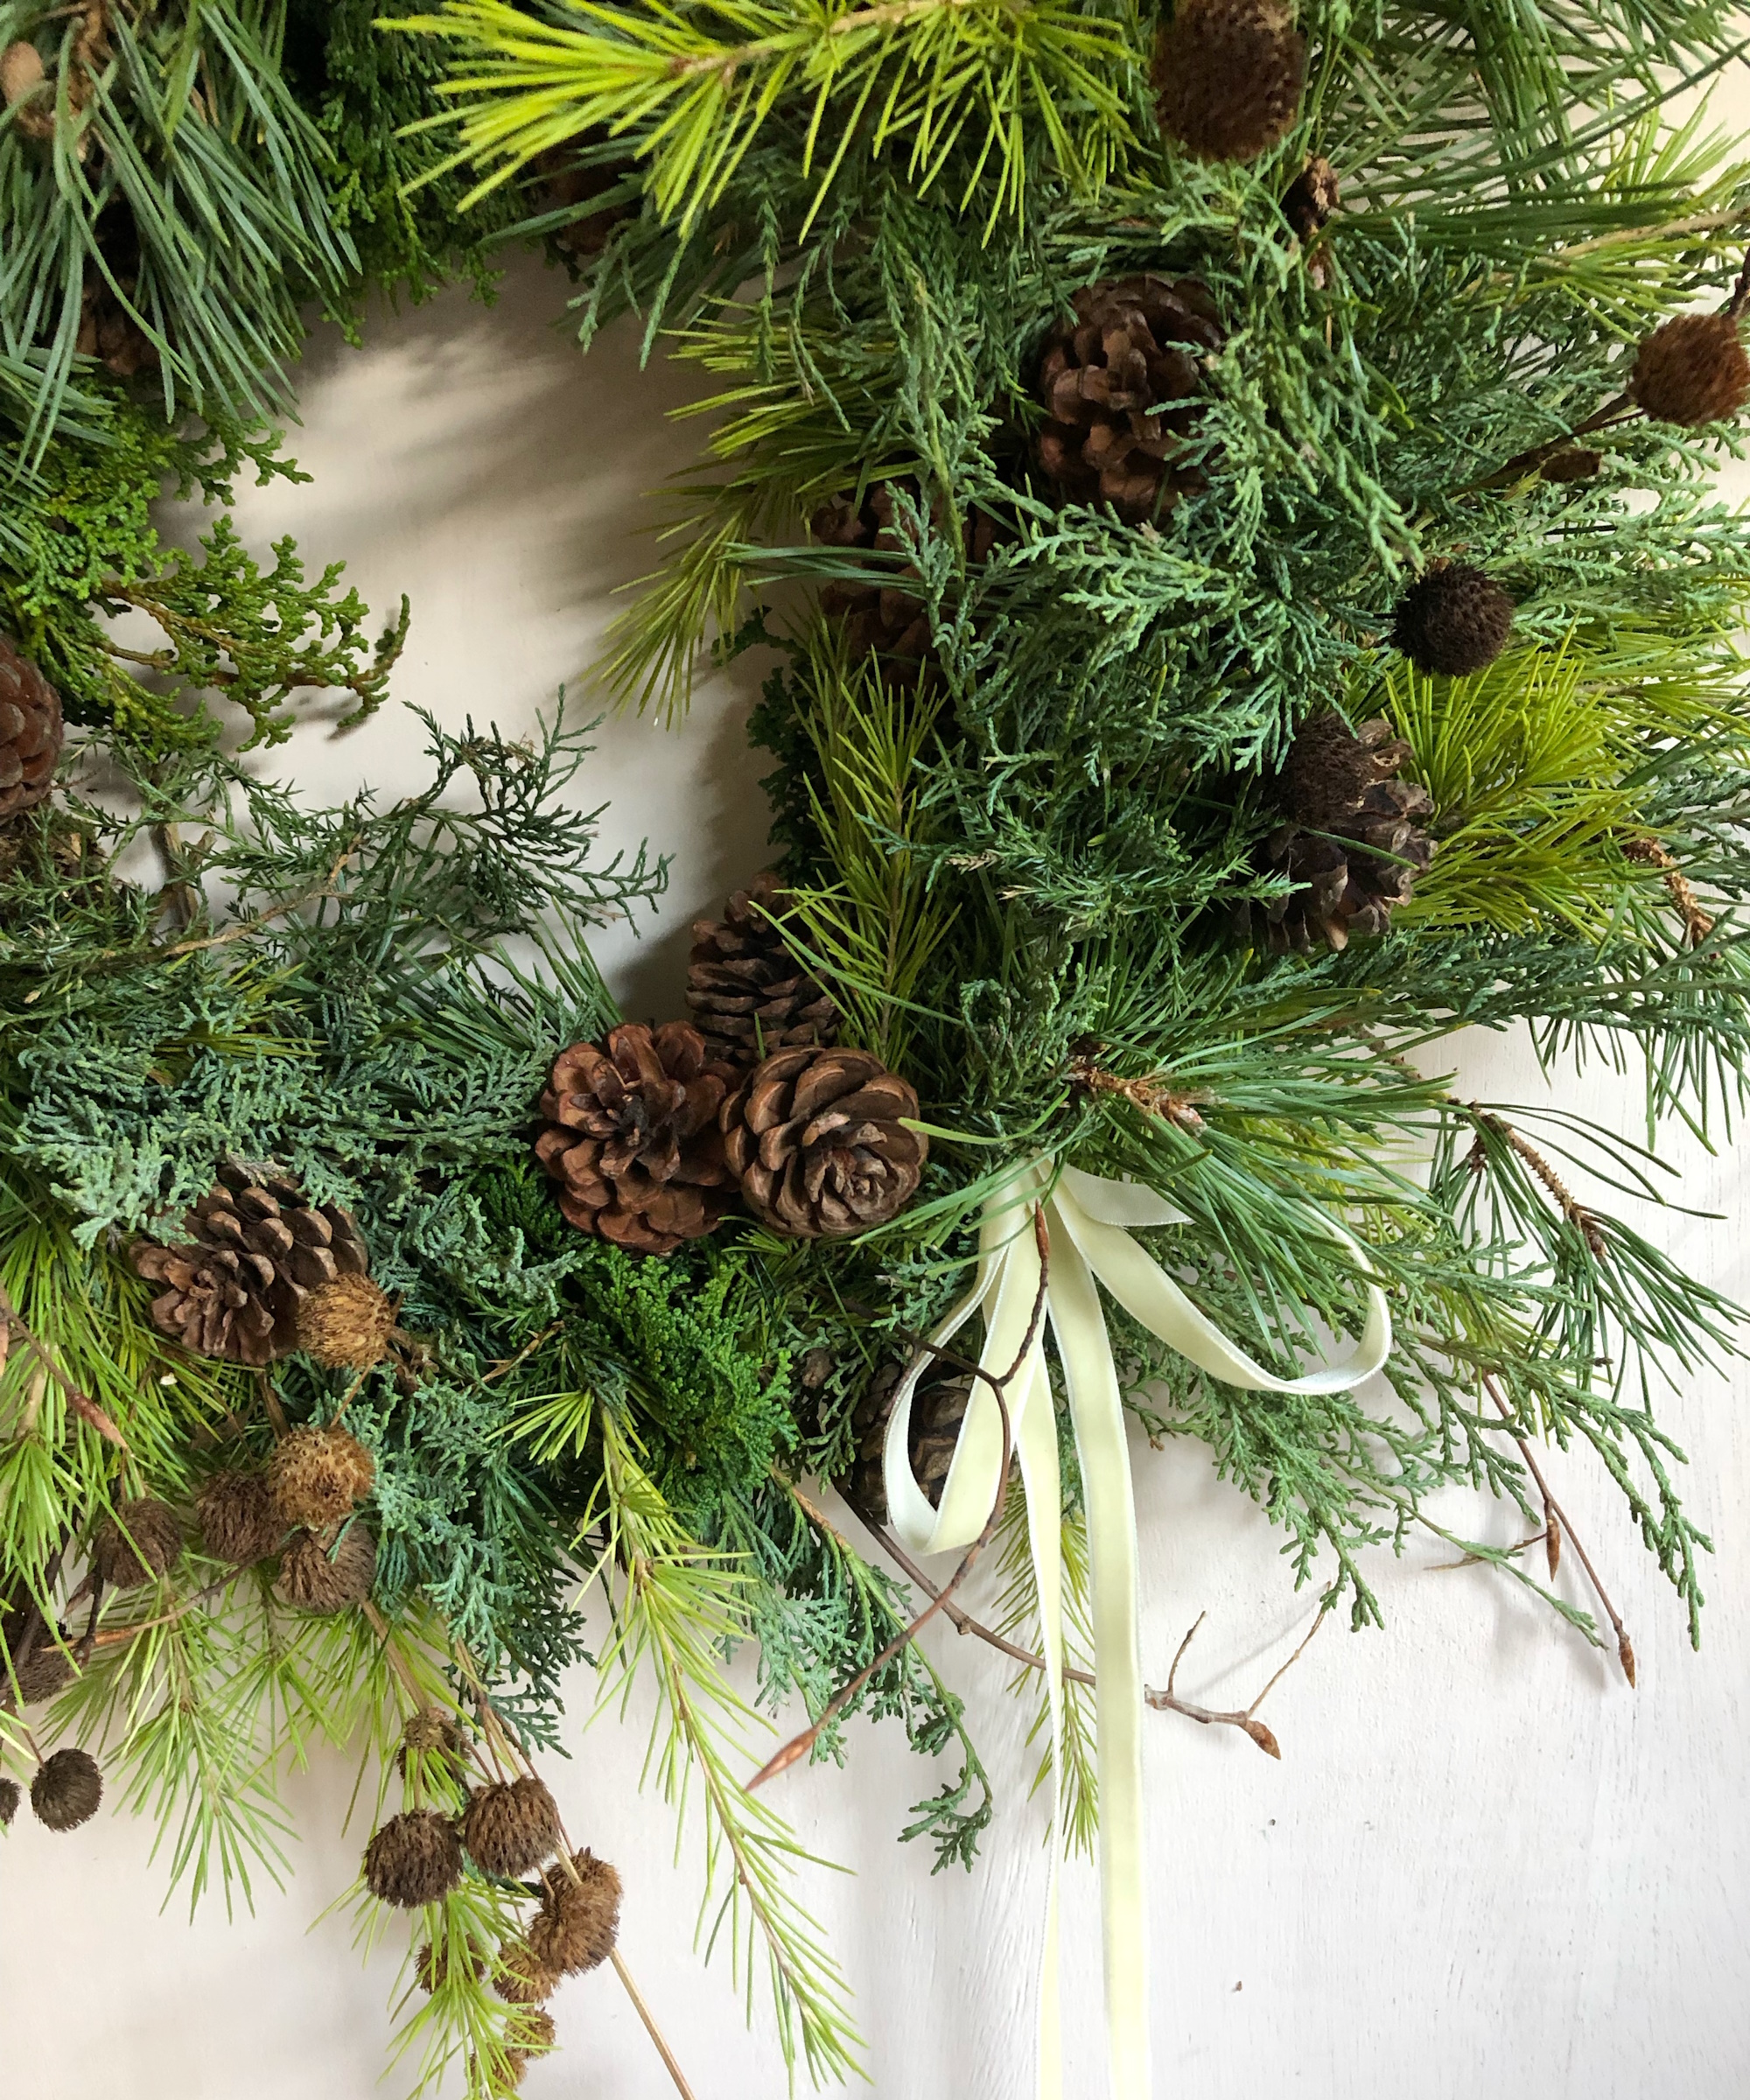
Loop a wide velvet ribbon through the wreath to hang it from. Alternatively, you can use clear fishing wire or jute twine to hang the wreath. This won’t show up like ribbon does, leaving all the focus on the wreath itself.
Don’t be shy about making a statement with the finishing touches. If you love decorating with bows, making a velvet one is a lovely way to finish your design – you can either match it to the colors in the wreath or choose a complementary, opposing color for a bigger impact. There are so many more wonderful wreath ribbon ideas here for inspiration.
Pro tip: Sometimes less is more when it comes to elegance, so if you would rather opt for a more understated design choose a narrower velvet ribbon in a neutral shade, keep your decorations to one or two natural choices, and let all your wonderful ingredients do the talking.
For a bolder wreath, consider complementary color schemes; choosing opposing hues from a color wheel will create a little more impact. Think sumptuous golds with deep blues or timeless red and green with woodland inspired browns and balanced with whites for an effortless, natural look.
FAQs
How do you make a scented Christmas wreath?
Many varieties of evergreen festive greenery is scented, so opt for spruce, eucalyptus, pine and balsam fir as a base. Dried ingredients are not only wonderfully textural and can work to enhance a scheme, but also carry beautiful festive fragrances. Dried fruits are a firm favorite for good reason; lemon and orange scent adds a real punch. Similarly, bundles of spiced cinnamon or bunches of dried lavender are wonderful scented additions.
How do you keep a Christmas wreath from drying out?
A fresh wreath hung on the front door will be slowed in drying out by the cool air outside. It’s also a good idea to spritz a wreath with fresh water every two or three days. Spritz with water on the front and the back of the wreath to add moisture to the moss, too. Doing so will also bring out the lovely aroma of the foliage. If you’re hanging a wreath inside your home, avoid placing it near a fire or heating vent.
Being able to create festive designs in our own homes that not only look fabulous but last, too, is a tradition to look forward to every year. There are so many creative Christmas foliage ideas to consider, and ways you can add greenery to your Christmas table ideas. You can use these wreath-making steps to make a design for your festive dinner table, to fill with candles or adorn with fairy lights and enjoy throughout the day.

Rachel is a gardening editor, floral designer, flower grower and gardener. Her journalism career began on Country Living magazine, sparking a love of container gardening and wild planting. After several years as editor of floral art magazine The Flower Arranger, Rachel became a floral designer and stylist, before joining Homes & Gardens in 2023. She writes and presents the brand's weekly gardening and floristry social series Petals & Roots. An expert in cut flowers, she is particularly interested in sustainable gardening methods and growing flowers and herbs for wellbeing. Last summer, she was invited to Singapore to learn about the nation state's ambitious plan to create a city in nature, discovering a world of tropical planting and visionary urban horticulture.